Showing posts with label melting pot. Show all posts

Wednesday, 2 March 2011

Spring Has Sprung

Can anyone believe it's March, already? Well, it is and I wanted to wish everyone, a belated but happy St. David's Day. 

So, Spring is just around the corner and the daffodils are poking their little heads through the ground and nearly in bloom and to celebrate the end of a very long winter, I thought this card would be appropriate for today's share!! Hope you like it...
The daffodil image is from a acrylic stamp sheet by Dawn Bibby and I've used K&Company papers on the background. As finishing touches, I've added my much loved and well used flourish die cuts, some punched butterflies and last but by no means least...a little bit of indulgence! Yes, the Melt Pot came out, again and I melted down some UTEE and then dropped my Hero Arts rubber stamp into the molten liquid to make this beautiful piece of enamel!


Before I go, I just wanted to say a big, thank you for all your lovely comments on the last card I posted...you all made my day!! :D
I hope you all have a fabulous Wednesday and wherever you are, I hope the sun is shining!!
See you soon
Love Emma
xxx

Monday, 28 February 2011

Live The Life You've Imagined

Happy Monday, everyone and I hope you all had a fabulous weekend!

I also want to say a big hello to my new followers...it's always great to see new faces and I can't wait to hear your thoughts on my creations! Don't be shy..say hello, I can't wait to see your comments!!

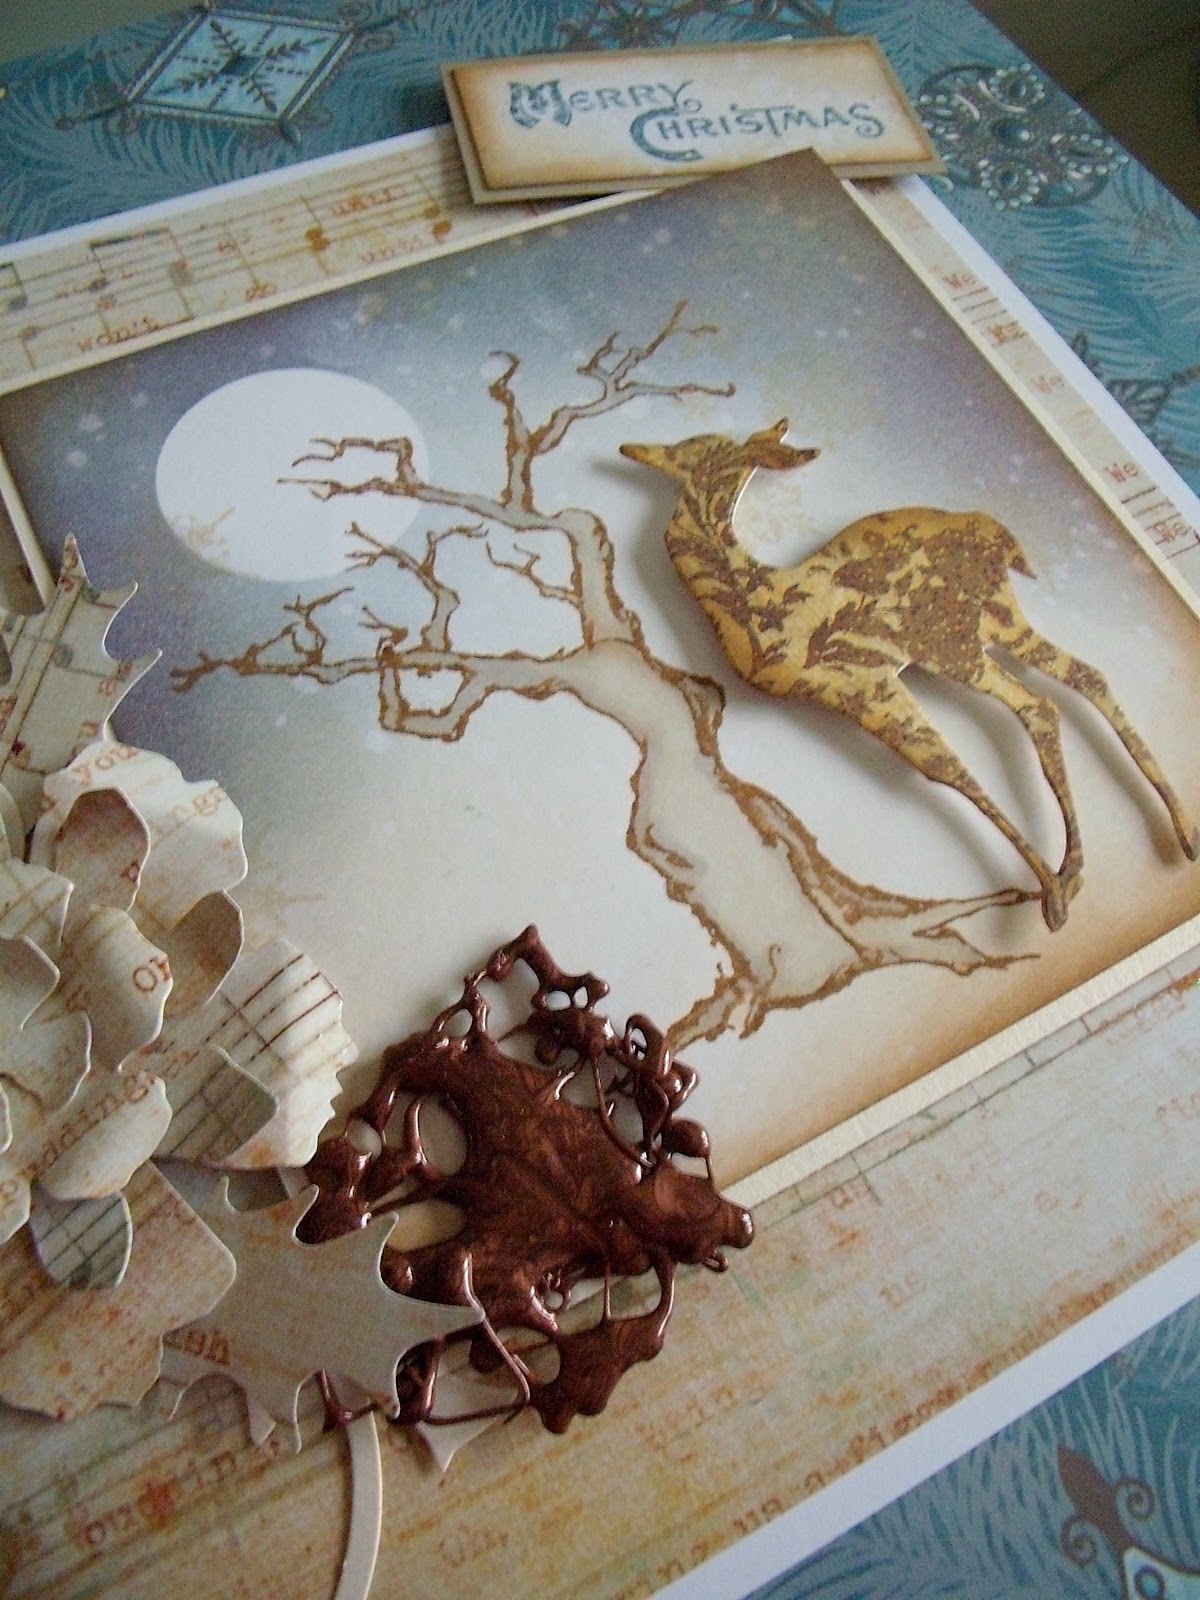
And talking of my creations, here is today's share.
I don't think it could escape anyone's notice over the last couple of weeks, that the crafting guru and all round craft god, Tim Holtz was visiting the UK. And whilst, I didn't manage to attend any of his workshops *sigh* ...I was so inspired by his visit, that I thought it was time to break open my new set of stamps and see what I could come up with...I hope you like it!!
Now, anyone who visits this blog on a regular basis, will know how much I love to make paper flowers but over the weekend, I thought I'd try something a bit different, get out the Melt Pot and see what I could come up with...and I'm really quite chuffed with my first effort. Ta~dah...I present my enamelled tattered floral! lol
The background of the main stamped image is made using exactly the same technique, with the Big and Juicy inkpad, as I used on my last post but it shows how different it can look each time you do it. Even if you wanted to, you would never be able to achieve the same look twice! All the images are handstamped using various elements from all Tim's stamps and as a finishing touch I added the flourishes and die cut leaves!


I'd better be going, I'm currently working on the next batch of samples for the Clarity Shows on Create and Craft and if you get a chance to tune in, you must...there's some fabulous stamps available to buy!
Hope you all have a fab week and I'll be round to all your blogs to comment on your lovely cards, asap!
See you soon,
love Emma
xxx

Entered in The Stamp Man Challenge Blog ~ Curls and Swirls

Friday, 14 January 2011

Heart to Heart

Here we are again...Friday already! Can time please stop flying? ...I'm getting dizzy!

Well, my flu seems to be holding me to ransom, still and there's no sign of it going anywhere, at the moment! There's so much of it around, everyone you talk to seems to have had it or know someone with it and anyone who is suffering with me...you have my sympathy. It's horrible, isn't it?

Yesterday, I felt so bad I didn't manage to get around to a post but there's still a few more cards that I want to show you all from the ClarityStamp show. So, here we go...hope you like them!

 Love using this technique. Melting UTEE in the melt pot and then dropping the stamp into it to give this amazing effect which worked so well with the heart stamp. It also shows the quality of Clarity Stamps to give such a deeply etched impression. I die cut the wings and crown from gold mirri card and then used alcohol inks over the top of the card.


 This card is in stark contrast to the first one. My influence came from a Nordic Christmas theme. I also thought the Stampendous embossing powder that I used on the heart images, gave such a beautiful, glittery effect and just gave that lift and texture to the overall effect.


Tomorrow, I'll be back with the final share from the shows. But in the meantime, I hope you all have a wonderful Friday and I also wanted to say a big thank you to my new followers! Hope you love what you see, here on my blog and that you keep coming back to check regularly!

See you soon!
Love Emma
xxx

Thursday, 16 December 2010

Under the Tree

Another day and another of those very special Christmas cards, that I wanted to share with you all. Thank you to everyone who left a comment on my last post...you all made my day with such lovely and positive feedback about the card!
Once again, this card was made using a lot of Tim's products and I combined, both the stamped and die cut elements with some more beautiful, traditional papers from My Mind's Eye. I think they all work so well in conjunction with one another.
Also, on this card you can see a little bit of Melt Pot enamel art in the corner, which I thought complimented and just added to the altered art look of the card.


Thanks for stopping by and taking the time to look at my creations...as I always say, your comments and words mean the world to me and I appreciate every single one!

I'm now off to continue wrapping my Christmas presents in big white bows!! My wrapping theme for this year is inspired by Tiffany & Co. and I'm very pleased with how they look so far!

Have a wonderful Thursday and see you tomorrow with another card!
Love Emma
xxx

Tuesday, 31 August 2010

Giggle...

Hi everyone...hope you all had a wonderful Bank Holiday weekend and now, ready to start a new week and new month. It's unbelievable where August went...but today, I woke up to see dew on the grass and a definite autumnal chill in the air. I love Autumn and can't wait for the leaves to start turning a beautiful shade of orange...

As for today's post...I did promise you that I was working on a lil stationery set and here it is...
This letter and envelope set works perfectly with the Post-it Note holder in the previous post and show's that if you think outside the box, you can create so much more that cards with these Gorjuss images from The Crafthouse Press. I've even created some bottle top drawing pins with left-over images and some UTEE, melted in the Melt Pot and poured into the caps, to give this gorgeous enamelled look.
Everything that you see on these projects is made totally by hand, I even made the little paper flowers using a Craftwork Cards Perfect Petals template and painstakingly cut out all the petals and layered them up, one by one before popping a beautiful bead in the centre. Sometimes, the harder these projects are, the more I love doing them...it's as if my creative juices never know where to stop!!! But I really do love what I do and I love sharing them with you all and seeing all your lovely comments. It makes it all worthwhile....
Thanks for stopping by and looking at my lil creations....have a wonderful week!
Emma
xx

Thursday, 8 July 2010

Just like chocolate...

It's Thursday already...can you believe it!?! I've been taking it fairly easy this week...but you can never stop a crafter from crafting and this is a card I've made using the Melting Pot. By, the way...don't worry, I haven't forgotten all the Gorjuss cards that I want to show you all...they will all be finding their way onto the blog over the next few weeks! I just thought I'd interject with something a little bit different though!! :)
I knew that when I finally got a Melting Pot, I would love it but I didn't realise just how much....it's fabulous!! This particular technique was done by melting down the Ultra Thick Embossing Enamel, together with some Utee Flex. The Utee is added to give the enamel some flexibility...without it, you might find the enamel is very brittle and can break. Once it was all melted in the pot, I then just trickled out the molten enamel onto a craft sheet, to form a pattern and left it to harden. It's as easy as that!

But when I looked at it, in it's hardened state, the first thing that it reminded me of was some delicious, glossy good enough to eat, drizzled chocolate and that's why I wanted to make up a card in these dark chocolatey colours! So, to make up my card, I ran some white cardstock through the Cuttlebug, using the Spellbinders Impressibilities Stencil, which I inked up with a Versamark ink pad. This left me with a debossed image on the card! I then brushed over some perfect pearls to leave this beautiful shimmery effect to the debossing. Once that was done, I matted and layered my different textures of papers and cardstock, added some ribbon and finally adhered my piece of melt art to my final matt, which leaves you with this very simple but extremely elegant greeting card!
Have a fabulous Thursday and watch this space for some more Gorjuss cards!!!
Emma
xx

Thursday, 24 June 2010

Distressed...

Well, I started this week loaded with good intentions and one by one...it all went horribly wrong, culminating in a complete internet shut-down yesterday! But as always, I'm looking on the bright side and this time next week, I will be demonstrating for my very first time at the QVC Customer Craft Event in London! Am I nervous?? ...hell yeah but I'm really looking forward to it and I can't wait to show off all the wonderful goodies from The Crafthouse Press.

But back to today and the card that I want to share with you....
I am really proud of this card...and this is my very first project that I've made using the Melting Pot. And believe me, it will be the first of many. I've actually wanted the Melting Pot for a very long time and I was lucky enough to be given it as a present for my Birthday and I LOVE it....it's everything I expected plus more....
I combined my Melt art, which you can see in the shot above, together with some other fabulous products from Ranger and Tim Holtz, including Perfect Pearls and Tim's ~ Urban Chic Rubber Stamps, Distress Inks and Distress Stickles. I adore experimenting with new techniques and these just suit my style perfectly.

Using Perfect Medium, I stamped the images onto some black Co-Ordinates card, which I had lightly sanded to give a distressed look. Then, I dusted over the stamped image with the Perfect Pearls, which leaves this beautiful, pearlescent shimmery appearance to the image. Once all this is done, it's just a matter of building up the card with some matting and layering and then, using the stamps to give this wonderful collage effect to the overall appearance. I even stamped the flowers, so that they appeared grungy and in keeping with the rest of the card.

Even if you don't think you can do the grunge look on cards...give it a go! You only need to make it as grungy or distressed as you want...but once you start, there will probably be no stopping!! Me, I'm just a happy stamper, who loves getting messy and will always find new and inventive ideas to work with.
Powered By Blogger

Total Pageviews