Hello friends...
I'm sure by now, you've all seen the amazing new Christmas 2022 idea-ology release from Tim Holtz, watched the LIVE and if you're like me, the ideas will be sparking inside your head ~ there is that much goodness in this release, it's incredible and remember some of these items, they aren't just for Christmas, they can be used every single day, so now is the time to stock up as these won't be hanging around for too long.
With all this Christmas inspiration and so many ideas in my head, I decided that I wanted to create something that used the Accordion Folio as a base, and I made a project that was all about family, something that I think is so important at this time of year. This has become even more meaningful today, as we lost a beloved member of our family yesterday. He will be missed dreadfully, as he was such a huge part of my life, and I'd like to dedicate this make to him as he loved Christmas so much...
********
So, let's get started and let me introduce you to the family and my Wonderful Life folio take you for a walk through my family memories folio!
The
idea-ology accordion folio that I used comes in two sections, a folder and booklet and for this particular make, I removed the accordion booklet from the centre, and used the gusseted folder/cover, which I made a slight alteration to. I replaced the accordion booklet with file cards which I will show you later.

I began by making an alteration to the folder and creating a fourth flap, that I attached to the central section, along the top of the folio, to form a cross shape. To create this flap, I used Mixed Media Heavystock and scored the card panel to create the fourth spine. The spine measures exactly the same depth as the spines on the folder so that it creates the perfect closure.
Photo below shows the folder with flaps closed...
...and this creates a section that will hold the file cards securely.
To strengthen the folder I adhered plaid Design Tape, along each of the folded sections, placing the tape on the outside and the inside of the folder, which you can see in the photo below.
My folder is now ready to start covering and I began by covering each surface, back, front, inside and out using papers from the Christmas Backdrops pack and Worn Wallpaper Scraps, which are collaged and adhered to each panel separately and I added machine stitched borders to each of them.
Now for the cover star...
....and I couldn't resist this little girl, she is my absolute favourite from the Paper Dolls pack.
The paper doll is colour tinted using Distress Watercolour Pencils, which have such an intense pigment and really do colour these images so well.
I mounted this darling little girl onto a frame, that is in the Ephemera pack and placed a panel of the candy stripe Worn Wallpaper behind the aperture. I arranged the paper doll with a selection of holly pieces, taken from the Worn Wallpaper pack and the Christmas Botanicals Layers before applying small amounts of Snowfall Grit paste to the leaves and splattering a dusting of Picket Fence Distress Paint over the top.
Underneath the arrangement, I attached a Christmas Word Plaque that I painted with Candied Apple Distress Paint, wiping away the paint to reveal the lettering, and completed the plaque with two hardware heads on either side.

As added decoration, I used a hinge clip and some tiny bells that I clipped to the front cover and once again, painted these with Candied Apple Distress Paint.
To complete the cover, I attached some mirrored stars to the frame....
...and wrapped some candy cane twine around the spine.
Moving onto the inside of the folder...
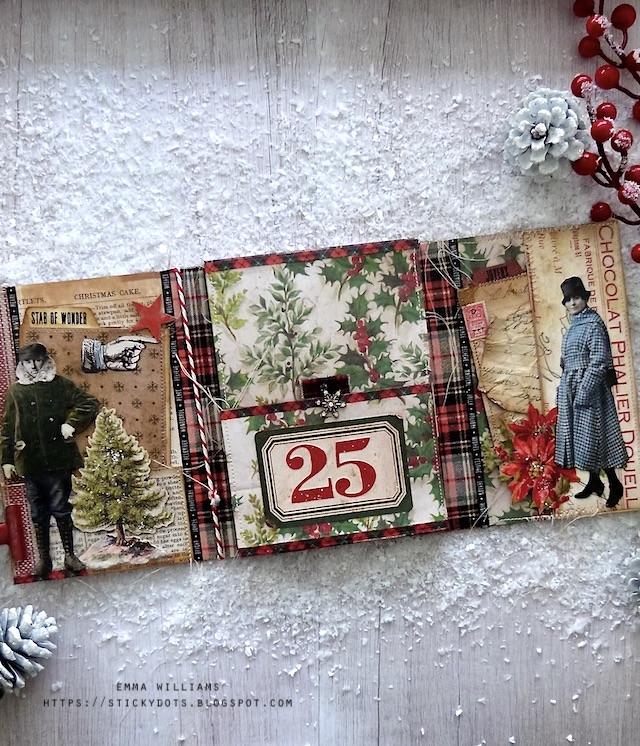
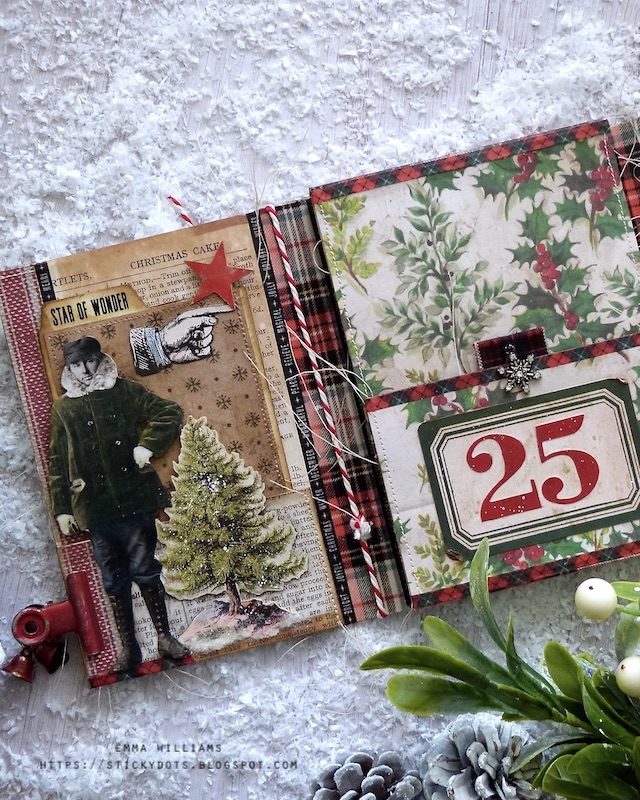
...and it opens to reveal the 'father', who is standing proudly by the tree that he'll be taking home.
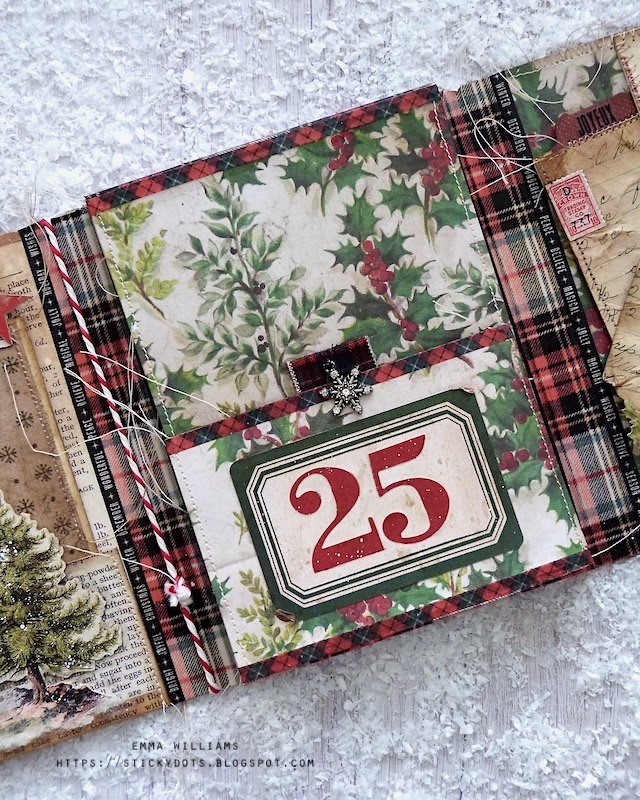
On this opening page, I cut the flap to create a straight edged pocket, which I stitched down and this holds a file card.
The file card is covered with Backdrop papers and I added ephemera pieces and layers to embellish it.
Once again, I colour tinted the image with Distress Watercolour Pencils.
In the photo below, you can see how the clip that attaches to the front, also looks great from the inside when you open the folder.
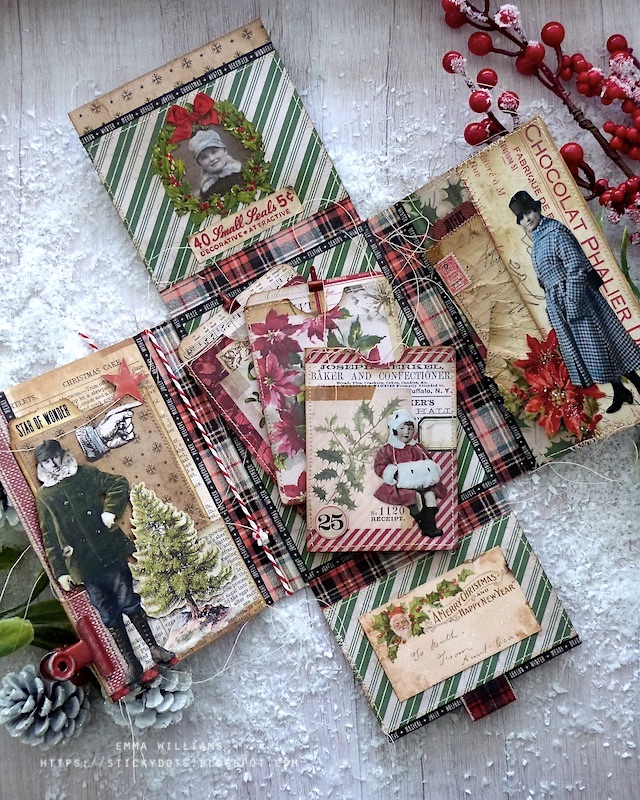
Now we turn the next page to reveal the inside of the folder, and this shows how that extra panel creates the central section that will hold the file cards. This panel is decorated with Design Trim tape, ephemera pieces, and Christmas layers. I added Linen Patchwork tape to create a pull and a Snowflake Adornment which I stitched into place.
Now we open it up to reveal the inside...
All of the panels are embellished with Christmas Layers, Clippings Stickers and ephemera pieces and you can see on the right hand side, I added "Mother" and she is attached to another pocket, that holds another file card, that can be slipped in behind the image.
The top panel is all about little brother, which is an image from the Collage Tiles pack and is placed behind the wreath. I attached an ephemera piece beneath it to complete this panel.
...and finally, the bottom panel has a message.
Now for the inside, and I wanted to used the file cards to create little memory pockets.
Each pocket is different and on the first pocket, is another paper doll image...the little sister!
The remaining two pockets that I've made are all covered in papers from the Christmas Pocket Card pack and once again, I machine stitched borders around the edges and added ephemera pieces and tiny clips.
On the backs of the pocket cards, I stamped messages using the
Festive Overlay Stamp Set.
So, that’s my folio finished and ready to place on display as a memory to Uncle Charlie, we’ll remember you this Christmas with a glass of Mulled Wine.
Sleep well and give Auntie Rita a hug from me!
Thank you for taking the time to look through this Christmas story and I hope my make fills you with inspiration and ideas for folios that can be personalised and created for your families. As always, I love seeing what you create inspired by anything you see on my blog. So, leave me a message, here, on Facebook or on Instagram and I'll pop over to take a look!
See you soon...Emma xx
ALL IDEA-OLOGY AND TIM HOLTZ PRODUCTS USED IN THIS MAKE ARE AVAILABLE FROM SIMON SAYS STAMP, INCLUDING:


I absolutely love this thank you so much for the insight on how to make it are you on YouTube at all?
ReplyDeleteFantastic! Such attention to detail..love it!
ReplyDeleteWow. Just gorgeous. Every page is pure perfection.
ReplyDeletedefinitely going to make this one...
ReplyDeleteWhat a loving tribute to your uncle Charlie. I had my favorite uncles as well. This is fabulous make, and I definitely will be adding this to my list of want to make... LOL. Yes, it is getting very long. So, if it is a long cold Winter, I will have something to keep me busy.
ReplyDeletelooks like a make to me. love how you put everything together. thanks as always for sharing and all the inspiration.
ReplyDeleteLove this!!!
ReplyDeleteYou are very creative. Love how you took this folder and made it your own by adding the flap and using the inside for another day. I have to say, I was able to purchase most of the items on your list and what I couldn't get, I will make my own. I want to add some personal photos and a place to journal my own special Christmas memories. I am definitely going to use your ideas and combine them with mine to make my one of a kind. Thank you for your inspiration!
ReplyDeleteI love this, every bit of it! If I make it, I want to do it just like yours. What a treasure!
ReplyDeleteIt’s beautiful Emma!! Are you on instagram?
ReplyDeleteThank you so much for your lovely comment about this project, I really do appreciate it and yes, I’m on Instagram…you can find me here:
Deletehttps://www.instagram.com/artymiss/
Hope that helps… ♥️