Showing posts with label glitter. Show all posts

Monday, 9 December 2019

Make a Christmas Wish...

Hello friends and welcome to the brand new Simon Says Stamp Monday Challenge! This week our theme is all about STARS and all we want you to do is incorporate them into your projects and just have fun playing along!

I love everything to do with the moon and stars, it absolutely fascinates me, so this was my perfect challenge and I created a Christmas card plaque which I will be giving to my parents for Christmas. The theme for this was all about wishing upon those sparkly stars, making their dreams come true and all courtesy of Santa's Helper who is delivering that precious star so that they can make their wish and I hope 2020 will be their year to shine brightly!!
So, here we go and here's how I created my very special project...


To begin with we'll start with the background and for this I cut a panel of watercolour card, 14 x 18cm and started to add some colour using layers of Distress Inks ~ Evergreen Bough, Tumbled Glass and Antique Linen which I applied to my glass mat, spritzed with water before dragging the card through, transferring the colour onto the card.

Once I was happy with my build up of colour layers, I heat dried the card.

After applying some torn pieces of tissue tape to the central area of my inked card, I added a layer of Matte Collage Medium over the top and once again, heat dried the medium before applying some depth of colour using Pumice Stone and Evergreen Bough Distress Crayons and blending out any harsh lines with my fingertip. I then added a touch of Crackle Paste to create a little more texture, just over the taped background and applying it to random areas. Once it was dry, I ran the Pumice Stone Crayon over the paste, just to accentuate the crackles.

To add even more texture, I used the Hocus Pocus Mini Layering Stencil over the taped area and applied some Grit Paste through the stencil. Ofnce the paste is dry I then splattered the background with some Black Soot Distress Paint and machine stitched a border around the outside.
I matted my background onto layers of card, one layer covered with Red and White Design Tape from Christmas 2018, a layer of green card, a layer of kraft card and a layer of gold metallic card. I then mounted my layers onto a white card blank which I inked around the edges with Antique Linen Distress Ink.

I now have my background and it's time to start creating a scene and I started with Santa's Helper. I cut the image twice  from black chipboard and layered the two pieces over the top of one another to create one substantial die cut. I then applied a layer of Matte Collage Medium over the top and sprinkled black glitter over it. Tap away the excess and set to one side. Once the glitter is completely set, I then coloured a piece of Mummy Cloth with Barn Door Distress Spray Stain and once that was dry, I wrapped it around the elf's neck to keep him warm and tied it to create a scarf.

For the stars, I cut four various sized stars from chipboard using one of Tim's older dies, the Crescent Moon and Stars die and also used the Sizzix Dimensional Stars die, both of which are from my own stash, to cut one of the medium sized stars in the dimensional stars set. After folding the star along the score lines, I applied a layer of Matte Collage Medium over each of the five stars and added some Gold Rush Glass Glitter.

Tap away any excess glitter but whilst the medium is still wet on the glittered stars, I added even more glitter and sparkle and sprinkled Vintage Platinum Glitter Dust over the top. Allow for all the stars to completely dry.
Taking the baseboard frame from the Christmas Layers and Baseboard Frame set, I cut a section from the bottom of the frame so that it would fit my card perfectly. The frame measures, 12.5 x 16cm.
I attached the frame to my background using foam pads and then added four Hardware Heads, embossed with a little white embossing powder and placed them onto each corner.
Taking my glittery elf, I placed him onto foam pads and attached him in the centre of the frame. I then added the dimensional star so that he's carrying it.
You can see the dimension that the foam pads give to the elf in the photo below...
At the top of the frame, I added an arrangement of Holiday Greens, cut from Classic Kraft Stash. Each piece was dry brushed with Picket Fence Distress Paint and once I'd added a smear of Collage Medium over the foliage pieces, I dipped them into Rock Candy Distress Glitter.
Allow to dry and then arrange the pieces in a spray across the top of the frame. I also added a few pieces of foliage that I cut from silver metallic kraft stash before attaching a mini plaquette in the centre of the foliage. To complete the foliage, I added some berries and as many of you know if you follow my work, I use Autumn Red Tonic Nuvo Drops to create these and just apply a drop the relevant pieces.

Add the remaining stars by attaching them around the frame.
Finally, I used the 'Christmas Wishes' Quote Chip along the bottom of the frame and used two silver metallic droplets to either side of the chip.
So, that's my card finished and ready to be written and given to my parents ~ fingers crossed they love it as much as I loved creating it and I also hope you love this project and all the techniques that I've used to bring it to life!
Don't forget, if you would like to see more inspiration from my talented teamies over on the challenge blog and every week, one lucky random participant has the chance to win a $50 gift voucher from Simon Says Stamp and you can join in up to 5 times, which means you could have 5 chances to win. You have until Monday 8am Ohio time. 1pm UK time, 2 pm CET to join in and good luck....


Thank you so much for taking the time to stop by today and hope to see you again soon, love Emma xxx


Recipe for project:

Tim Holtz/Sizzix: Santa's Helper, Dimensional Stars, Mini Holiday Greens
Mini Layering Stencils Set 43
Distress Inks: Walnut Stain, Antique Linen, Tumbled Glass and Evergreen Bough
Distress Spray Stain: Barn Door

Thursday, 25 August 2011

Sarah Hurley Challenge 48 ~ Bling and Sparkle

Hi everyone!!!

Hey, did someone steal summer?? I'm sitting here with all the lights on and watching the rain as it pours down outside...hmm, I think this is what's known as the Great British summer!! lol

Anyway, I thought I'd drop by to let you know that today is the start of a new challenge over on Sarah Hurley's Challenge Blog and the title of this challenge ~ BLING AND SPARKLE. We'd love you to join us and you have two weeks to break out the glitter and gems and maybe be the lucky winner of a voucher to spend with our sponsors, My Mum's Craft Shop.

And here's my card for the challenge, using some more of those fab papers and designs from Sarah's Wonderland cd. I just love this cd and can't get enough and I combined these with some Spellbinders die cuts and a Tim Holtz flourish.

For my bling, I used some glitter paper to make the handmade roses and finished off the whole card, with a gold crown and black sparkly gem.

Right, it's time for me to head back to the craft room and start making some more cards. It's never ending..I'm a human card making machine!! lol

I'll be around to catch up with all your creations on your blogs, asap.
See you soon and enjoy the rest of your day!

Love Emma
xxx

Tuesday, 22 March 2011

Symphony In Black

Hello, everyone and thank you, so much for all your lovely comments on the cards that I posted last week. I was really overwhelmed with them and it really does mean so very much to me, to know that all my friends took time out of their busy schedules to tell me, that they liked them.

So, this is the start of another week and has already been quite eventful. At the moment, I'm working on some more samples for the next Clarity show on Create and Craft, on April 3rd. I've also received some gorgeous pens from the lovely people at Kuretake, this morning and I'm frantically trying to make some cards for them, with a deadline of Friday!!!!

That's not to mention that I've got my Mum's birthday to organise for the weekend and a cake to bake...will I do it?? *Mission Impossible music starts to play*...I'll let you know... lol

But before the mayhem broke loose, I did manage to make this card...I hope you like it!


I'm actually a very big fan of the work of the artist Erté and this is my favourite illustration of his. So, when I was browsing through The Craft Barn the other day and saw this fabulous stamp from Katzelkraft, I just knew it would find it's way into my shopping basket and I wasn't disappointed when it finally arrived ~ I love it!!!

I know that this is the most popular of all his artwork but I think you can tell why...it's just so simple, elegant and depicts the Art Deco era perfectly and I really hope I've done this image and Erté justice with my card!

The papers that I used are from Inspire Me and I coloured the image with Promarker Pens, adding highlights of Stickles glitter glue.


Well, I'd better get back to stamping and also playing Florence Nightingale to my Mum, who isn't very well, at the moment.
I hope you all have a wonderful Tuesday!
See you soon...
Love Emma
xxx

Friday, 18 March 2011

Gold

Yesterday, as some of you know, I went to The Stitch & Craft Show in Olympia. The funny thing about going to Olympia, is how long it takes! I live in West London, probably about 10 miles away but it actually took me 1.5 hours to get there. That's London Transport for you, together with a long and chilly wait on the platform at Earls Court!! 


This was my first visit to this show and even though it didn't cater for papercrafting as much as I hoped, I still managed to come away with a few bits and pieces and a lighter purse!! lol I also managed to see Dawn Bibby, who was as busy as ever and surrounded by her fans but I did manage to take a photo of her, in a quiet moment. And last but not least, I caught up with the lovely, Sarah for a coffee and chat. All in all, it was a good day out and I can't wait to start playing with my goodies that I bought back from the show!!

Now, it's back to today's share and, a big hello to all my new followers... *waves* Thanks for following me and I really hope you'll stop by and say hello back, very soon!!

And here's today's cards, using a combination of these Clarity Stamps. I hope you like them...

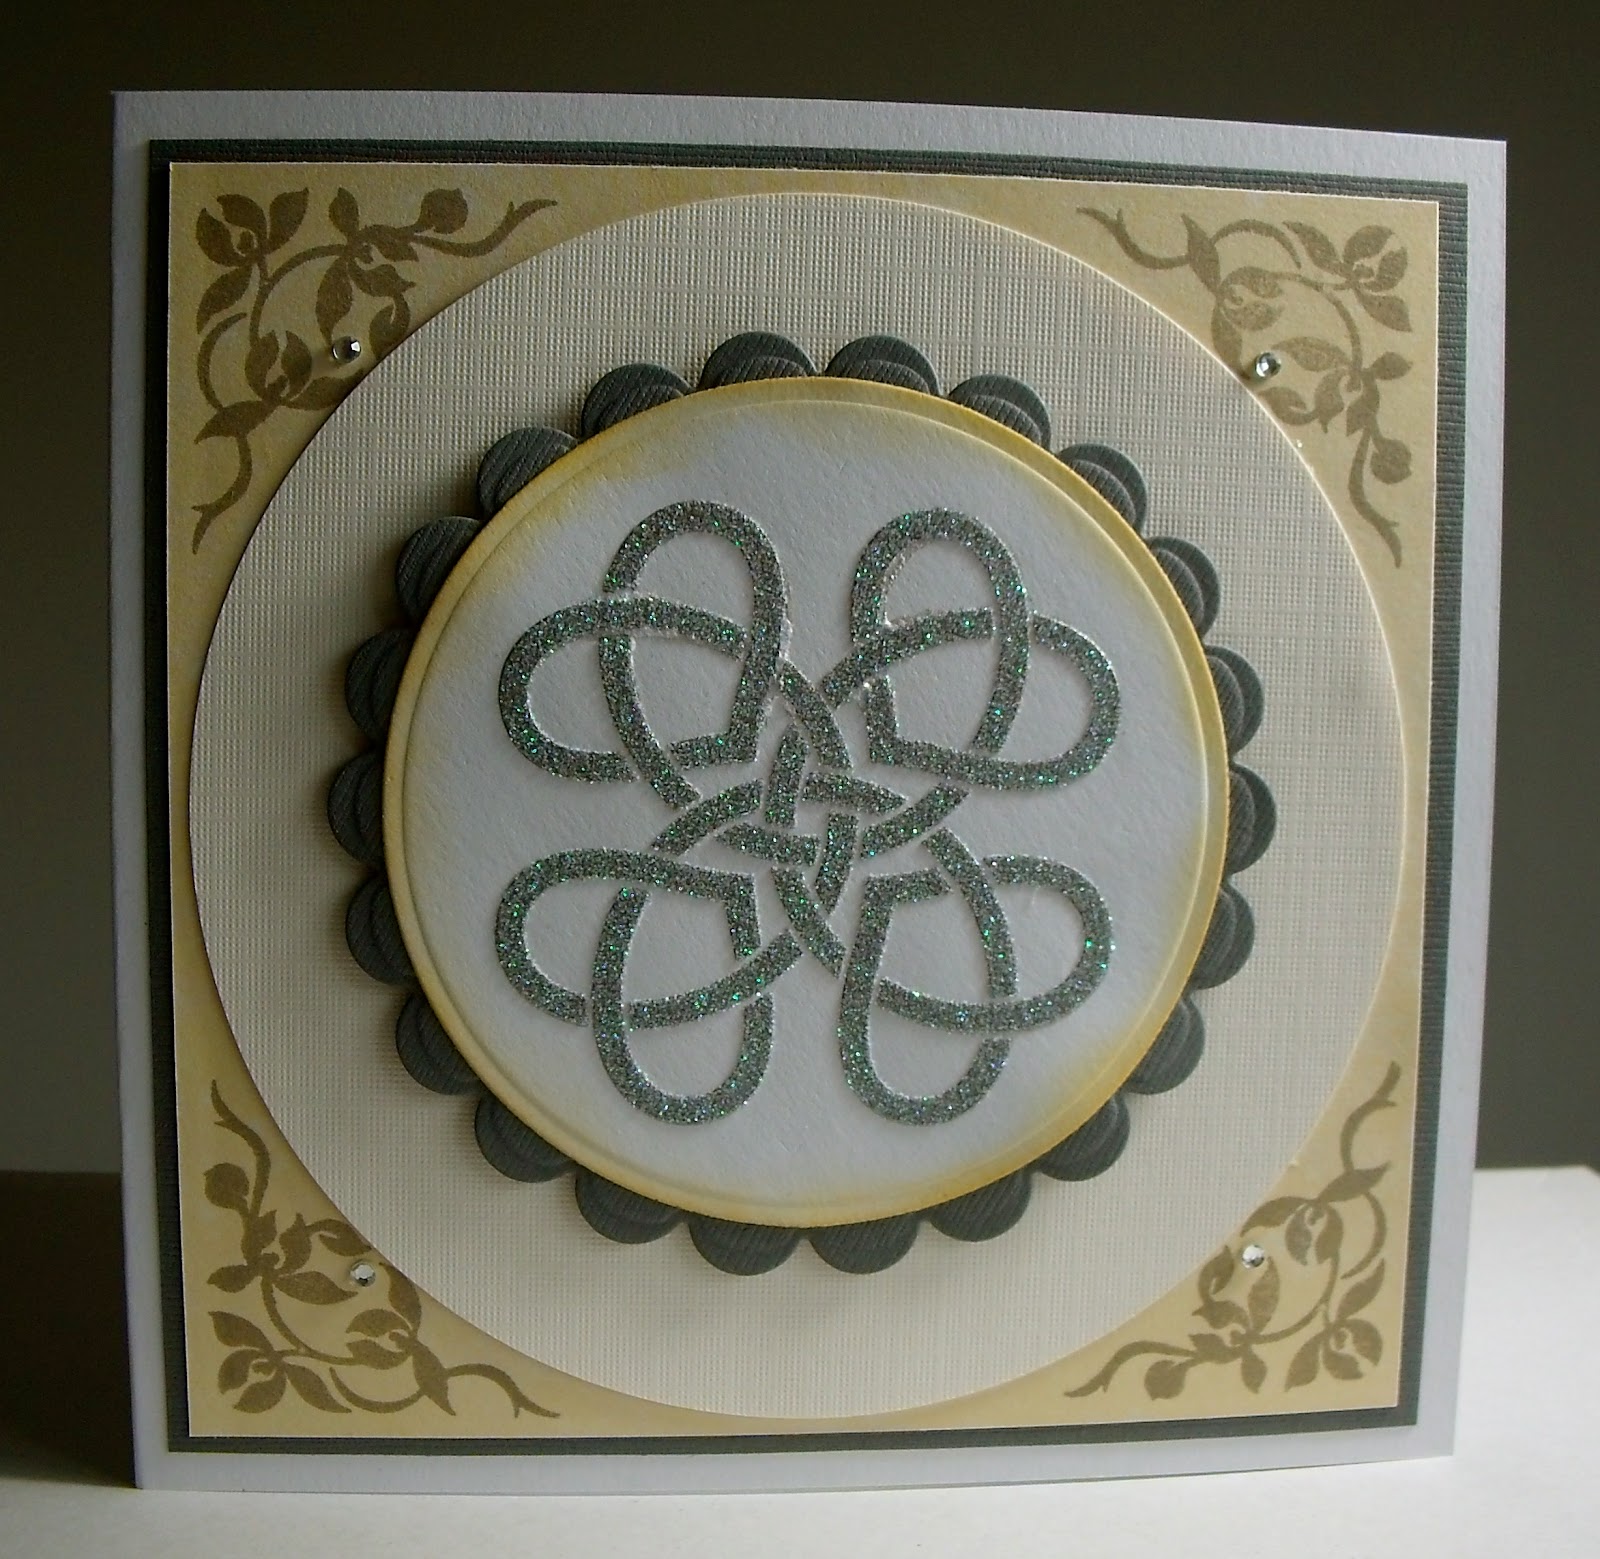
Both cards feature all types of embossed work. From dry embossing, using a Tim Holtz embossing folder, heat embossing, using Dreamweaver embossing paste, the list goes on but I really wanted to show you all the different effects that can be achieved with these fabulous techniques.

This card was made using the Celtic corner stamps to create the border and embossed with gold embossing powder. I then used one of the flourishes from the other set to make my Melt Art enamel feature.


This second card, was inspired by the Celtic corners and I used a Dreamweaver stencil and embossing paste to create the Celtic symbol in the centre of the card. I then stamped the four corners with the flourishes and added crystals as a finishing touch.

So, tomorrow I'll be back with the final two cards in my little Clarity mini series! lol
I hope you all have a wonderful Friday.
See you tomorrow...
Love Emma
xxx

Monday, 20 December 2010

Winter Wonderland

Hope you've all had a fabulous weekend and I know I said I was dreaming of a white Christmas but damn you, you've come a week too early. At the moment, like many other's I'm trapped in a winter wonderland and just hoping that there will be some respite so that I can make it to Tesco and get some food. If not...Christmas dinner will be Turkey, without any trimmings or vegetables! Arghhhhh....
In the meantime, at least I have my crafting to keep me busy and here's another of those special cards that I made. Hope you like it... 
I chose to make a wardrobe opening card and once again, I've used all of Tim Holtz's beautiful stamps and dies to make the card and the background to the main image, was created by blending distress inks, to give the effect of a dusky, moonlit night! This is all combined with some stunning backing papers from K & Company.


I've also been making some of my own Christmas decorations...those Martha Stewart glitters were just too stunning not to use and I had some fir cones that I'd collected on a walk in the woods, so...I thought, why not?? And here's the results....
Thanks for stopping by and taking the time to look at my little creation and stay warm, wherever you are!
Love Emma
xxx

Friday, 17 December 2010

Playing in the Snow

As the snow starts to fall once again outside, I don't think I could have chosen a more appropriate card than this one to share with you all!

It's another of those very special cards that I did manage to make in my, more than busy run up to the Christmas and it's something a little bit different to the other's that I've been sharing with you but I love it!
I actually made this card for my Dad to give to my Mum because just like me, she also adores penguins. So, I knew that this lil creation was going to go to a good home and be gratefully received. The actual image is all hand glittered, using Martha Stewart glitters and a glitter by numbers sheet that I bought from QVC. It's a little bit messy but the end result is definitely worth it.

I also, have to recommend the glitters which are amazing...the sparkle on them is stunning and these photos just can't do that justice.
Once the image was finished, I chose some backing papers that I'd been saving for a special occasion and matted them onto the card blank. The handmade roses are once again courtesy of Tim Holtz's Tattered Florals die and as a final touch, some beautiful organza ribbon that matched perfectly and then, I added my beloved snowflakes, die cut using a Spellbinders Snowflake die.


Hope you all have a fabulous and not too busy, weekend!!
Love Emma
xxx

Powered By Blogger

Total Pageviews