
Hello everyone...
Hope you're all well and had a great weekend! As always, a new week means we have a brand new Simon Says Stamp Monday Challenge and this week, with Valentine's Day less than 10 days away, we can feel that LOVE IS IN THE AIR and hope you'll join us for our fun challenge theme, where the DT are also showcasing the products of PaperArtsy.
With so many amazing crafty products to 'love', I'm sure that the ideas for this theme will be endless and we can't wait to see what you create and of course, over the many years of my blog, I've been making a lot of pieces that I hope will inspire you. But back to today, and this year my Valentine's make is all about a love bird, and I can't wait to share how I created this piece using products from Tim Holtz, and Sizzix!

So, here we go...it's time to share some L.O.V.E. and talk you through how I made this week's project!

TAG
This tag began life as a panel of Distress watercolour card, and I spritzed the card with water before sprinkling some of PaperArtsy's In The Navy Infusions over the wet surface. You don't need a lot of this powder, a little goes a long way and you can always add more if you need it. TOP TIP: I pierce a small hole in the top of the metal cap, and shake the powders through the hole, this gives me the minutest amount to use.

With the powder sprinkled over my wet card, I then added another light misting of water to dissolve the crystals and make the colour pop.

I didn't want a complete coverage of colour, I wanted to leave some white space around the infusions.
After heat drying the cardstock, and ensuring there are no wet areas for the next stage ~ I cut my tag from the card, using the largest sized Framed Tag and I inked the die using Clear Embossing Ink and a brayer. I just roll the brayer over the raised part of the tag die to transfer the ink, place the die on my card, and then run through the machine.
Working quickly, remove the die and sprinkle gold embossing powder to highlight the debossed areas of the die cut tag. Tap away the excess and then heat emboss the powder until molten.

I mounted the tag onto grey cardstock, followed by a layer of burlap, each time leaving a border showing around the outside.

To complete the tag, I added an eyelet through the hole to reinforce it and then threaded some rope through the hole itself.

INNER PANEL
Moving onto the inner panel of the tag, and taking the larger panel of the card that I used for the tag, I cut a smaller inlay panel. I machine stitched around the edge and then placed this onto my tag using foam pads.

HEART WOOD SLICE
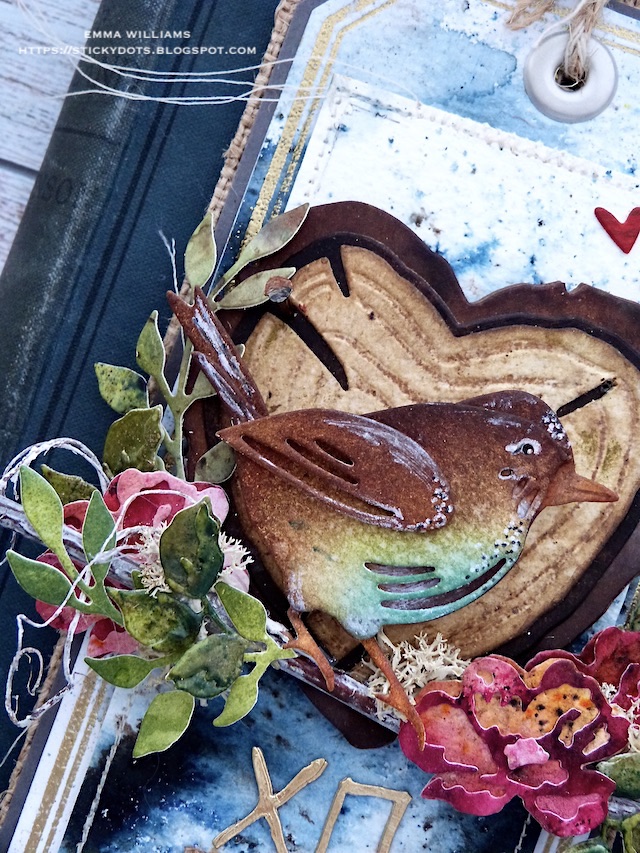
We're now ready to created the centrepiece and I started with the wood slice.

I used the heart shape from the Wood Slice and Alphabet Thinlits Die Set and cut the layers that I need to build the slice, from various shades of inked Heavystock Mixed Media Card, I also cut a further four layers of the largest section of the die.
COLOURS USED:
Base; Ground Espresso Distress Spray Stain
Middle; Walnut Stain Distress Spray Stain
Top: Antique Linen, Old Paper and Frayed Burlap Distress Spray Stain, plus Gathered Twigs Distress Crayon
After placing each layer over the top of one another, I have a really thick wood slice but without the weight...it's still light enough to be used on a card front, or as I have, used on a tag.
I applied a layer of Matte Collage Medium over the top of the slice, and once dry, I ran the Gathered Twigs Crayon over the top to accentuate the tree rings on the slice, wiping away the excess crayon with a cloth.
I attached the slice to my tag, using foam pads.

FEATHERED FRIEND
For my little bird, I used the smaller bird from the Feathered Friends Die Set to cut watercolour card, and then inked and coloured my bird with Distress Inks, blending the ink over the surface.
INKS; Tumbled Glass, Rusty Hinge, Vintage Photo, Gathered Twigs, Broken China, Old Paper
I then assembled the bird and added white pen highlights.
Using a twig from my garden, I adhered this across the tag with hot glue, and then attached the bird to sit on the branch, using foam pads to secure my little feathered friend in place.

The foam pads, also add height and dimension to the tag.

FLORA and GREENERY
To create my greenery and flowers, I used the Mini Brushstroke Flowers Die Set and cut the leaves and flowers from watercolour card, coloured with The Sage and Are You Cerise? Infusions, applied to the damp cardstock in exactly the same way as I made the background panels.
Once I had a varied selection of foliage, I wanted to add a little more depth to the smaller pieces, so I applied an embossing dabber over the surface of the die cuts and sprinkled some Peeled Paint Distress Glaze over the top. After tapping away the excess, I heat embossed the glaze.

I arranged the flowers and the foliage around the bird, then added some curly moss and reindeer moss, both of which I have in my stash.

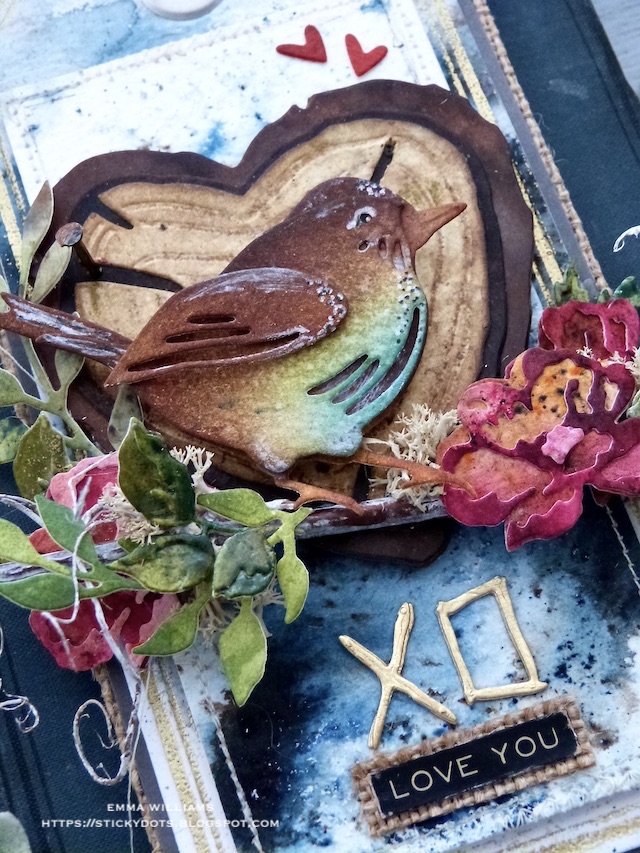
SENTIMENT
For the sentiment, I used a combination of the "Love You' from the Metallic Sticker Book, layered over a strip of burlap and the letters, 'xo' cut three times from gold metallic kraft card, using the alpha dies from the Wood Slice and Alphabet Die Set. After I layered each letter, one over the other to resemble the thickness of chipboard, I attached them to my tag.

We're nearly there and all that's left is the details.....
DETAILS
I added two small die cut hearts that I cut from red card using the dies in the Falling Hearts Die Set and placed these in the top right hand corner...

...before adding a Remnant Rub, just above it.
Finally, I hammered a nail tack into the wood slice itself, which is painted with a combination of Black Soot, Crackling Campfire and Ground Espresso to create a rusty effect to the metal.
...and that completes my project for this week, which I hope you love and feel inspired by some of the techniques and products that I've used.

Don't forget that every week, one lucky random participant has the chance to win a $25 gift voucher from Simon Says Stamp and you can join in up to 5 times, which means you could have 5 chances to win. You have until next Monday at 8am Ohio time. 1pm UK time, 2 pm CET to join in and good luck....


Recipe for project:


No comments:
Post a Comment
Thank you for all your comments and messages, they are all appreciated and I hope you'll come back and visit again soon...
Emma ~xx