
Hello everyone...
Can you believe we're already at the end of January?!? It doesn't seem a minute since we were getting ready for Christmas, and now here we are heading into the second month of the year! Time sure does fly...
...and as we start a brand new week, it's also time for the new Simon Says Stamp Monday Challenge and this week our theme is all about FOOD & DRINK. I'm sure you'll all be spoilt for choice with so many products available that are perfect for this theme, and we can't wait to see what you'll make.
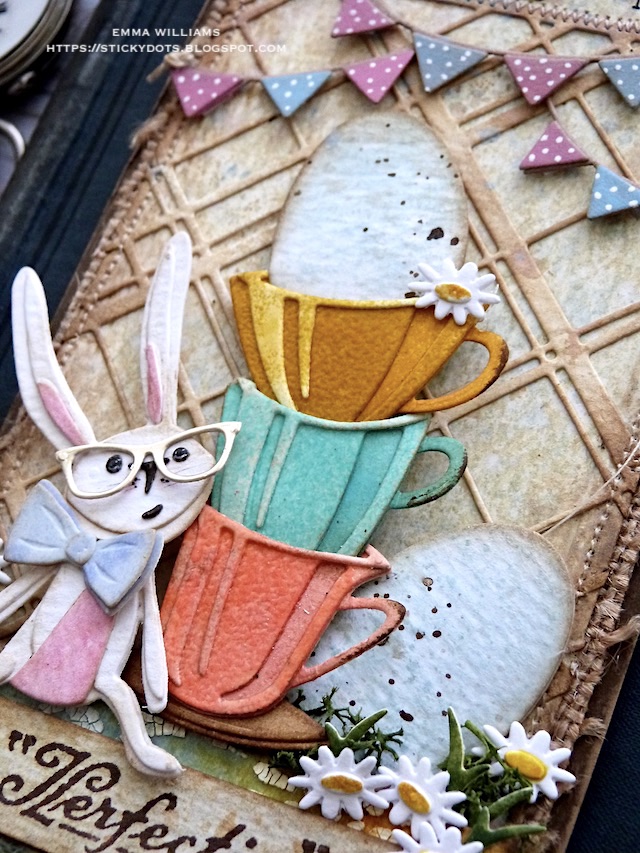
I had some fun with my make for this week's challenge and created a tag featuring the cutest bunny ever who has his little heart set on getting his paws on that massive egg sitting in the stack of teacups and as I wait for my Bunny Stitch dies from Tim's brand new Sizzix Everyday 2023 collection to arrive, I used a mixup of old and new dies to bring this make to life ~ Papercut Cafe Thinlits Die Set, combined with the Bunny Games dies from last year and the Layered Plaid from Christmas.

So, here we go...it's time for some die cutting fun!


TAG
To begin with I created my base tag and used the largest size Framed Tags die set to cut Watercolour Distress Card.
I didn't want to ink the frame on this particular tag, so I just used the die to cut and create the embossed/debossed edge around it. To add colour, I spritzed the tag with a light mist of water and then used Antique Linen, Old Paper, and Speckled Egg Distress Spray Stains before heat drying the surface and inking the edges with Walnut Stain Distress Ink.
Now to add that background and for this I used just the die with the thinner lines from the Layered Plaid set to cut a further piece of watercolour card. I adhered a self adhesive sheet to the back of my card panel before cutting which helps to stick the finished die cut without any need for wet glue.

I then spritzed the card using the same combination of sprays as before and once again heat dried the surface before inking the edges with Walnut Stain Distress Ink.
I adhered the plaid die cut to my tag ~ this won't fit the entire length of the tag, but that isn't a problem, as I'll be hiding this behind the scene and you won't see it on the finished piece.

To complete the tag, I machine stitched around the edge and then across the top join of the plaid die and added a number using a Specimen Remnant Rub, placed in the top right hand corner.

Once I mounted the tag onto a piece of burlap, followed by a panel of brown kraft cardstock, I set this to one side to move onto creating the scene.

PERFECTION BANNER
Across the bottom of my tag, I wanted to add my wording and I stamped the word "Perfection" onto a piece of card, inked with the same colours as before. This stamp is from the Eccentric stamp set and I stamped it with Ground Espresso Archival Ink, before cutting an inverted 'v' into one end of the banner strip.

I machine stitched down the left hand side before mounting it onto cardstock that I had in my stash, and attaching it across the bottom of my tag using foam pads.
PAPERCUT CAFE
Moving onto the stack of teacups and for this I used three of the five cups in the die set and cut each piece from cardstock that I made using one of my favourite techniques to create the look of faux Enamel.
For this I chose three different colours, working down from the top ~ Fossilized Amber, Salvaged Patina and Saltwater Taffy and Walnut Stain for the saucer.

I inked Mixed Media Heavystock Card with each individual colour of ink, making sure that I had three various shades from dark to light. This will create my layers for building the cups and creating the shading. After I sprinkled the same colour of Distress Glaze over the top, I heat embossed the inked panel until the powder is molten and then die cut my various layers to build the cups.

The glaze works so well to create the look of a shiny surface on these die cuts.
Ink the edges of the cups and then stack them inside one another, placing each cup into the slits that are cut into the die cuts themselves.

I attached the stacked tea cups to the tag using foam pads, before moving onto some Bunny Games....
BUNNY GAMES

For this tag, I'm only using the sitting bunny and cut the body from white card, and the tummy and ears from card that I inked with Spun Sugar Distress Ink. I inked each layer with Frayed Burlap Distress Ink before I layered the individual piecesto create the one bunny and then added his little face, cut from black kraft card.
Now to add character to this little cutie, and I was inspired by one of Tim's makes for this and cut a pair of glasses from metallic kraft card, using the Cool Yule set and a bow tie from the Tailored Die Set.
I then placed the bow tie around his neck and the glasses perched on his nose and placed him onto my tag using foam pads, sitting him on the left of the stack of teacups.

The eggs are both cut using the smaller of the two Easter Egg Dies in the Bunny Games set. I cut these from watercolour cardstock inked with Speckled Egg Distress Spray Stains and then splattered Ground Espresso Distress Paint across the surface.
After inking the edges of each egg, I tucked one into the cup at the top and the second, just peaking out from the side of the stack.
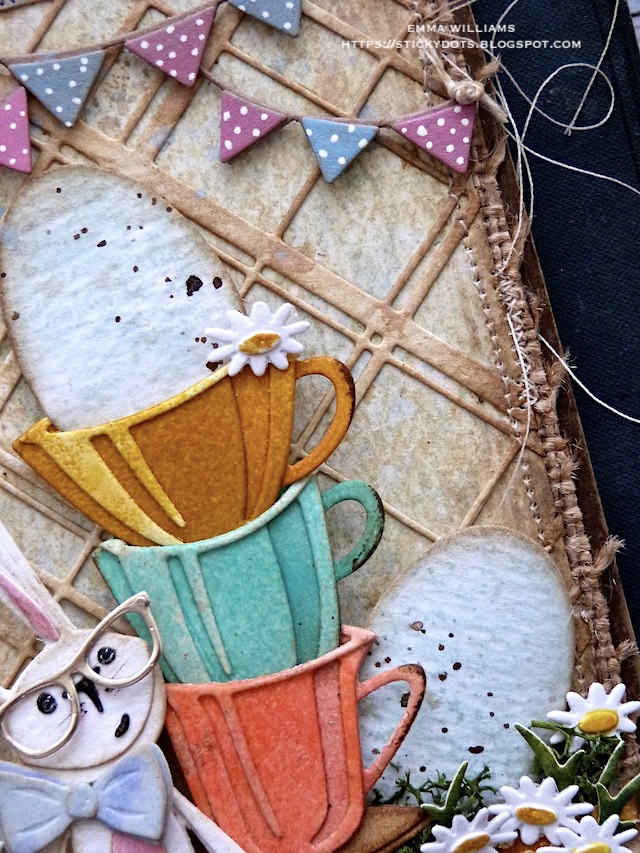
BUNTING
Using the dies from the Bunny Games set, cut two sections of bunting from Kraft cardstock and layer each pennant onto it. I then used Watercolor Pencils, Tumbled Glass and Kitsch Flamingo, to colour the individual pennants before adding dots with a white fine line gel pen.
I attached the swathes of bunting across the top section of my tag.

We're nearly there and all that's left is the details....
FINISHING DETAILS
After attaching little clumps of moss around the base of the cups, egg and bunny, I cut my daisies and little tufts of grass, which once again are from the Bunny Games Die.
I attached each daisy to my tag, arranging them in clumps around the base of the scene.

To complete and finish the hole reinforcer at the top of the tag, I attached a We R Memory Keepers Eyelet which was fixed into position with their Crop A Die before I added a Mini Book Ring Fastener through the hole.

Finally, I added a mini pin, clipped to the corner of the sentiment banner and dyed some Mummy Cloth with Speckled Egg and Antique Linen Distress Ink, which I tied around the tag, placing it just below the banner and secured with a knot on the left.

So that's my tag finished for this week and even though I didn't make this for Easter, I hope you love what I've created and it might give you some ideas for all those makes that will need to be made before you know it.

As always, if you make anything, or if you've been inspired by anything that you've seen here on my blog ~ then please, let me know by tagging me on social media or leaving a comment here and I will be right over to take a look!
Don't forget that every week, one lucky random participant has the chance to win a $25 gift voucher from Simon Says Stamp and you can join in up to 5 times, which means you could have 5 chances to win. You have until next Monday at 8am Ohio time. 1pm UK time, 2 pm CET to join in and good luck....


Recipe for project:


How cute is this!! Absolutely gorgeous artwork Emma! This IS perfection! :-)
ReplyDeleteHope you have a great week!
luv
Lols x x x
emma this is WONDERFUL!!!! paula xo
ReplyDeleteOh my gosh Emma!!!! Cutest Easter tag ever!!!
ReplyDeleteEmma, this is just so adorable!!!!! This piece was just the nudge I needed to order the Tailored set and I also had to order Cool Yule for those specs!!!!!! I used the links in your blog. Hopefully those are affiliate links. Thanks so much for sharing your process for this spectacular make.
ReplyDelete