
Hello everyone....
This week's brand new Simon Says Stamp Monday Challenge has begun and our theme is all about THINGS WITH WHEELS and if you'd love to join us and play along, then we can't wait to see what will inspire you and how you will interpret our fun theme!
For my make, I chose to use the Road Trip Colorize Die, which is one of the brand new sets from the Tim Holtz/Sizzix Everyday release for 2023. For my previous project that I made using this die set, just click here but for this particular make, I was inspired by one of my favourite cities in the world, New York and together with the Alicia Key's song, Empire State Of Mind ~ I created this little yellow taxi cab to feature on my Mini Clipboard.

So, jump aboard...it's time to share how I made this week's project!


CLIPBOARD
To begin I used the Tim Holtz Mini Clipboard as my base and after removing the clip from the board, which is really easy ~ all you need is a screwdriver and unscrew each of the fasteners, I applied a run of Design Tape Trim around the edge of the board, before choosing a piece of paper from Backdrops Vol 1. I used the New York City map, which of course is perfect as a backdrop for this piece and trimmed it to size before machine stitching a border around the outside.

I adhered the panel of paper to my board using Matte Collage Medium and then sanded the edges with the brand new Sanding Disks by Tim. (These are a game changer and I highly recommend anyone who hasn't tried them yet...to try them NOW)
After applying a further coat of the medium over the surface of the paper, I ran my Walnut Stain Distress Crayon around the edge and then addd Hardware Heads to the top left and right hand corners of the clipboard.

CLIP
With the board finished, I moved onto the clip and I wanted a really rusty, gnarly feel to this piece of metal, so I decided to alter it and began by applying a layer of Translucent Grit Paste over the surface. After allowing it to dry, I then painted the entire clip with Black Soot Distress Paint. After allowing the paint to become a little tacky, I wiped away the excess before applying a dry brushing of Ground Espresso, Crackling Campfire and Antiqued Bronze over the top, layering each paint colour one by one, and drying them in between applications.
To accentuate the pasted areas, I used a small amount of Sterling Foundry Wax and applied it to the surface using my fingertip. You only want a hint of this, so just a light touch will do. Heat set the wax with a heat gun.
Finally, I added a Mini Flair Embellishment to the centre of the clip. This one features the hand, which is to represent hailing the cab.

Once I'd re-attached the clip to the board, I then attached a Swivel Clasp. I altered the metal with the same paints as I used on the clip itself.

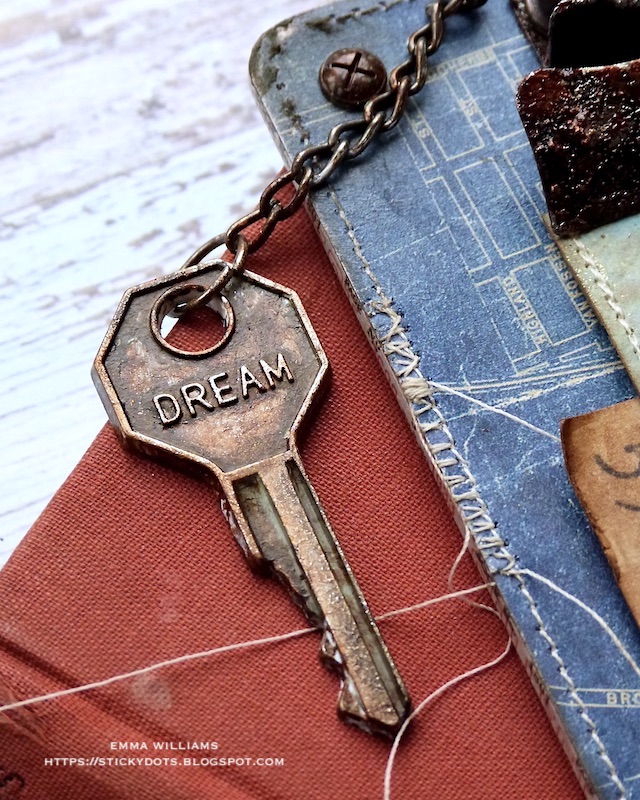
At the end of the clasp, I added my Word Key. I chose the key that has dream written on it, which is obviously representing the Alicia Key's song and the line, "where dreams are made of". I altered the metal clip with the same paints as before but then applied a small amount to gilding wax to accentuate the lettering. This is a wax that I have in my stash but you can find plenty of different metallic waxes at Simon Says Stamp.
INNER PANEL

To create the second layer to this piece, I cut a panel of Mixed Media Heavystock card and applied Ground Espresso, Speckled Egg, Frayed Burlap, and Tumbled Glass Spray Stains over the surface, which I'd already misted with water. I then applied some more water to blend the stains before dripping tiny amounts of Speckled Egg Oxide Spray over the top.
To add interest to the panel, I used some stencils, and started by applying Walnut Stain Distress Ink through the Script Mini Stencil from set 49, you can see the number on the left of the panel. Heat set the ink, before applying the next layer, and for this I used the Circuit Mini Layering Stencil from set 48. I began by applying Translucent Grit Paste through the stencil with a palette knife, directly onto my panel of inked card and after removing the stencil, I sprinkled gold embossing powder over the top. Set it to one side to dry, which will usually take approx 30 mins depending on your surroundings. Once I was happy to move on, I used a heat gun to emboss the gold powder until molten. Do not overheat the paste as it will bubble, it's better to apply heat in small areas and move on quickly.

After inking the edges and machine stitching a border, I attached the panel to my board using foam pads, before placing a Numbers Snippet, 59 Yards to the left hand side of the panel.

Across the board, I placed a ruler piece that I broke the end off. I inked the wood with Walnut Stain Distress Ink and attached it to my board, adding two Hardware Heads on the right hand side. I then took a straight edge trim from the Bat Webs Etcetera Trim Pack, painted it with Black Soot Distress Paint and once dry, added a Design Tape trim along the edge before attaching it along the top of the ruler piece to form the road.

Just beneath the ruler piece, in the bottom right hand corner, I added a Labeled Remnant Rub.

YELLOW TAXI CAB
Now we can start to build the scene and I began by making and assembling the cab, which is the car from the Road Trip Colorize Die Set...
I cut each layer using the dies, and if you need any help there are guidelines on the back of each die piece that you can follow.
The only difference with this make, is that I exchanged the blue layer for yellow and used a Mixed Media Heavystock card that I spritzed with Mustard Seed and Fossilized Amber Spray Stains.
With the car assembled, I added a piece of Mica sheet behind the die cut to form a window, you can use acetate for this if you don't have Mica. I wanted to create the look that the window is wound down, so I just added a piece that would fit half the window and attached it at the back of the die cut car.

Now to make that taxi cab look realistic and for this, I used some dies from the Abstract Elements set, which you can see below.


Don't forget that every week, one lucky random participant has the chance to win a $25 gift voucher from Simon Says Stamp and you can join in up to 5 times, which means you could have 5 chances to win. You have until next Monday at 8am Ohio time. 1pm UK time, 2 pm CET to join in and good luck....


RECIPE FOR PROJECT


ABSOLUTELY GORGEOUS!!!!! :-) love the whole design of this Emma!! :-)
ReplyDeleteHope you have a great week!
luv
Lols x x x
What a fabulous make. Love how you turned the car into a taxi cab. I was thinking the hand was to stop people at the crosswalk, but, when you said, "hailing a cab", I was, of course....love it.
ReplyDelete