Showing posts with label mini clipboard. Show all posts

Monday, 6 April 2026

Men At Work...

Hello everyone...

Hope you've all had a wonderful Easter and the Easter Bunny left you some treats...

As always on a Monday, it's time for the brand new Simon Says Stamp Monday Challenge and this week our theme is called ANYTHING BUT A CARD. and we are showcasing the amazing products of the one and only, Tim Holtz. If you'd like to join us, then all the details are at the bottom of this post and we would love to see what you create...

For my make, I created a Tim Holtz idea-ology Mini Clipboard and used some of the brand Neutral 8 x 8 Palette Paper Collection for the background to this masculine project all about skilful workmen. The idea for this came from the famous 1932 photo showing 11 ironworkers eating their lunch of a steel beam above NYC, and with this in mind...I chose to use a Paper Doll couple, sitting on a ruler that stretches across the clipboard and over the edge....

So, let's get started because it's time to share how I created my project...

COVERING THE CLIPBOARD

To begin with I removed the metal clip from the board itself by unscrewing the screws on the back. Set this to one side.

I painted the board with Black Soot Distress Paint and whilst this was drying, I cut a panel of paper from the Neutral Palette paper pack. I chose the paper with the horizontal strips, showcasing the various different designs in the pack. I cut slightly smaller than my board, so that the finished piece will have a black border showing around the edge.

At this point, I did add an additional strip of paper from the collection, as I didn't want the black blueprint design to sit prominently at the top of my project, so I cut a separate, lighter strip and adhered this to the centre of the dark band.

After machine stitching a border in black cotton thread around the outside of the paper, and adding some rips and tears around the edges, I adhered the panel onto my board using Matte Collage Medium.

I splattered Black Soot Distress Paint across the surface and then used the Gathered Twigs Distress Crayon around the edges of the paper, blending out the colour towards the centre of the covered board.

CLIP

Firstly, I attached a star adornment to the centre of the clip before adding texture to the surface and then  changing the colour of the clip. For this, I used Translucent Grit Paste and Distress Paints.

I began by applying the paste to the surface of the clip, adding it randomly and not paying too much attention to where I placed it. Once the paste is dry, I added the colour ~ I used a brush to apply a combination of Black Soot and Crackling Campfire Distress Paints.

I added the Crackling Campfire first, allowed for this to dry and then dry brushed Black Soot over the top, allowing the brush to lightly kiss the surface with the paint and not adding too much. Once I was happy with the combination, I applied some Antiqued Bronze Distress Paint over the top of the textured areas to add some highlights.

Once the paint was thoroughly dry, I re-attached the clip to the board.

FOCAL POINT

With my board complete, it's time to move onto the scene and we'll start with the circle that sits at the back of the men.

For the base of the circle, I used the inside pop out section from one of the Etcetera Facades. You can also die cut or cut a circle of mount board to create this.

I covered the circle with another design from the Neutral Palette Collection and then cut a slightly smaller circle from the same design. I machine stitched around the edge of the circle before matting this piece over the top of the larger circle.

I then used foam pads to attach a target ephemera piece, which is from the idea-ology Urban Layers pack that is now sadly retired. If you don't own this pack, then you can always die cut the layers from card....

In the centre of my circular layers, I added a Junk Drawer Baseboard piece.

To add some texture around the edges of the large circle, I used more of the Translucent Grit Paste, applying it around the outside.

Once the paste was dry, I mounted my circles onto the clipboard with foam pads and placed some Screwheads around the outside. I altered the metal and the Translucent Grit Paste with a combination of Black Soot, Antiqued Bronze and Crackling Campfire Distress Paints.

Beneath the circles, I needed to add my beam and for this, I used a Ruler Piece, covered with a Paper Strip and a Pinked Etcetera Trim, that sits underneath to support the ruler piece.

To cover the Etcetera Trim, I used the Decorative Trims die from Sizzix/Tim Holtz and cut a piece of the paper from the pack. I adhered it to the trim with Matte collage Medium, and also applied the medium over the top to seal the paper, before I applied Gathered Twigs Distress Crayon to the surface, blending out the colour with my finger tip.

For the ruler piece, I broke each end carefully snapping them off and then covered the ruler with a Paper Strip. I then applied Matte Collage Medium over the top and used my Gathered Twigs Crayon to age this piece.

I attached the Etcetera Trim underneath the Ruler Piece, allowing the pinked edge to show and then attached this to my project, placing it directly beneath the layered circles. The ruler is attached so that it overhangs the right hand side of the clipboard.

I then attached one of the Paper Doll Poses figures to the project using foam pads and placing it on the left of the clipboard.

To colour tint the paper doll, I used Distress Crayons in, Faded Jeans, Rustic Wilderness, Gathered Twigs, Scattered Straw, Tea Dye and Aged Mahogany.

Finally, I added clumps of moss along the ledge and hammered a couple of Nail Tacks into the ruler, placing them on either side.

FINISHING DETAILS

For those all important final touches, I added a Quote Label Chip in the bottom right hand corner...

...and then attached a swivel clasp to the clip. I then added some extra chain and attached a Junk Drawer Baseboard piece with the number 35 to the end of the chain...

Finally, I added some Cello Stickers around the edges of the paper, where it's attached to the back board.

So, that's my make finished for today and I hope you love the piece I've made and inspiration behind it...

Don't forget that every week, one lucky random participant has the chance to win a $25 gift voucher from Simon Says Stamp and you can join in up to 5 times, which means you could have 5 chances to winYou have until next Monday at 8am Ohio time. 1pm UK time, 2 pm CET to join in and good luck....


Thank you so much for taking the time to stop by today!
Love Emma xxx

Monday, 21 July 2025

It's a Kind of Magic....

Hello everyone...

As we begin the new week, it's time for a brand new Simon Says Stamp Monday challenge and this week,  we are challenging you to MAKE YOUR OWN BACKGROUND!

So, with so many different ways of doing this, and whether you use inks, sprays, pastes or paints, you will be spoilt for choice and we can't wait to see how you will interpret this fun challenge theme.

For my background I chose to use Distress Spray Stains and Oxide Sprays, together with stamps and I just had so much fun building up those layers to create interest and texture ready for the focal point of those beautiful butterflies.

So, let's get started because it's time to share how I created my background...

For this make, I used a combination of Tim Holtz products and chose an idea-ology clipboard, a Size 8 Etcetera Tag and a size 8 Mixed Media Heavystock tag as my substrates.

BACKGROUNDS

The background on the tag and the clipboard are both created using the same colours of sprays, oxide sprays and inks. I chose the following:

DISTRESS SPRAY STAINS: Iced Spruce, Old Paper, Speckled Egg. Gathered Twigs

OXIDE SPRAYS: Old Paper

DISTRESS INKS: Uncharted Mariner, Scorched Timber

I began by cutting a panel of Mixed Media Heavystock card, and also used a size 8 Mixed Media Heavystock tag. I misted each of these surfaces with water and then started to apply my sprays, using the Distress Spray Stains first and only applying a light touch of Gathered Twigs, and then some light flicks of Old Paper Oxide. I applied a little more water to blend the colours and then allowed these to dry. You can also use a heat tool to dry the inks.

Once my surfaces were dry, I inked around the edges with Scorched Timber Distress Ink.

To add some more interest to my background, I used Black Soot Archival Ink to ink up the script stamp from the Stampers Anonymous Tiny Toadstools stamp set and added the script randomly onto my card panel and tag.

Set the panel to one side and taking the tag, I added some more stamping down the right hand side. I used one of the stamps from the SA Faded Type stamp set and inked this with clear ink, before applying gold embossing powder over the top. Tap away the excess and then heat emboss until molten.

Finally, I used Tim's Splatter Brush to add some white paint speckles and machine stitched a border around each piece to complete the backgrounds.

CLIPBOARD

We're now ready to start constructing this piece and to begin with I worked on the clipboard and after unscrewing the clip, I attached the inked card panel to the board using Matte Collage Medium.

I then stamped the Factory No.1896 down the left hand side of the board. This stamp is from the Eccentric stamp set.

Taking the clip, I wanted to this to have a rusty, crusty appearance which is so easy to achieve and you can see a tutorial on how I do this by clicking HERE.

To alter this clip, I used exactly the same process as I used in my earlier post, but I omitted the Salvaged Patina Paint on this particular piece.

Once the clip was ready, I reattached it to my board and then attached the Mini Plaquette, No.79 to the centre of the clip.

TAG

Moving onto the tag, and to begin with I stamped the butterflies from the Papillon stamp set down the left hand side of the tag. This stamp set now has co-ordinating dies from Simon Says Stamp, so no more fussy cutting when we move onto the next step.

BUTTERFLIES

To create the butterflies, I re-stamped the image onto watercolour card using the brand new Mini Oxide Ink Pads and my stamp platform.

I inked the stamps directly with various colours from this release, including Crackling Campfire, Barn Door, Peacock Feathers, Bundled Sage, Scorched Timber, and Gathered Twigs. I personally find it easier to do one butterfly at time. I then lightly misted water over the inked stamps before stamping them onto the card.

If you feel you need more colour, then re-position your card on the platform and just go in with the ink pad.

Once I was happy with my butterflies, I used the Simon Says Stamp co-ordinating die set to die cut each one from the card.

I inked the edges of the die cuts with Frayed Burlap Distress Ink and then attached them to the tag, lifting the wings and not attaching these. I placed each image over the top of the previously stamped image on my tag, and this ensures I get the correct placement and also you can see the text from the stamp.

Before I attached my tag to the Etcetera Tag, I stitched the bodies of the butterflies to the tag.

With my tag complete, I attached it to the clipboard using Matte Collage Medium.

To complete the tag, I added a Curator Ephemera piece in the top right hand corner.

I also added a Quote Chip, 'A Little Magic Can Take You A Long Way", and once again, I placed a Cello Sticker tape over the chip.

Finally I added an Adornment Star and two hardware heads, all of which I painted with gold acrylic paint.

DETAILS

It's now time for all those tiny finishing details and I began by adding a Numbers Snippet to the right hand side of the clipboard, tucking it underneath the tag, and once again, I added a Cello Sticker Tape.

Finally, I attached a Swivel Clasp to the clip and from the chain, I hung an idea-ology Thought Token which I painted with Candied Apple Distress Paint. Once dry, I then scribbled Phantom Mist Distress Crayon over the token and wiped away the excess to reveal the wording.

So, that's my make complete and I hope you've loved the piece I've created and feel inspired by the techniques.

As always, if you make anything, or if you've been inspired by anything that you've seen here on my blog ~ then please, let me know by tagging me on social media or leaving a comment here and I will be right over to take a look!

Don't forget that every week, one lucky random participant has the chance to win a $25 gift voucher from Simon Says Stamp and you can join in up to 5 times, which means you could have 5 chances to winYou have until next Monday at 8am Ohio time. 1pm UK time, 2 pm CET to join in and good luck....


Thank you so much for taking the time to stop by today!
Love Emma xxx

Monday, 5 June 2023

Jump On Board....

Hello friends...

Happy Monday and hope you all had a great weekend! Just before I share this week's post, I just wanted to say a big thank you to everyone who sent me Birthday wishes, gifts and cards ~ I felt very spoilt by all the love you gave and appreciate every single message.

So as we put my birthday weekend behind me, it's time for a brand new Simon Says Stamp Monday Challenge and this week our theme is make ANYTHING BUT A CARD and with so much choice, I'm sure that you'll all have some fun making and sharing your fabulous projects which the DT will be excited to see.

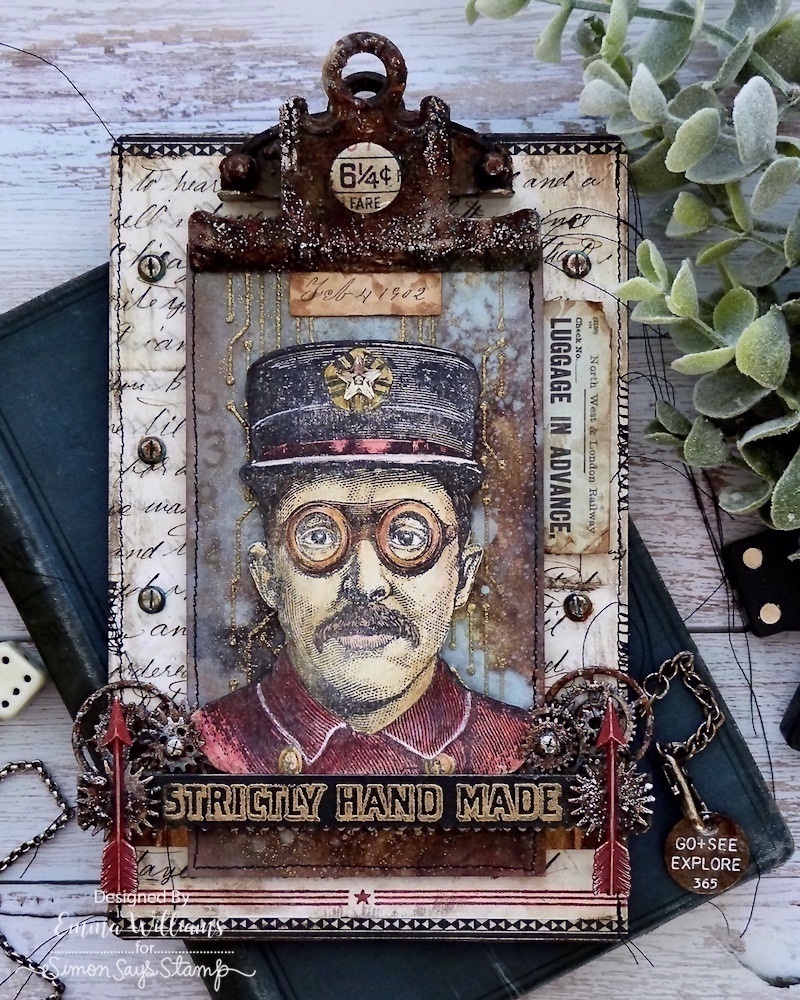
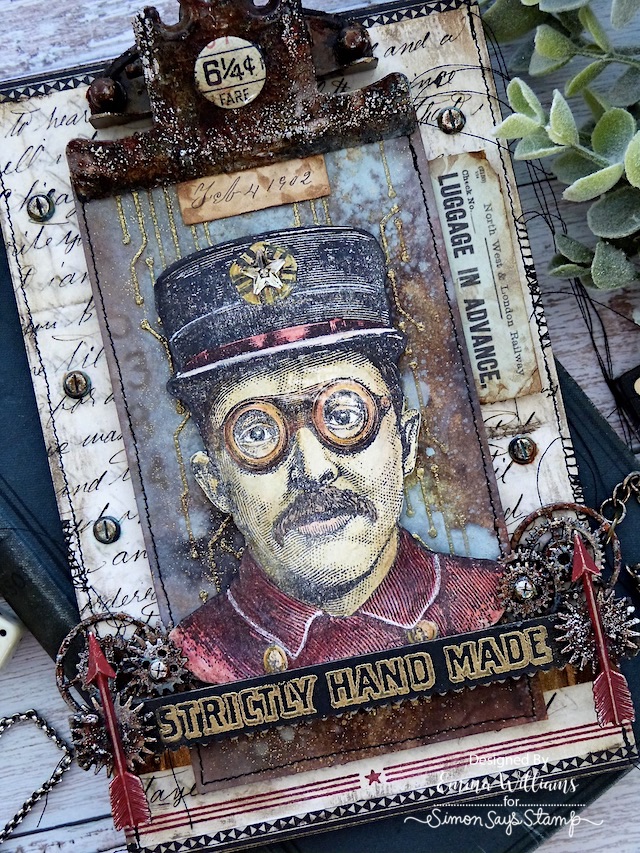
For my make, I chose to create a Mini Clipboard with a masculine theme and used one of my favourite stamp sets from the 2023 Tim Holtz/Stampers Anonymous release ~ The Inspector as the focal point, coloured with Distress Marker Pencils.

 So, jump aboard...it's time to share how I made this week's project!

CLIPBOARD

To begin with I started by covering my clipboard.

To cover the board, I removed the clip by unscrewing the screws that hold it in place on either side. I then took a panel of paper from Backdrops 6, I chose a script design and after cutting it to size, I adhered a strip of Design Tape Trim to the top and bottom edges of the paper.

I then took the star border stamp from The Inspector set, inked this with Barn Door Archival Ink and stamped it across the bottom section of the paper, just above the trim tape before I went on to adhere the panel to the backboard with Matte Collage Medium, adding a coat over the surface to seal the paper. 

After running my Walnut Stain distress crayon around the edge of the paper, I blended the colour with a damp baby wipe.

Now to create that rusty appearance to the clip and I began by adding some Translucent Grit Paste over the surface of the metal and allowed it to dry and become hard. Once that has happened, it's time to start adding the paint layers and applying each colour individually and drying between applications, I used the following Distress Paint colours to colour the metal.

BLACK SOOT, CRACKLING CAMPFIRE, GROUND ESPRESSO, ANTIQUED BRONZE, SALVAGED PATINA, RUSTY HINGE.

I love that pool of ink on the right hand side...it makes my inky heart so happy!

Once I was happy with the blend, I moved onto the next stage but remember if you need to add any more of each individual colour, just make sure you dry the previous layer before adding the next ~ if you don't it might become a little muddy in appearance.

To accentuate the grit paste, I used Treasure Gold Gilding Wax that I have in my stash, and using my fingertip, I applied the smallest amount over the top of the crusty surface.

After I re-attached the clip to the board, I attached a Mini Flair Embellishment, 6¼¢ and adhered it in the centre of the clip using Matte Collage Medium.

TAG

With my clipboard ready, it's time to move onto the tag that sits behind the inspector.

For this I used a size 8 Mixed Media Heavystock Tag and began by misting with water before applying the following spray stains and Oxide Sprays;

Ground Espresso, Speckled Egg, Frayed Burlap, Tumbled Glass, Rusty Hinge, Crackling Campfire and Speckled Egg Oxide Spray

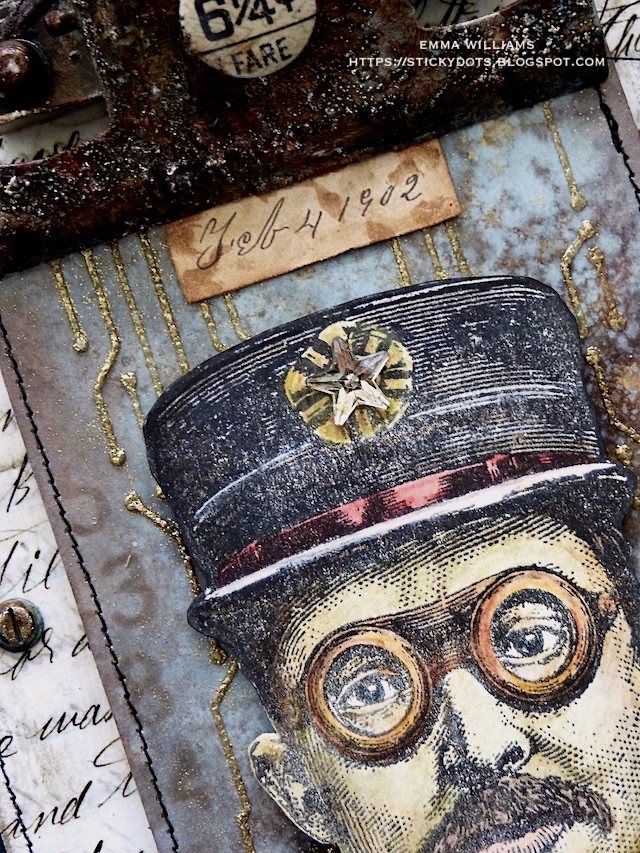
I heat dried the tag thoroughly before placing the Mini Layering Circuit Stencil from set 48 over the top of my tag and using a palette knife, I applied more of the Translucent Grit Paste through the design.

Remove the stencil and working quickly whilst the paste is still wet, sprinkle gold embossing powder over the top and then set to one side for the paste to harden ~ this should take about 30mins dependant on weather conditions. Once it is hardened, then carefully heat emboss the gold powder until it becomes shiny and molten ~ be careful to not linger too much on any one spot as the paste will bubble and the powder.

In the open areas of the tag, where there's no raised embossed areas, I added some numbers using the numbers stencil that is also in Set 48. I inked through the stencil using Walnut Stain Distress Ink.

I machine stitched a border around the edge of my tag, inked the edges with Walnut Stain Distress Ink and then mounted it onto a piece of chipboard before adding foam pads to the back and mounting it onto the centre of my tag, securing it in place at the top with the clip.

At the top of the clip, I added a Numbers Snippet. I dipped the snippet into Gathered Twigs Distress Ink that I applied to my glass mat and then heat dried the ink. I also added a Memoir Ephemera piece on the right hand side of the tag, Luggage In Advance, again inking the edges with Walnut Stain distress Ink and adding a few rips and tears before I mounted it onto the clipboard using foam pads.

THE INSPECTOR

After stamping the image of the inspector onto a piece of Mixed Media Heavystock card, I watercolored him with Distress Watercolour Pencils. In my previous make, I chose to colour his jacket and cap blue, but on this make I coloured him with Barn Door to create a red jacket and hatband and his cap is coloured with Hickory Smoke.

The face is coloured with Antique Linen and Frayed Burlap, before I moved onto his glasses, coloured with Rusty Hinge and Barn Door. I added a blush of pink to his cheeks and lips and his hair and moustache are both coloured with Walnut Stain.

After cutting around the outline of the stamped image, I attached the image onto my tag with more foam pads to add dimension.

In the centre of the crest on his cap, I added a mirrored star, altered with a little Mushroom Alcohol Ink.

DECORATIVE TRIM

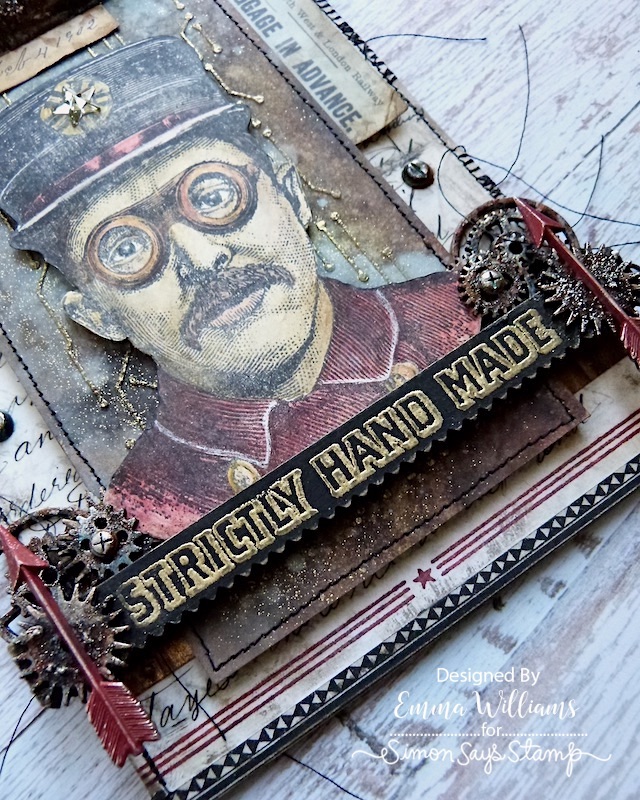
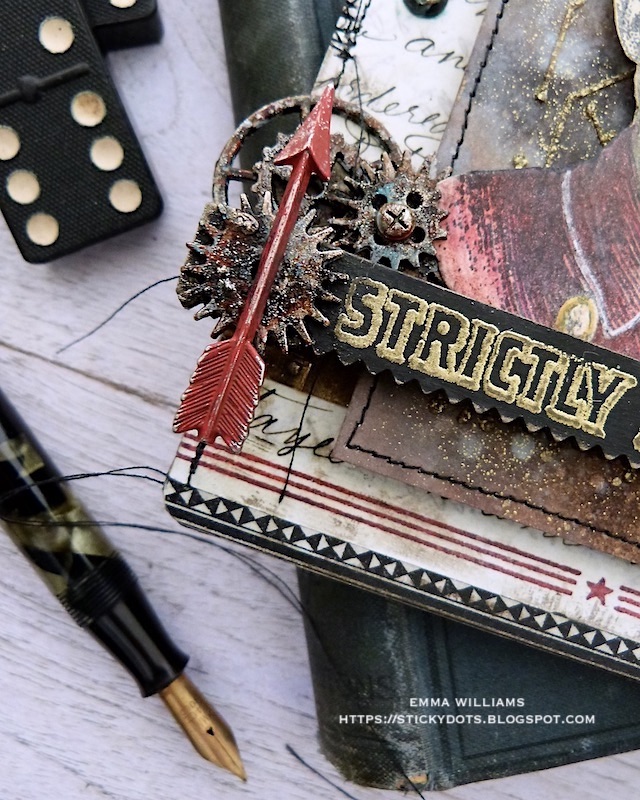
Across the bottom of the Inspector I added a Pinked Decorative Trim. I painted the trim with Black Soot Distress Paint, dried the paint and then sanded the edges before stamping the "Strictly Hand Made" wording in clear embossing ink directly onto the trim.

Sprinkle with gold embossing powder and then heat emboss. I attached the trim using foam pads.

GEARS

On either side I added a combination of Sprocket Gears and Mini Sprocket gears, all of which have a light coverage of Translucent Grit Paste, and once dry, painted using the same colours as I used on the clip.

I arranged the gears, layering them on top of one another and also attaching them to the trim and creating the dimension to give the appearance they are all connected to the next set, and would all turn one another.


To complete this section, I painted two Arrow Adornments with Candied Apple Distress Paint and once these were dry, I adhered them over the tops of the gears, placing them both pointing upwards.

We're nearly there and it's just the final touches left.

FINISHING DETAILS

Down each side of the tag, I placed some Hardware Heads onto the board itself. These are once again altered with the same paints as I've used throughout and adhered with Matte Collage Medium. I also added some of the smaller Hardware Heads to the centres of the gears.

Finally, I added a Hook Clasp to the right hand side, that I fixed to one of the gears and hung a Thought Token, "Go, See, Explore" from the end.

So that's my project finished and I hope you've loved the tricks and techniques I've used to make this piece.

As always, if you are inspired by anything you see on my blog, don't hesitate to message me or tag me on any social media platforms or leave me a message here and I'll pop by to take a look ~ I'm always so humbled and honoured to see what you've been making after visiting my blog.

Don't forget that every week, one lucky random participant has the chance to win a $25 gift voucher from Simon Says Stamp and you can join in up to 5 times, which means you could have 5 chances to winYou have until next Monday at 8am Ohio time. 1pm UK time, 2 pm CET to join in and good luck....


Thank you so much for taking the time to stop by today ~ stay safe and keep well.
Love Emma xxx


RECIPE FOR PROJECT

Distress Spray StainGround Espresso, Speckled Egg, Frayed Burlap, Tumbled Glass, Rusty Hinge, Crackling Campfire 
Distress Crayons: Walnut Stain
Distress Inks: Walnut Stain
Distress Paint: Black Soot, Antiqued Bronze, Salvaged Patina, Ground Espresso, Crackling Campfire, Rusty Hinge
Treasure Gold Gilding Wax from my own stash
Powered By Blogger

Total Pageviews