Showing posts with label mica stains. Show all posts

Saturday, 13 January 2024

Simon Says Stamp Smitten and Sweetheart Blog Hop ~ Day 2

Hello everyone and welcome to Day 2 of the Smitten and Sweetheart Blog Hop ~ day 1 of this hop can be found here!
I'm so excited to be joining this hop and you might have arrived here from my extremely talented friend, the amazing Alberto Gava but if not, and you want to catch up with everyone who is participating in this hop, then don't worry because you can head back to the beginning, HERE.

For my card set, I chose to combine products from the two releases and used the beautiful Flower Love Stamp Set with the Friendship Leafy Cluster stamps to create a couple of projects that celebrates friendship. You can check out all the fabulous new products in the Sweetheart release, HERE and the Smitten release, HERE.


So you've seen the cards, and it's time to share how I created them...

To begin with I made my background, which is one sheet of black heavystock card that I stamped the design onto, and then cut into three separate panels which I used on the two card projects.

BACKGROUND

With the panel of black heavystock card in front of me, I took the larger leafy clusters stamp from the stamp set and inked this with Versamark Clear Ink. I then stamped the pattern, one leaf at a time, onto the outside edges of the cardstock, leaving plenty of open space in the centre of the panel. After sprinkling with gold embossing powder, I then heat set the powder until molten and glossy.


Now to colour the leaves, and for this, I used a combination of Polychromos Pencils and Tim Holtz's Wicked Elixir Mica Spray Stain. I began by colouring inside the embossed areas with the various shades of green pencils, this helps to intensify the colour of the Mica Stain. Once I had coloured all the leaves, I then spritzed some of the stain onto my glass mat and used a waterbrush, or a paintbrush to apply a colour wash over the top to create the beautiful shimmer.

Allow for the mica stain to dry before cutting the background into three separate panels which are ready to cut and use on the cards.

2 panels measuring 8.5 x 11.5cm and a 3rd panel to measure 3 x 8.5cm.

After machine stitching a border around the outside of the panel, I matted each panel onto gold metallic kraft stash, leaving a border around the outside.

FLOWERS

I used the Flower Love Stamp set to create the selection of flowers that I used on each of the cards. The flowers are all stamped in clear embossing ink onto black card and then I coloured them in exactly the same way as I coloured the leaves, first a layer of polychromos pencils and then I painted the Mica Spray Stain over the top to create the shimmery, jewelled tones.

For the flowers I used the following colours of Mica Stain:

Yuletide, Juniper Berry, Snow Flurries and Flickering Candle

Once the colour was laid down, and I was happy with the tones and intensity, I actually fussy cut each bloom because I don't own the matching die set. But if you don't like cutting and would like the die set, that is available HERE.

With all the components ready, it's time to make the cards.

CARD No. 1

Kraft card blank measurement: 15.5 x 12cm

To create the first layers on the card, I cut a panel of black card, 15 x 11.5cm and attached this to the card blank.

Using one of the 8.5 x 11.5cm stamped background panel, ink up the 'I cherish our' and the 'friendship' stamps from the Friendship Leafy Cluster set with Versamark Clear Ink and stamp this onto the left hand side of the card panel, placing it in one of the open spaces.

Sprinkle gold embossing powder over the sentiment and heat emboss until molten.

Taking a splatter brush, lightly splatter gold paint over the surface, and set to one side to dry.

Using 8 of the stamped flowers, I arranged these onto the card panel, layering some of the stamps over the top of one another to create dimension and using foam pads to attach each of them.

I mounted the finished panel onto a piece of black cardstock, slightly larger than the artwork and with a machine stitched border before mounting these layers onto a final layer of gold metallic kraft stash.

I then mounted the panels onto the card blank using foam pads.

Finally, I added three of the Rainbow Splash Drops to complete this card.

CARD No.2

Kraft card blank measurement:18 x 11.5cm

For this card, I cut a black card panel slightly smaller in size than my card blank and then wrapped a piece of hand dyed Tim Holtz's Mummy Cloth Trimming around the card.

This strip of cloth is dyed using a combination of Shabby Shutters and Antique Linen Distress Spray Stains before heat drying until thoroughly dry. I then wrapped the trimming around the card, and tied it into a bow on the left hand side to secure it into position.

For this card, I used the remaining two stamped and coloured panels both of which are matted onto gold metallic kraft card. 

As with the previous card, I stamped the sentiment, Friends Make The World Beautiful, onto the larger sized panel and lightly splattered gold paint across the surface before I mounted both panels onto a piece of black card, 16 x 9.5cm which once again had a machine stitched border around the outside.

Using foam pads, mount the layered card panels onto the front of the card blank and to complete the card, I used the remaining two stamped flowers, layering one over the top of the other with foam pads. This flower is attached it to the left hand side of my card.

Finally, I placed three of the droplets onto the sentiment panel and one larger sized droplet in the centre of the flower and that completes both of my card projects for this hope and i hope you love what i've created.


HOP ORDER:


Simon Says Stamp Blog 

Nina-Marie Trapani

Caly Person

Jennifer McGuire

Suzy Plantamura

Amy Rysavy

Debby Hughes

Emily Midgett

Lisa Addesa

Alberto Gava

Emma Williams ♥️ You are here!

Heather Hoffman

Carly Minner

Tracy Ware

Jessica Vasher


Simon Says Stamp is giving away a $25 coupon to every stop on the blog hop from the blog comment section! So, this means you can leave a comment here and on every stop along the way to increase your chances. Winners will be notified and they will be posted on the Simon Says Stamp blog on Wednesday, 17th January and all winners will need to contact/email Simon Says Stamp to claim their prize. 

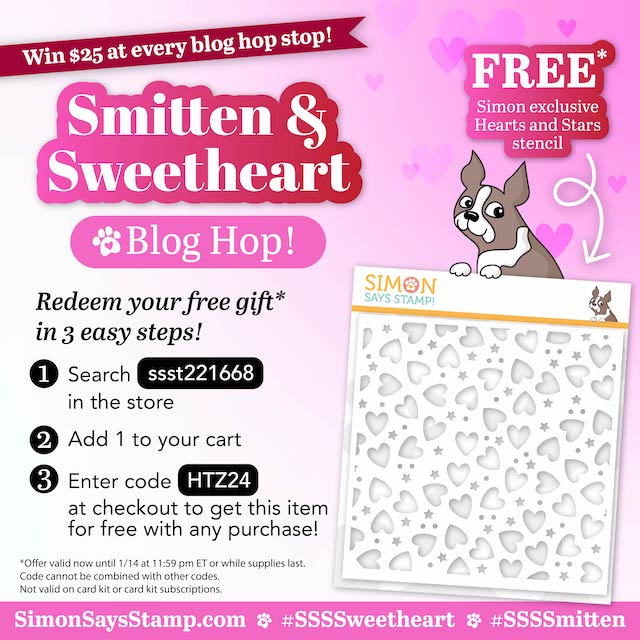
Also, don't forget that you have until the 14th January at 11:59 EDT to claim a free gift with every purchase! The Hearts and Stars Stencil is available whilst stocks last and all you need to do is enter the code HTZ24 at checkout.

Thank you so much for stopping by today and don't forget to go and check out Day 1 of the hop!!!
See you soon, Emma x


Monday, 11 September 2023

Sleigh Bells Ring....

Hello everyone...

Hope you are all well and had a fabulous weekend. As always, a brand new week means the new Simon Says Stamp Monday Challenge has begun and this week our theme is called TAKE FLIGHT!

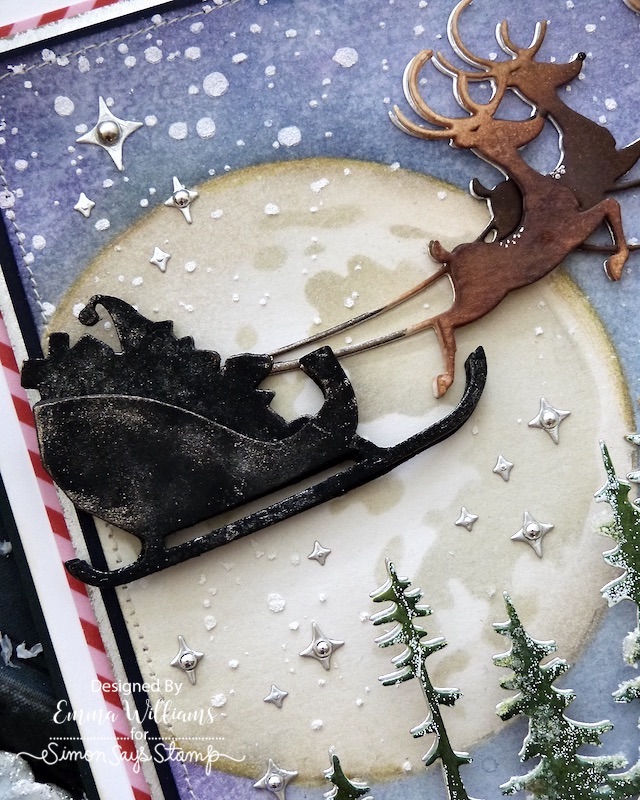
Now there are many interpretations for this theme, birds, insects, planes ~ you name it, they will all work so well but when it came to my make, I had one thing in mind ~ Santa Claus! How could I resist the brand new Reindeer Sleigh die set from Tim Holtz and Sizzix, it was just sitting on my desk and perfect for this challenge. So, with this in mind, it was time to bring the wintery scene to life and if you listen, you might just hear those sleigh bells ringing as Santa and his reindeers, including Rudolph start their journey....

So let's get started and here's how I created my card...

To begin with I cut a card blank from black card, 15.5 x 21cm, this is what Tim refer’s to as an ‘Emma sized’ card, and I matted a layer of white heavystock card onto the front, leaving a narrow border of the black showing. I then cut a second panel of white heavystock card, 14 x 19.5cm and added a border of Candy Cane Christmas Design Tape. If you don't have this, then patterned paper or any design of tape you have to hand will work equally as well. I adhered the tape around all four of the edges to create the patterned border for my finished card.

BACKGROUND

I then started creating the background for the scene and placed the medium size of the set of 3 Stampers Anonymous Moon Masks on the left hand side of a panel of White Distress Watercolor card, 13 x 18.5cm, which is flipped over to reveal the smooth side.

With the moon mask in place, I used Stormy Sky and Chipped Sapphire Distress Inks and a blending tool, to ink the top section of my card panel, leaving the lower section white.

I then applied Villainous Potion Distress Ink over the top, gradually working from the outside towards the moon, so that it would be a slightly darker shade around the edge.

Now that the colour of my sky is complete, I removed the moon mask, replaced it with the second mask and used Hickory Smoke to ink the second layer onto the inside of the moon to form the craters. I also added shading around the edge of the moon with the same ink. Over the top of this, I lightly blended Antique Linen to create the solid colour of the moon.

After flicking water over the top and dabbing away the drips with a paper towel, I heat dried the inked surface to set the inks and then applied Grit Paste through the Speckles Layering Stencil to add the snowy effect.

On the white section I added some shading to give the look of snow drifts using Speckled Egg Distress Ink and then completed the panel with some machine stitching around the outside.

To complete the panel, I stamped the sentiment, "a wonderful Christmas" onto the bottom section of the panel in Black Soot Archival Ink. This sentiment comes from the Christmas Time 3 stamp set and is one of my favourite stamps from Tim ~ I just love that font so much, it's perfect for capturing some vintage magic.

I matted the finished panel onto a piece of navy blue card, followed by silver metallic kraft card and then, using foam pads I mounted it onto the card blank.

With the panel complete, it's time to start die cutting....

FOREST SHADOWS

To begin with I coloured a piece of mixed media heavystock card using the following combination:

DISTRESS SPRAY STAINS: RUSTIC WILDERNESS, BUNDLED SAGE

MICA STAINS: TREE LOT

Once the card was dry and the blend was just right, I used the trees from the Forest Shadows Die Set to cut my two separate images to create the background layer and the foreground. I also cut a second layer of silver metallic card, which I used as a drop shadow behind each of the green layers.

To create the snowy effect on the edges of the trees, I brushed the Embossing Dabber very lightly over the tips and then sprinkled White embossing Powder over the top. Tap away the excess and heat emboss the powder.

Because I wanted to add some glitter and snow, I applied a light coverage of Micro Glaze over the top of each die cut. This will stop any ink turning your snow green and bleeding into the Grit Paste, which I added along the bottom of the die cut.

I allowed for the paste to dry, before drizzling some Glossy Accents over the Grit Paste. Working quickly, I sprinkled Mica Flakes and Rock Candy Glitter over the top, tapped away the excess and set this aside to dry.

...and once the pieces are dry enough to handle, I attached them to my card front, placing them across the background, slightly overlapping the edges and creating different heights to each piece by adding foam pads to the larger die that sits in the foreground.

At this stage, I also added some Snowfall Paste to the trees, just using my finger to apply it on the tips of each one.

The trees are now in place and we're ready to welcome Santa....

REINDEER SLEIGH

To build santa's sleigh, I cut 4 separate images from black card. Layer the die cuts over one another to make two separate pieces and then I placed them in my splatter box and spritzed each one with Frozen Fog Mica Stain, dabbing away any excess with a paper towel. Once dry, I cut one of the pieces into the shape of santa's sleigh and then layered this over the top of the second one, attaching it with foam pads to add some dimension. 

I finished the die cut by adding a touch of gilding wax around the edge, this will help to create a shimmer from the moon.

Moving onto the reindeers and for this, I cut all my reindeers from Distress Watercolour Card. I then inked the images with a combination of Gathered Twigs, Walnut Stain, and Vintage Photo, making sure that I didn't ink the antlers.

Once I was happy, I spritzed a light mist of water over the top and then heat dried each piece before assembling them to create the complete die cut. 

I just love how Tim has given us the option to layer the deers to create more dimension, they look amazing.

Taking the larger reindeer die, cut a panel of silver metallic kraft card, sand around the edges before adhering the reindeers over the top of the metallic die cut to create a shimmery shadow.

After adding some white pen detail work, I attached santa and his friends to my card, placing santa against the moon.

DETAILS, DETAILS, DETAILS

For the finishing details to this card, I added some of the tiny sparkly stars from the Forest Shadows Die Set. I cut these from silver metallic kraft stash card and then adhered them onto my background. In the centres of some of the stars, I added silver metallic droplets.

So that's my card finished and I hope you love what I've made and LOVE the new dies from Tim, as much as I do ~ they are gorgeous and I can see many Christmas projects being made with all the dies from this amazing release, which you can check out HERE and if you did miss the LIVE launch party on Saturday, just pop on over to Tim's blog to check out the replay.

As always, I hope you love the card I've made and the techniques I've used and if you make anything, or if you've been inspired by anything that you've seen here on my blog ~ then please, let me know by tagging me on social media or leaving a comment here and I will be right over to take a look!

Don't forget that every week, one lucky random participant has the chance to win a $25 gift voucher from Simon Says Stamp and you can join in up to 5 times, which means you could have 5 chances to win. You have until next Monday at 8am Ohio time. 1pm UK time, 2 pm CET to join in and good luck....


Thank you so much for taking the time to stop by today ~ stay safe and keep well.
Love Emma xxx

Recipe for project:

Distress Ink: Speckled Egg, Gathered Twigs, Vintage Photo, Walnut Stain, Antique Linen, Stormy Sky, Villainous Potion, Hickory Smoke, Villainous Potion
Distress Spray Stain: Rustic Wilderness, Bundled Sage

Monday, 28 August 2023

Halloween Town...

Hey everyone...

Hope you all had a wonderful weekend but how, how...is it the end of August already?!?! This year has gone so quickly and here in the UK, I'm not even sure if we've had Summer ~ after a brief heatwave in June, it's not been the greatest but saying that, it suits me as I'm not someone who enjoys intense heat and I'm always ready for Autumn!

So, back to today and this week's Simon Says Stamp Monday Challenge which is called Sparkle and Shine! There's so many products out there that you can use to play along with our fun challenge and I hope you'll join us and can't wait to see what you create.

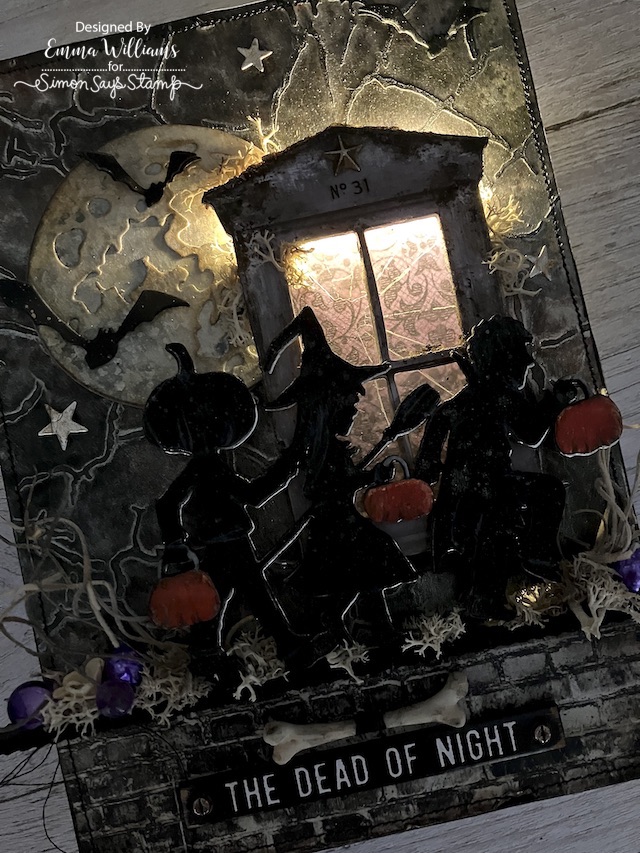
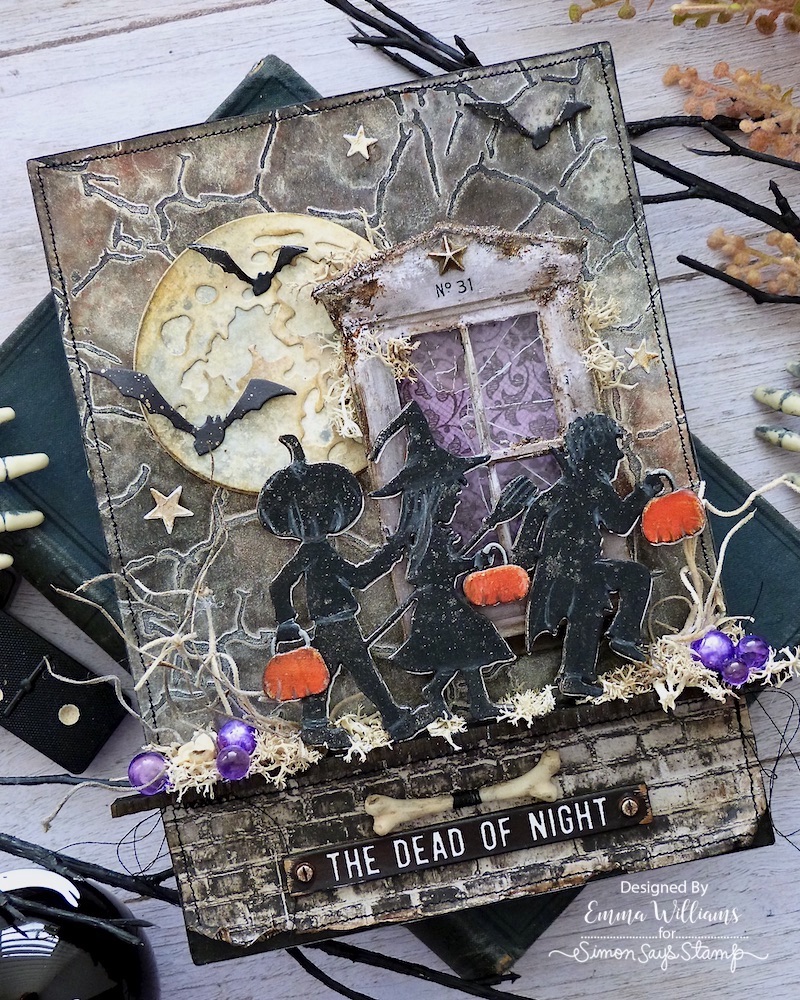
For my make, I chose to create a project using Mica Stains and Tiny Lights to create plenty of shine, and quite a bit of sparkle ~ I just hope the photos can do it all justice. I combined all this with some of the new Halloween products from Tim Holtz, including the Halloween Night Thinlits Dies, the Moonlit Die and the window and shattered glass from the idea-ology release and if you dare to enter, then welcome to the dead of night....


For this make, I used a small Stampers Anonymous/Tim Holtz Etcetera Panel.

BACKGROUND

To begin with I'll start with the shimmery sparkly background for my panel and I cut a piece of Heavystock Mixed Media Card the same size as the panel itself and apppied Black Texture Paste through the brand new Fractured Layering Stencil, which was my favourite from the new Halloween release that Tim showcased on his YouTube Live on Saturday.

Once the paste is dry, I then spritzed over the top using the Mica Stains, and chose a combination of Unravelled, Fallen Acorn, Specimen, Phantom Mist and Mulled Cider, spraying each colour individually and misting a small amount of water over the top to blend them. Once happy, I dried the panel, cut a small portion away from the bottom and machine stitched a border around the outside before I adhered this onto the top half of the Etcetera Panel.

I then cut a piece of the brick wall paper from the Halloween Backdrops pack and after adding a few rips and tears around the edge, I machine stitched a border around the edge and placed this onto the panel, beneath the inked card.

To create a nice, finished edge around the panel, I added some design tape, which is the perfect width for these panels.

Across the panel, I added a ledge which will be where I place my trick or treaters. The ledge is created from a Pinked Etcetera Trim, painted with Black Soot Distress Paint and when attached with Matte Collage Medium, it slightly overhangs each side of the panel.

We're now ready to move onto the next step, the die cuts that will create the scene...

DIE CUTS

I used a selection of dies for this make, the Trick or Treaters from the Halloween Nights set, combined with bats and moon from the Moonlight set.

I began with the moon, which is cut from Mixed Media Heavystock card. This is in two separate sections and I used the smaller size moon in the pack. Once I had my pieces cut, I then spritzed the moon with Unravelled and Phantom Mist Mica Stains, allowed them to dry and then inked the edges of each piece, before layering them together to form the moon. I adhered this die cut with foam pads, placing it in the top left hand corner of the panel.

Die cut a selection of bats from black card, using the same die set and shape the wings to make them appear as if they're in flight.

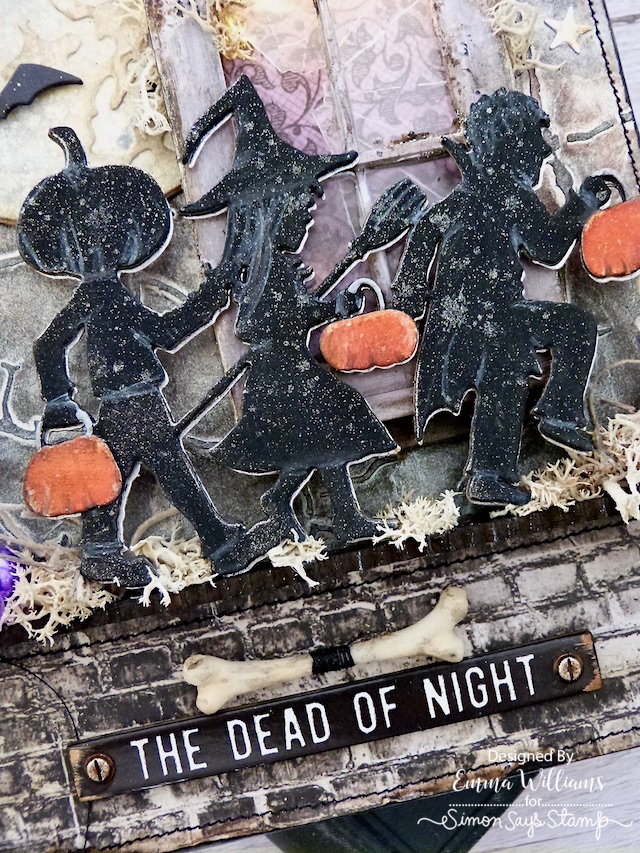
Now for the trick or treaters and these are cut from black card. I cut three layers of this image and then layered them together to form one substantial die cut. You can see the depth this creates in the photo below.

I lightly spritzed Phantom Mist Mica Stain over the top of the die cut and then set it to one side to dry. After cutting another image of the trick or treaters, this time from silver metallic kraft card, I then attached the silver card to the back of the die cut, slightly offsetting it to from a shadow cast by the moonlight. 

To add more detail to the black silhoutte, I used a white pencil and just drew in highlights on each figure.

For the final detail to these little people, I cut the pumpkins from cardstock inked with Carved Pumpkin Distress Ink. I then placed each pumpkin over the top of the die cut, and outlined the handle with a silver pen.

We're now ready to bring the scene to life...

WINDOW FRAME AND LIGHTS

Starting with the tiny lights, which create the perfect glow (or shine) behind the window and highlight the silhouettes so well...

To begin with, I drilled a small hole through the panel, placing it where the lights will be attached behind the window. I did this at the top of my frame and just wound the wired backwards and forwards before attaching them to the panel with hot glue. You can wait to do this when you have the frame ready to fit onto the panel, and then this will ensure you hide the lights behind the frame and get the right position.

The frame itself is from the Halloween Layers pack, which also contains the shattered window. (If you need more of the acetate/shattered windows then you can buy these separately)! I cut a panel of the shattered window to fit behind my frame. This can be attached with either matte collage medium or red line tape.

With the frame good to go, I then applied some Translucent Grit Paste around the frame, and around the windows, which I allowed to dry before altering it with a little Distress Paint ~ Black Soot, Crackling Campfire, Vintage Photo and Ground Espresso.

I cut a piece of the purple floral design Halloween Backdrops paper and attached this to the back of the frame with foam pads, and this helps to create the look of wallpaper behind the window.

On the top facade of the frame, I added a small Remnant Rub, No.31 from an older set that Tim made for Halloween a few years ago and I also attached an Adornment Star, which I altered with Statue and Sterling Foundry Wax. Remember to heat set the wax to create a permanent finish.

CREATING THE SCENE

Attach your frame to the panel with more foam pads, placing it to slightly overlap the corner of the moon.

Next, I attached the Trick or Treaters, placing them along the ledge and applying foam pads to the back for more dimension.

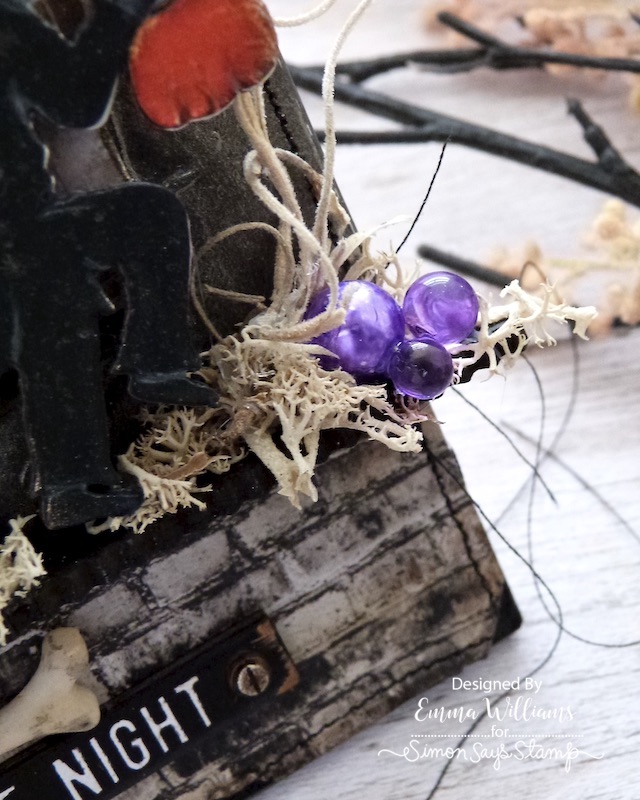
Add clumps of moss around the base of their feet, along the ledge and then I tucked some Spanish Moss into the arrangement.

I also added some moss around the window frame.

Adhere the bats into position, I placed two on the moon and third in the top right hand corner and then I added some small silver stars. These are always on my desk, leftover from previous projects and I cut them using the Tim Holtz/Sizzix Falling Stars Die.

Finally, I added some Bubbles and Baubles along the ledge. I chose a selection of sizes from each set and then popped them into a clip bag, together with a few drops of Amethyst Alcohol Ink. Clip and seal the bag before shaking them and coating them in the ink.

Tip them out onto a paper towel and once dry, I attached them with Glossy Accents, placing them on each side of the ledge.

Finally, I added the quote chip, "The Dead of Night", which is from the Halloween Baseboards and Transparencies set, and I placed this on the lower section of the panel, adding Hardware Heads on either side and above the quote, I attached a Boneyard Finding. I wrapped some black cotton thread around the bone and then attached it with Matte Collage Medium.

So that's my project for this week complete and as always, I hope you love the piece I've made and will be inspired to try out some of the 'tricks and treats' fo this make.

As always, if you make anything, or if you've been inspired by anything that you've seen here on my blog ~ then please, let me know by tagging me on social media or leaving a comment here and I will be right over to take a look!

Don't forget that every week, one lucky random participant has the chance to win a $25 gift voucher from Simon Says Stamp and you can join in up to 5 times, which means you could have 5 chances to win. You have until next Monday at 8am Ohio time. 1pm UK time, 2 pm CET to join in and good luck....


Thank you so much for taking the time to stop by today ~ stay safe and keep well.
Love Emma xxx

Recipe for project:

Tim Holtz for Sizzix: Moonlight, Halloween Nights
Distress Paint: Black Soot, Vintage Photo, Crackling Campfire, Ground Espresso
Alcohol Ink: Amethyst
Distress Ink: Walnut Stain
Hot Glue Gun
White pencil and silver gel pen
Moss from my own stash

****These are not affiliate links****
Powered By Blogger

Total Pageviews