
Hey everyone...
Hope you all had a wonderful weekend but how, how...is it the end of August already?!?! This year has gone so quickly and here in the UK, I'm not even sure if we've had Summer ~ after a brief heatwave in June, it's not been the greatest but saying that, it suits me as I'm not someone who enjoys intense heat and I'm always ready for Autumn!
So, back to today and this week's Simon Says Stamp Monday Challenge which is called Sparkle and Shine! There's so many products out there that you can use to play along with our fun challenge and I hope you'll join us and can't wait to see what you create.
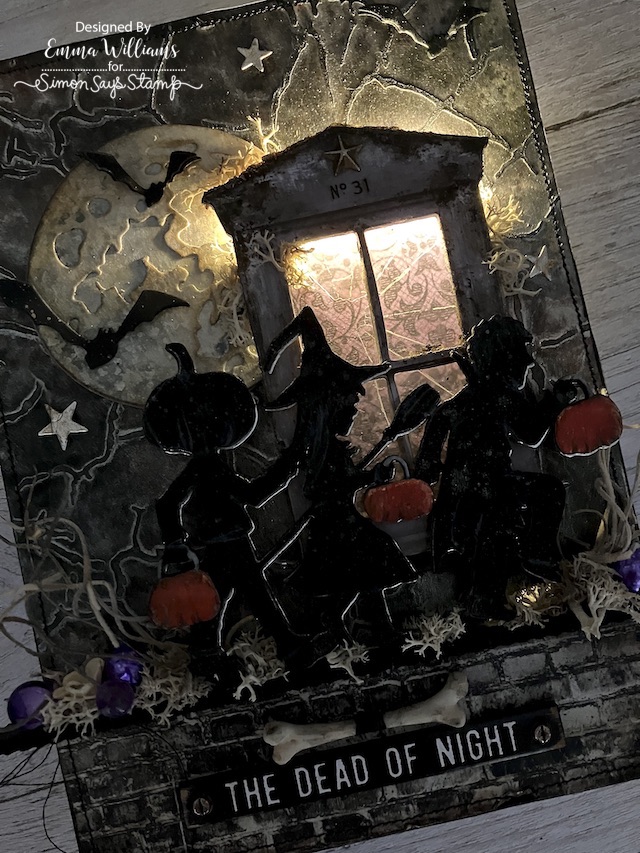
For my make, I chose to create a project using Mica Stains and Tiny Lights to create plenty of shine, and quite a bit of sparkle ~ I just hope the photos can do it all justice. I combined all this with some of the new Halloween products from Tim Holtz, including the Halloween Night Thinlits Dies, the Moonlit Die and the window and shattered glass from the idea-ology release and if you dare to enter, then welcome to the dead of night....


For this make, I used a small Stampers Anonymous/Tim Holtz Etcetera Panel.

BACKGROUND
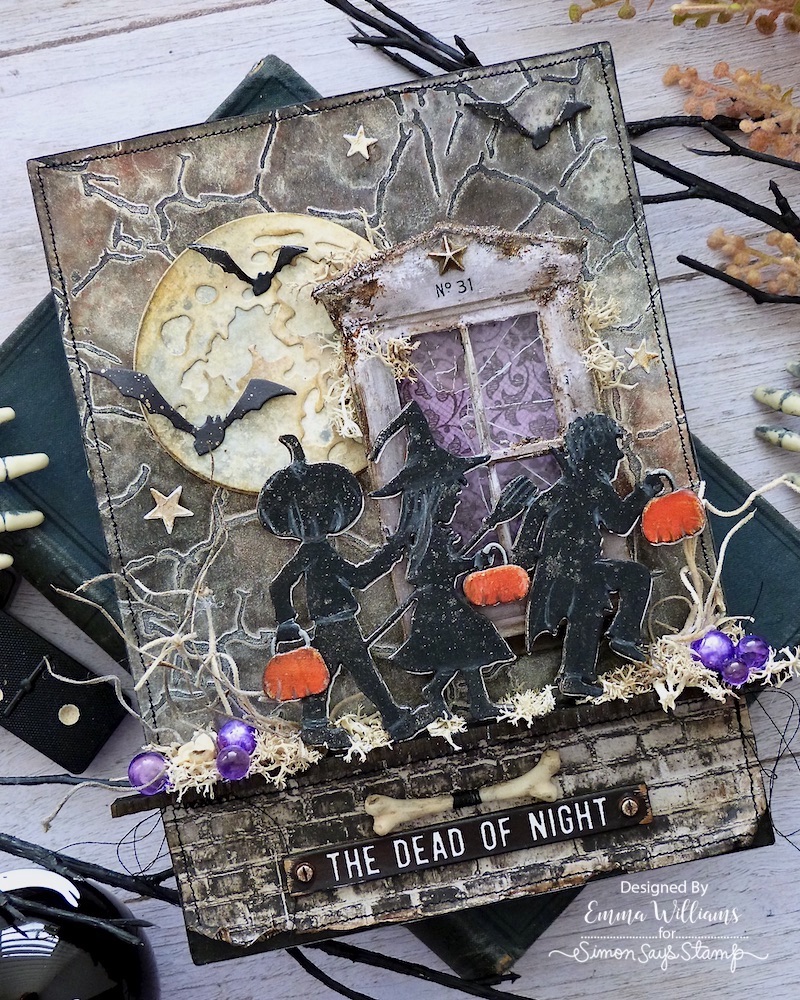
To begin with I'll start with the shimmery sparkly background for my panel and I cut a piece of Heavystock Mixed Media Card the same size as the panel itself and apppied Black Texture Paste through the brand new Fractured Layering Stencil, which was my favourite from the new Halloween release that Tim showcased on his YouTube Live on Saturday.
Once the paste is dry, I then spritzed over the top using the Mica Stains, and chose a combination of Unravelled, Fallen Acorn, Specimen, Phantom Mist and Mulled Cider, spraying each colour individually and misting a small amount of water over the top to blend them. Once happy, I dried the panel, cut a small portion away from the bottom and machine stitched a border around the outside before I adhered this onto the top half of the Etcetera Panel.

I then cut a piece of the brick wall paper from the Halloween Backdrops pack and after adding a few rips and tears around the edge, I machine stitched a border around the edge and placed this onto the panel, beneath the inked card.
To create a nice, finished edge around the panel, I added some design tape, which is the perfect width for these panels.

Across the panel, I added a ledge which will be where I place my trick or treaters. The ledge is created from a Pinked Etcetera Trim, painted with Black Soot Distress Paint and when attached with Matte Collage Medium, it slightly overhangs each side of the panel.

We're now ready to move onto the next step, the die cuts that will create the scene...
DIE CUTS
I used a selection of dies for this make, the Trick or Treaters from the Halloween Nights set, combined with bats and moon from the Moonlight set.
I began with the moon, which is cut from Mixed Media Heavystock card. This is in two separate sections and I used the smaller size moon in the pack. Once I had my pieces cut, I then spritzed the moon with Unravelled and Phantom Mist Mica Stains, allowed them to dry and then inked the edges of each piece, before layering them together to form the moon. I adhered this die cut with foam pads, placing it in the top left hand corner of the panel.

Die cut a selection of bats from black card, using the same die set and shape the wings to make them appear as if they're in flight.

Now for the trick or treaters and these are cut from black card. I cut three layers of this image and then layered them together to form one substantial die cut. You can see the depth this creates in the photo below.

I lightly spritzed Phantom Mist Mica Stain over the top of the die cut and then set it to one side to dry. After cutting another image of the trick or treaters, this time from silver metallic kraft card, I then attached the silver card to the back of the die cut, slightly offsetting it to from a shadow cast by the moonlight.

To add more detail to the black silhoutte, I used a white pencil and just drew in highlights on each figure.
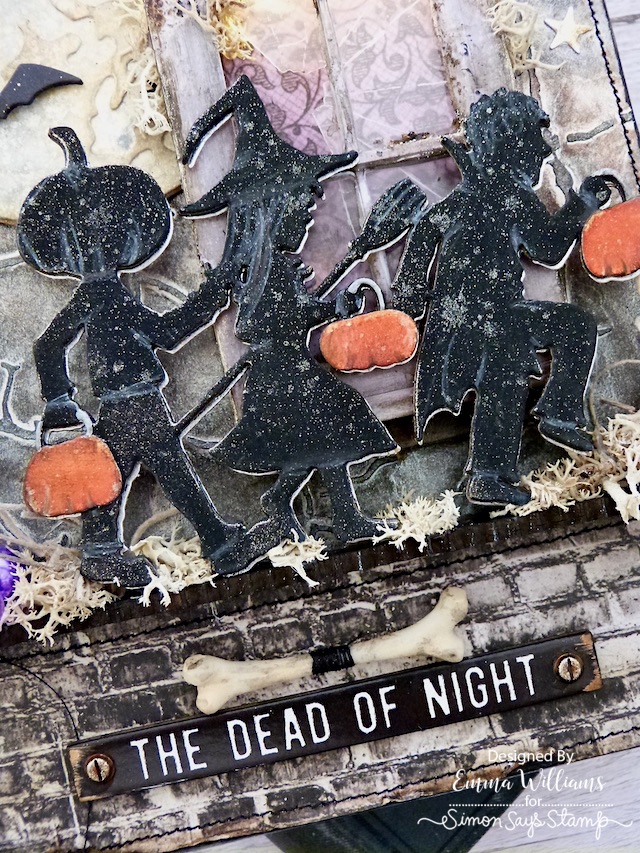
For the final detail to these little people, I cut the pumpkins from cardstock inked with Carved Pumpkin Distress Ink. I then placed each pumpkin over the top of the die cut, and outlined the handle with a silver pen.
We're now ready to bring the scene to life...
WINDOW FRAME AND LIGHTS
Starting with the tiny lights, which create the perfect glow (or shine) behind the window and highlight the silhouettes so well...

To begin with, I drilled a small hole through the panel, placing it where the lights will be attached behind the window. I did this at the top of my frame and just wound the wired backwards and forwards before attaching them to the panel with hot glue. You can wait to do this when you have the frame ready to fit onto the panel, and then this will ensure you hide the lights behind the frame and get the right position.

The frame itself is from the Halloween Layers pack, which also contains the shattered window. (If you need more of the acetate/shattered windows then you can buy these separately)! I cut a panel of the shattered window to fit behind my frame. This can be attached with either matte collage medium or red line tape.
With the frame good to go, I then applied some Translucent Grit Paste around the frame, and around the windows, which I allowed to dry before altering it with a little Distress Paint ~ Black Soot, Crackling Campfire, Vintage Photo and Ground Espresso.

I cut a piece of the purple floral design Halloween Backdrops paper and attached this to the back of the frame with foam pads, and this helps to create the look of wallpaper behind the window.

On the top facade of the frame, I added a small Remnant Rub, No.31 from an older set that Tim made for Halloween a few years ago and I also attached an Adornment Star, which I altered with Statue and Sterling Foundry Wax. Remember to heat set the wax to create a permanent finish.
CREATING THE SCENE
Attach your frame to the panel with more foam pads, placing it to slightly overlap the corner of the moon.

Next, I attached the Trick or Treaters, placing them along the ledge and applying foam pads to the back for more dimension.

Add clumps of moss around the base of their feet, along the ledge and then I tucked some Spanish Moss into the arrangement.

I also added some moss around the window frame.
Adhere the bats into position, I placed two on the moon and third in the top right hand corner and then I added some small silver stars. These are always on my desk, leftover from previous projects and I cut them using the Tim Holtz/Sizzix Falling Stars Die.
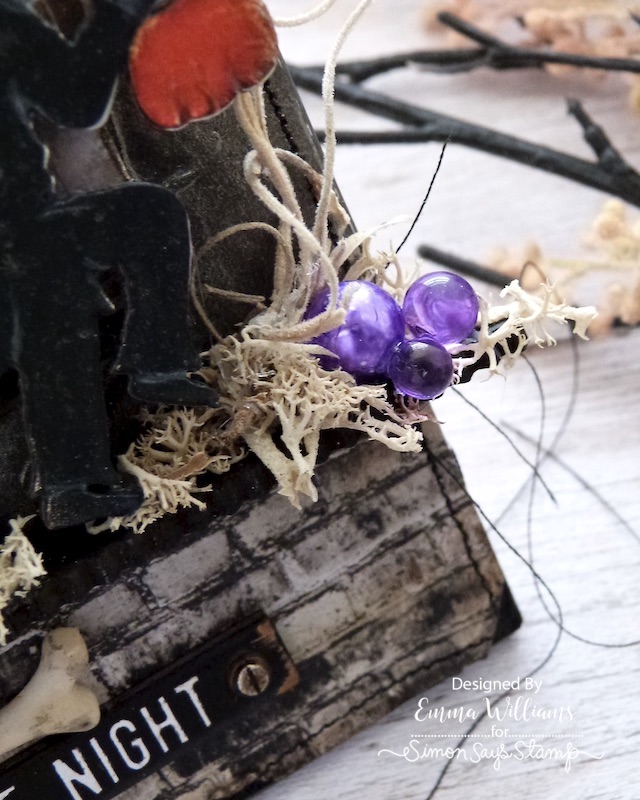
Finally, I added some Bubbles and Baubles along the ledge. I chose a selection of sizes from each set and then popped them into a clip bag, together with a few drops of Amethyst Alcohol Ink. Clip and seal the bag before shaking them and coating them in the ink.
Tip them out onto a paper towel and once dry, I attached them with Glossy Accents, placing them on each side of the ledge.

Finally, I added the quote chip, "The Dead of Night", which is from the Halloween Baseboards and Transparencies set, and I placed this on the lower section of the panel, adding Hardware Heads on either side and above the quote, I attached a Boneyard Finding. I wrapped some black cotton thread around the bone and then attached it with Matte Collage Medium.

So that's my project for this week complete and as always, I hope you love the piece I've made and will be inspired to try out some of the 'tricks and treats' fo this make.

Don't forget that every week, one lucky random participant has the chance to win a $25 gift voucher from Simon Says Stamp and you can join in up to 5 times, which means you could have 5 chances to win. You have until next Monday at 8am Ohio time. 1pm UK time, 2 pm CET to join in and good luck....


Recipe for project:


This is STUNNING!!!!!
ReplyDeleteLove the lighting; makes it super spooky!!!