Showing posts with label etcetera facades. Show all posts

Monday, 24 February 2025

A Spoonful Of Sugar...

Hello everyone...

It's time for a brand new Simon Says Stamp Monday Challenge and this week's theme is called LOOK TO THE NIGHT SKY! ✨ The DT have created lots of inspiration using this fun theme and we can't wait to see what you will create, whether it's all things celestial, or a make inspired by the a creature of the night ~ it will be fun to see your interpretations.

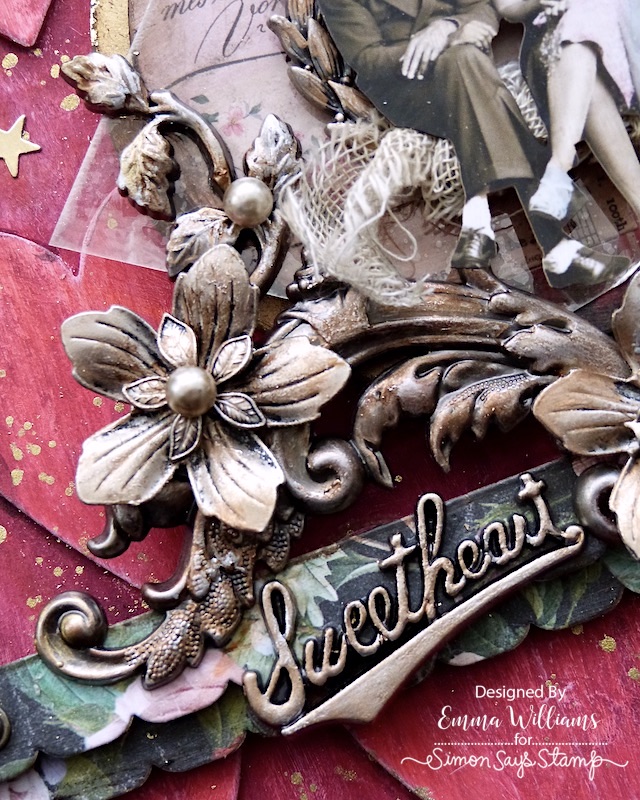
For my make, I created a piece inspired by Mary Poppins and the adventures that await her as she drifts off into a moonlit sky and I used many Tim Holtz products within this make, including Etcetera pieces from Stampers Anonymous and die cuts from Sizzix.

So let's begin...it's time for some 'supercalifragilisticexpialidocious’ fun....


To begin with I used a Size 8 Stampers Anonymous Etcetera tag and a Facade which I twisted around to have the point at the bottom.

FACADE

The facade is covered with some of the smaller sized Collage Tiles from Tim's idea-ology range. I cut the strips down into smaller sections, so that they fit the facade perfectly and then attached them using Matte Collage Medium.

I applied a coat of the medium over the top, and once this was dry I used the Walnut Stain Distress Crayon to add a vintage touch, applying it around the edges of the facade and in between each of the joins of the collage strips.

After using the splatter brush to splatter some Picket Fence Distress Paint across the surface, I set this to one side to dry and moved onto the tag.

TAG BACKGROUND

I used a Mixed Media Heavystock Tag and the moon mask, and started by applying Distress Inks to the background to create the night sky.

I laid the smallest moon mask in the top right hand corner and then inked the tag with a combination of the following Distress Inks:

Uncharted Mariner, Stormy Sky, Villainous Potion, Walnut Stain, Vintage Photo, and Black Soot

I applied each of the first three colours separately to build up the background, taking the ink to approx 2/3rds of the way down the tag, before using Black Soot around the edges. Along the base of the tag, I used the brown tones.

Once I was happy with the night sky, I removed the mask and spritzed the tag with a light misting of water before heat drying the tag.

Taking the co-ordinating inner section of the moon mask, I inked through this with Hickory Smoke Distress Ink. I then removed this and applied Antique Linen over the top to create the blend and soften the Hickory Smoke. I also added some shading around the outside of the moon. 

After another light mist of water and inking the edges with Walnut Stain Distress Ink, my background is complete and all I needed to do was machine stitch a border around the outside edge, add a few splatters of Unravelled Mica Stain and then attach the tag to a Size 8 Etcetera Tag using Collage Medium.

I then attached my tag to the Etcetera Facade using foam pads for added dimension and placing it so it overlaps the top edge of the facade.

ETCETERA TRIM

Across the bottom of the tag, I placed an Scalloped Etcetera Trim, which I covered with Backdrops paper from my scrap box, cut using the Decorative Trims Die Set. I attached the paper to the trim, placed this directly onto my tag, and then added the Theories Quote Chip, "Adventure Awaits", over the top.

On either side of the chip, I adhered a Screw Head, altered with a little Black Soot, Crackling Campfire and Antique Bronze Distress Paint, to create a rusty effect to the metal.

At this stage, I also placed an altered Screw Head on the point at the bottom of the Etcetera Facade.

DIE CUTTING THE SCENE

We can now bring the scene together and we'll start with the character herself using the dies from Sizzix/Tim Holtz The Park Thinlits Die Set.

I cut 4 layers of the silhouette and the umbrella from black kraft card, and a 5th layer from silver kraft card.

Once I had layered all my pieces to form one silhouette figure and the umbrella, I placed these over the top of the silver pieces to form a shadow behind her.

The figure and umbrella were attached to the tag using foam pads.

You might notice that I added some silver highlights to the umbrella which I did using a silver Sharpie Pen, running it down the handle and just over the top point.

Around her feet I used dried moss and flowers.

Now Mary wouldn't be complete without her scarf and for this I used an older die set that I had in my stash ~ Christmas Papercuts 2 Colorize. In this set is a snowman and he has a little scarf, which fits this figure perfectly. So I cut the pieces from inked card in my stash and placed the finished scarf around her neck.

With the silhouette in place, I needed to complete the night sky.

I used a couple of Sizzix/Tim Holtz die sets to create the stars and the clouds ~ Vault World Travel and Falling Stars.

The clouds are cut from watercolour card, then inked around the edges with Hickory Smoke and Speckled Egg. The stars are cut from silver metallic kraft stash card. I then attached all the pieces onto the background, adding small gems in the centre of the stars for some added sparkle.

We're nearly there and all that's left is the finishing touches....

DETAILS

In the top left hand corner, I adhered a number 28, which I had on my desk from a previous project but sorry, I can't remember which pack of Tim's ephemera this comes from ~ it's in one of them somewhere!!!!

I completed the piece by hanging a Swivel Clasp from the hole in the top of the tag, and then attaching a "Choose Happy" Thought Token from the end.

I altered the metal of the token using the same paints as I used on the Screw Heads and once dry, I used the Picket Fence Distress Crayon, rubbed over the wording before using a soft cloth to wipe away the excess ~ this technique will accentuate the wording on the token.

So that's my project complete and I hope you love what I've made and feel inspired by the techniques I've used.

As always, if you make anything, or if you've been inspired by anything that you've seen here on my blog ~ then please, let me know by tagging me on social media or leaving a comment here and I will be right over to take a look!

Don't forget that every week, one lucky random participant has the chance to win a $25 gift voucher from Simon Says Stamp and you can join in up to 5 times, which means you could have 5 chances to winYou have until next Monday at 8am Ohio time. 1pm UK time, 2 pm CET to join in and good luck....


Thank you so much for taking the time to stop by today...
Love Emma xxx

Recipe for project:

Distress InkUncharted Mariner, Stormy Sky, Vintage Photo, Villainous Potion, Walnut Stain and Black Soot
Distress Paint: Black Soot, Antique Bronze, Crackling Campfire

Gems, Dried flowers and moss from my own stash

Monday, 27 January 2025

One Love...

Hello friends...

As another week flies by, it's time for the brand new Simon Says Stamp Monday Challenge and as Valentine's Day approaches, the DT are feeling the love with this week's challenge theme, which is called ~ Have A Heart. If you would like to join us, all the details can be found in this post and we would love to see what you create and hope you'll play along.

For my make, I decided to embrace the theme and inspired by this loving couple from the Mini Paper Dolls set, I used the Tim Holtz Stacked Hearts die set by Sizzix to create a dimensional background on a Stampers Anonymous Etcetera Panel before adding layers of Tim's idea-ology to complete the make.

So, let's begin because it's time for me to share the love!


PANEL

I used the largest size of the Rectangular Etcetera Panel.

Using various sizes of hearts from the Stacked Hearts Die Set, I cut three layers from Mixed Media Heavystock card, to form each heart, layered them over one another and adhered them with Collage Medium before adhering the completed hearts to the panel.

Once all my hearts were in position, I applied a coat of Gesso over the surface and allowed this to dry before then adding the colour.

For this I used a combination of Lumberjack Plaid first, and then once this layer was dry, I dry brushed Black Soot Distress Paint over the surface. If you feel at any point you need to add more of either colour, just go for it, but always remember to dry the layers thoroughly between applications.

After allowing the panel to dry, I then dipped a clean paintbrush into gesso and very lightly dry brushed over the surface to accentuate the raised areas and the edges of the panel.

Once again allow to dry before adding splatters of gold paint and some hints of script, which I stamped using the script stamp from the Tiny Toadstools stamp set.

To complete the panel, I used gold metallic flakes to add accents to the hearts. To adhere the flakes, I used Cosmic Shimmer Flake and Glitter Glue. Once you apply the glue, allow it to become tacky before adding the flakes. I then brush away any excess with a stiff brush.

ETCETERA TRIM

My panel is now ready to decorate and I began by attaching an Etcetera Trim. I used the widest trims in two different depths and after covering them with paper from the Backdrops Vol 1 paper pack. I then attached the layered scalloped trims across the panel before attaching a screw head on either end of the trim, painted with gold acrylic paint.

MAIN FOCAL POINT

Moving onto the main focal point, I began with the circles. Both of these circles are the waste that pops out from the centres of the Etcetera Facades. I painted the larger circle with gold paint, before I covered the smaller circle using a selection of Collage Strips that I attached to the circular panel before trimming away the excess. To neaten the edges, I used the sanding tool and then applied a layer of Collage Medium over the top. Once dry, I scribbled Walnut Stain Distress Crayon on each of the paper joins and blended the crayon with my finger.

For an added touch of opulence, I added some more of the gold flakes to the edges of the circles before layering them together and attaching them to my panel using collage medium. As a finishing detail, I added strips of Cello Sticker Tape ~ a product that I absolutely LOVE and can't get enough of!

Over the top of the circles I attached a piece of Mica Tile from my stash and attached three Screw Heads that I painted with gold acrylic paint.

PAPER DOLLS, SWEETHEART ADORMENTS, FLOURISH ADORNMENTS & FLORALS

We're now ready to alter those beautiful Floral and Flourish Adornments, together with the wreath at the back of the couple.

To add colour to the metal, I used Statue and Sterling on each of these pieces, applying one layer of wax at a time and then adding the second layer over the top, but not giving the metal a complete coverage. This will allow the layer of wax underneath to show through and create the variation of colour to the metal.

After I'd heat set the wax on all the pieces I used, I applied some dribbles of Mushroom alcohol ink over the metal before arranging and attaching them onto my panel with Matte Collage Medium, placing the flourishes across the bottom of the circle.

I altered the wreath and sweetheart metal pieces from the Sweetheart Adornments pack, together with a selection and florals in exactly the same way as the flourishes and attached these directly onto the flourishes themselves. In the centre of each flower, I added the smallest bauble finding, altered with Mushroom Alcohol Ink.

After colour tinting the paper dolls using Distress Crayons, I placed them onto the wreath, and sat them onto a bed of Mummy Cloth, dyed with a little Frayed Burlap Distress Spray Stain.

Finally, I added the Sweetheart piece, nestling it between the metal work, and attaching it to the trim.

In the photo below, you can see how much I built up the layers and the dimension this creates.

XO TYPOGRAPHY

We're nearly there and all that's left is to alter the XO Typography letters. I used the same Distress Paint colours as I used on the background for these letters, X and O and then once dry, accentuated them with some gold paint before attaching them to my panel, placing them in the centre of the heart, in the top left hand corner.

...and finished the piece with some gold die cut stars, that I had on my desk!

So that's my make for this week's challenge complete and I hope the ideas and techniques have inspired you to create some texture on your projects. 

As always, if you make anything, or if you've been inspired by anything that you've seen here on my blog ~ then please, let me know by tagging me on social media or leaving a comment here and I will be right over to take a look!

Don't forget that every week, one lucky random participant has the chance to win a $25 gift voucher from Simon Says Stamp and you can join in up to 5 times, which means you could have 5 chances to winYou have until next Monday at 8am Ohio time. 1pm UK time, 2 pm CET to join in and good luck....


Thank you so much for taking the time to stop by today...
Love Emma xxx


Wednesday, 16 October 2024

Hello everyone, welcome to the Witch Market and an update...

Hello everyone...it's been a while since I was last here and many of you have very kindly been sending messages to ask if I was ok and I thought now was the time to take this opportunity to update you all. If you follow me on social media, you probably already know the reasons why I've been absent from my blog, and why I've taken a break over on the Simon Says Stamp Monday Challenge but for those who don’t follow me, I thought I'd drop by, say hello and just fill you in on what's been happening since my last post in May.

So, here we go, and this isn't the easiest post I've ever written, I don’t usually share personal things on here, but I wanted to share this and hope you don’t mind reading it…

In May, my Mum suffered a Haemorrhagic Stroke and from the very beginning, the medics told us that we should hope for the best, but prepare for the worst. My Mum was a fighter though, she always had been and she wasn't prepared to leave us without one last fight of her life. And that’s what she did, she fought so hard and so bravely, but after 9 days, my Dad and I had to say goodbye and that was the hardest thing to do, because this beautiful woman, who had a smile that would light up a room and a sense of humour that would brighten our day, was everything to us ~ she wasn't just my Mum, she was my best friend, a beloved wife and a very special lady to everyone who knew her.

For the next 9 weeks, Dad and I tried to get used to life without Mum...it was hard, and it was definitely the most difficult time we had ever faced but no matter what we were going through, we had each other, and that was how we coped with the heartbreak.

But at the end of July, after spending a lovely day together, my Dad started to feel unwell and he was rushed to hospital. After a very long 5 hours, hoping and praying that I’d be able to take him home, my wonderful Dad, my hero, passed away and once again, I had to say goodbye. In the space of 9 weeks, my world had fallen apart….

These last five months have been extremely painful and I can't tell you how much I miss both of them, it's more than words could ever describe but they are always in my heart, by my side and they will never be forgotten because every night, they are both shining bright in the sky!

So, as I begin to slowly ease myself back into a world of creativity, I wanted to say thank you to everyone who has sent messages, cards, flowers and just been there for me during these last months. I especially want to say thank you to Tim, Mario, Paula, ❤️❤️❤️ and everyone at Simon Says Stamp. ❤️ You have all been so caring, and so supportive and it really has meant so much to me as I've tried to move forward and cope with all the chaos that comes with this huge loss.

*******

…and now, to the second half of this post, and if you follow me on Instagram or Facebook, you will have seen a few of the makes I've created for Tim's recent Halloween Sizzix, Ranger Ink and Christmas Stampers Anonymous releases.

I also shared this piece that I was creating for the Halloween idea-ology Live Launch. I'd actually already made this project just before Dad passed away but unfortunately, it wasn't quite finished in time for Tim's YouTube Live. But for those who haven’t seen it on my socials, it’s now time to welcome you to the Witch Market....


This post is really to show you around the make, it’s not a tutorial but I wanted to share some of the close up details with you and the products I’ve used. If you do have any questions though, then please don't hesitate to message me.

Products used in this post are available at Simon Says Stamp

*************

To create this piece, I began by choosing the Square Vignette Panel as a base, using the inside to create the appearance of a box. I painted the entire box, inside and out with Black Soot Distress Paint and then adhered Design Tape Trim around the four edges of the panel.

To add texture to the sides, I used the spider's web die in the Sizzix Vaults Fright Night Thinlits set. The web is cut from black card and I just snipped into the die cut to create sections and pieces which I then attached directly onto the box using Matte Collage Medium. Once dry, I just gently rubbed some Sterling Foundry Wax over the raised areas to accentuate the detail before I heat set the wax, using a low setting on my heat tool.

To add even more texture, I used Black Opaque Distress Texture Paste to create a gnarly, vintage effect, and once that was dry, I again used the Foundry Wax to highlight the details. To complete the box, I added some Hitch Fasteners to the top of the panel, and a Machinery Head on either side.

As we begin to walk around the market, you'll notice that I covered the back of the panel with the brand new Halloween Large Collage Strips. These are a favourite of mine and I love that you can use the strips just as they come out of the pack or like I did on this piece, where I cut them into sections so that they all fit perfectly. It’s a bit like a jigsaw and you will need to place some horizontally, and some vertically.

Inside the box, you can see that I built up the main central focal point by layering an Etcetera Facade, (with the circular piece in the centre removed), over the top of the smaller rectangular Etcetera Panel. Both of these pieces are covered with gorgeous papers from the Halloween Backdrops pack and on the centre of the Etcetera Panel, I also attached the black and white circular layer, which is from the Halloween Layers and Paper Dolls pack. You can just see this through the aperture and creates the perfect backdrop for the witches.

Now to add those Halloween Tiny Lights to create that perfect purple glow behind the witches. I attached the lights by drilling a hole through the back of the vignette panel, and continued drilling through the Etcetera Panel which I had fixed into position using Matte Collage Medium.

I then used hot glue to attach the lights to the back of the Facade, placing them around the edge of the circle. With these firmly attached, I used the risers that come in the facade pack, placed these on the back of this piece, and adhered this into position.

On either side of the facade, I used a Bat Web Etcetera Trim. Each trim is painted with Black Soot Distress Paint and then attached ~ one on the left, one on the right.. Once again, I added Black Opaque Distress Paste to each trim for added texture and accentuated this detail with Sterling Foundry Wax.

To complete this focal point, I used Spanish Moss and Mummy Cloth that I dyed with Frayed Burlap and Antique Linen Distress Sprays and tucked this in around the edge of the facade.
Now to move onto the witches...

To create support for the witches and to add some more depth to that central area, I attached "wooden planks". These realistic planks are from the Baseboards pack, and are perfect for adding to a window, or an opening to create a spooky effect.

I added two of these planks to form a cross, which as I mentioned, also doubles as the support needed for the witches heads to rest upon.
I actually used a combination of two Halloween Paper Dolls ~ one is the woman and child, and the other is the older lady, who sits on the right. I then added the eye mask and the witches hats, both of which are from the Halloween Sticker Book, before surrounding them with floral layers on either side.
At this stage, I also added the spider, painted with Distress Paint, and the Shake Well Before Using Label which I adhered directly onto the Facade. I also added the No.13 Remnant Rub, rubbed onto one of the Cello Sticker onto the left hand side, and finally some Screwheads.
Tucked into each side of the panel, and nestled amongst the floral display are some Drippy Candles and all that I did with these to add that orange glow is dab some Stickles Glitter Glue to each of the wicks.
To ensure that the figures look as if they are grounded and their feet aren't floating in mid air, I added an Etcetera Trim across the bottom section of the facade. I painted the trim with Black Soot Distress Paint, and attached it with Matte Collage Medium before adding moss, some Boneyard Findings and Mummy Cloth around their feet.
You'll also notice that I added a key from the Gothic Gates set. This key, which I altered with Distress Paints to create a rusty effect, hangs down on a chain which is attached to a Nail Tack, hammered into the facade.
Now to add some details and on either side of this panel, I attached the gothic gates which I made to look rusty using Transluscent Grit Paste and Distress Paints. I then added a spider along the very bottom, just crawling out of the gate....
...and on the opposite side, I attached a lock, which hangs from this open gate. Once again, Distress paints did their job of creating the look of a patina on the metal.
Now, no Witch Market is complete without bottles full of potions, poison and other elixirs, and this market is no exception because these three witches have been busy and as the 31st October draws near, they are obviously working their magic ~ ready and waiting to cast a spell or two....
I used a combination of Corked Vials and Tiny Corked Vials for this. You can read all about how I alter these clear glass vials on a previous post, and you can also see more of this technique HERE.

Once all my tiny vials were ready and all the little Curator labels were attached to the fronts, I just positioned them across the bottom of the panel, adding moss in and around each bottle.
Finally, I added the Witch Market sticker onto one of the "wooden planks" and used Nail Tacks to attach this to the bottom edge of the panel.
Thanks so much for stopping by today and I hope to be back full time with you very soon but before I go, this post is dedicated to my parents because without them, and without their encouragement to dip my toe into the craft world ~ I wouldn't be here! My Mum bought me my very first kit because she believed that I'd be quite good at making something!

So, with this in mind ~ I hope I made you both so proud of me and I hope you'll always be looking down to see the next part of my journey!
Love you both and shine bright!
xxx
Powered By Blogger

Total Pageviews