Hello friends...
Hope you are all having a great Monday and enjoyed Tim's Saturday Live, it sure was fun and if you're a Sizzix fan, then there was so much inspiration from all the makers!
So, as we start a brand new week, it's time for a new challenge over on the Simon Says Stamp Monday Challenge blog and this week our theme is all about using our FAVOURITE TECHNIQUES and with so many interpretations of this theme, I'm sure if you play along you will be spoilt for choice of what you will be making!
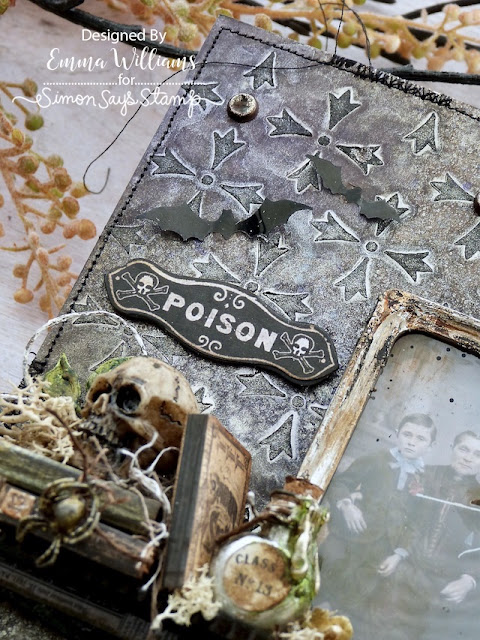
For my make, I chose to get my spook on and as my favourite time of year has started, I used my favourite technique which is all about stencils and spritzing to make a textured background for my Halloween Panel and used Tim's amazing new Black Texture Paste and the beautiful new Halloween Mica Stains to add some amazing sparkle and shine. I also thought this was a perfect backdrop to use with some of the new Halloween ideology pieces, because they are too good not to use.... 🖤
For this make, I used the smallest sized of the rectangular Etcetera Panels as my base and I covered the edges with Halloween Design Tape.
BACKGROUND
Now first of all, I am going to give a shout out to Tim and Ranger Ink for the brand new Black Texture Paste, because I don't know where this has been all my life ~ it is incredible but you have to get it whilst you can as it won't be around for long and I've already stockpiled it!
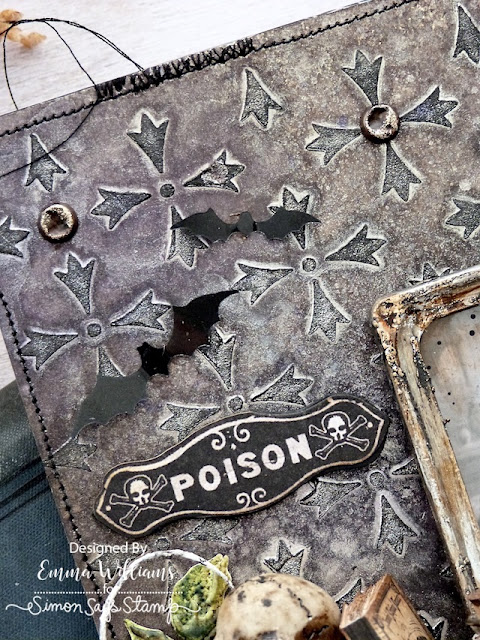
So to create this background, I cut a panel of Mixed Media Heavystock card the same size as the panel and then using my new favourite product, I applied the black paste through the Crossed Layering Stencil to cover the entire panel.
Let the paste dry thoroughly before applying the Mica Stains and I used a combination of Unravelled, Fallen Acorn and Ominous, spraying each colour individually and misting a small amount of water over the top to blend them. Once happy, I dried the panel and machine stitched a border around the outside before I adhered this onto the Etcetera Panel.
We're now ready to start work on the embellishments...
SHELF LEDGE
To begin with I made the ledge for all my embellishments to sit on and used a medium sized Pinked Etcetera Trims and a Bat Trim. I painted each trim with Black Soot Distress Paint and then once dry, I lightly spritzed them with Phantom Mist Mica Stain.
I then placed the pinked trim, attaching it at a 90° angle so that it formed the shelf and attached the bat web underneath. I then adhered a strip of Halloween Design Tape along the top of the web trim and placed a Curator Snippet Ephemera piece in the centre.
Beneath the ledge, I added the "From Regions Beyond" Quote Chip from the Baseboards pack. I sanded the edges and inked them with Walnut Stain before I attached it to my panel with Matte Collage Medium and added two Hardware Heads either side.
FRAME
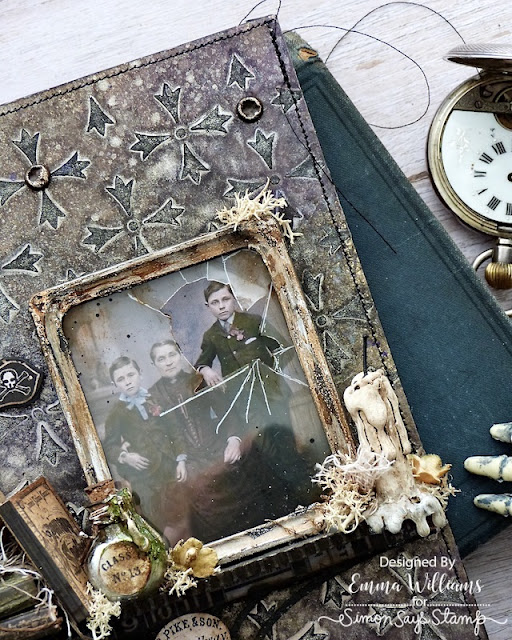
Now we're ready to move onto the frame and for this I used the larger sized idea-ology Photo Frame and altered it by first applying some foundry Wax over the metal surface. I used Statue, which I heat set and then applied a lighter layer of Sterling over the top, not applying a complete coverage and making sure the previous layer showed through in random areas. After I heat set the wax, I then applied some Black Texture Paste using my finger to spread the paste over the metal. Allow for this to dry and to create the look of rust, I smeared Burnt Sienna Acrylic Paint over the surface, again just applying it with my fingertip.
For the 'broken glass' effect that I used in the frame, I cut a piece of the shattered windows, (another new 'must have' idea-ology product from Tim), and I attached this to the metal frame with a strong adhesive tape. To add the 'oldy worldy' effect to the acetate, I flipped the frame over, so that I worked from the back and dribbled Mushroom Alcohol ink onto the acetate. I then added flicks of Black Soot Distress Paint and allowed this to dry.
Setting the frame to one side, I moved onto colour tinting the photo. I love this photo from the new idea-ology Halloween Layers pack which this year, contains a selection of paper dolls, photos, portraits and ephemera pieces ~ you have everything you need in one single pack.
I cut the photo so that it would fit inside the frame and then I coloured tinted it with Distress Crayons and a waterbrush and then using foam pads on the back of the metal frame, I placed the frame over the top of the photo and attached it to my ledge, leaning it against the panel.
EMBELLISHMENTS
CANDLE:
To make the drippy candle that sits to the right of the frame, I began by attaching the candle to the shelf using Matte Collage Medium and then taking my hot glue gun, I formed the drips around the base.
Once the glue was rock hard, I then painted it with a combination of Old Paper and Frayed Burlap Distress Paints before adding some moss around the base and a Bouquet Finding, that I tucked behind the candle.
BOOKS:
The books are so easy to make, and so addictive and I have already made an entire library ready for my Halloween makes. The covers are from the Halloween Ephemera Pack and to build these three books that I used on this make, you will need either old book pages, or you can use some of Tim's idea-ology papers ~ I do tend to use book pages, because they are easier to manipulate when building the pages, but the choice is yours and both work ok!
Taking the book covers from the Halloween Ephemera Pack, I scored the book to create the back and front and a spine and folded along the scorelines. I then cut my book pages to size ~ for this you will need to measure the front cover, width and height and then double the measurement to give you the pages that fit inside the book cover.
Once you've cut enough pages to fill the book and you do want to make sure it's really full, then fold each of them in half and then start adhering them inside the cover. I used Matte Collage Medium.
When the pages are all fixed into place and the secure, I scuffed the edges of the book pages, and then dipped my finger into some paint, and with the book closed, I rubbed the paint along the scuffed edges to add that gorgeous look of an old book.
I tied some twine around one of the books and added a Clippings Sticker to the spine to complete it.
I attached the books on the left hand side of the shelf, lying two of them on top of one another and then leaning the third against the other two.
Hanging down from the two books, I attached a spider from the Spiders and Branches Adornments set, and altered this with a little Mushroom Alcohol Ink and a touch of Gilded Foundry Wax.
SKULLS:
Now for the skulls and I used my finger to add a fine layer of Grit Paste over the skull's head to create more of a lumpy bumpy texture and then once it was dry, I rubbed the Black Soot Crayon over the surface, blending it out so it still shows the original colour in places. I placed the skull on top of the books, attaching him with Matte Collage Medium.
BOTTLE:
I have featured tutorials for these bottles many times on my blog but it always helps to recap and it's such an easy process. I used a Tiny Corked Vial for this make and applied a layer of Matte Collage Medium over the surface of the glass.
After allowing it to dry thoroughly, I then applied Sterling Foundry Wax over the top and gently heat set the wax until it was set.
The label that I used on the bottle is from Curator Snippets Ephemera pieces and I adhered it to the glass using Matte Collage Medium and then rubbing some Walnut Stain Crayon over the top to age it.
Cut a length of twine and after spritzing it with Walnut Stain Distress Spray Stain, I wrapped it around the necks of each bottle. For the corks, I actually burnt these by holding them over a naked flame ~ please be careful when you do this, as they do tend to catch fire quite quickly and I don't want to cause any accidents. You literally need to show them the flame and blow it out quickly.
Pop the corks into the bottles, and seal them with collage medium.
Finally, I used my hot glue gun and in exactly the same way as I did with the drips on the candle, I applied the glue to drip down the side of the bottle.
Once dry, I used some Envy Alcohol Pearls, applying this down the hot glue to colour it and then a smear of Sterling Foundry Wax over the top.
Don't forget that every week, one lucky random participant has the chance to win a $25 gift voucher from Simon Says Stamp and you can join in up to 5 times, which means you could have 5 chances to win. You have until next Monday at 8am Ohio time. 1pm UK time, 2 pm CET to join in and good luck....
Recipe for project:


So many small details that add so much to the project. I would have sworn that was an embossing folder, but could not remember which one, nope, stencil. Love the little book, design tape across the web trim, and that spider. I don't know why, but when I first saw it, in that color, it just seems to be creepier than normal. Maybe because it resembles a brown recluse spider. Give me the willies. Loving this one....
ReplyDeletei cannot get over how amazing this is! the attention to detail is incredible and that broken glass on the picture frame is the icing on the cake! i would love to make this....it is so perfect in every way! incredible job!
ReplyDeleteYour work is beautiful, and your attention to detail extraordinary! I really enjoy seeing your creations and am grateful you are willing to share your creative process and helpful hints for those of us newer to our art journey!
ReplyDelete