Hello everyone...
Hope you all had a good weekend and you're ready for a new week and a brand new Simon Says Stamp Monday Challenge! This week, WE'RE GOING AROUND IN CIRCLES with our fun challenge theme and we hope you'll join us and play along.
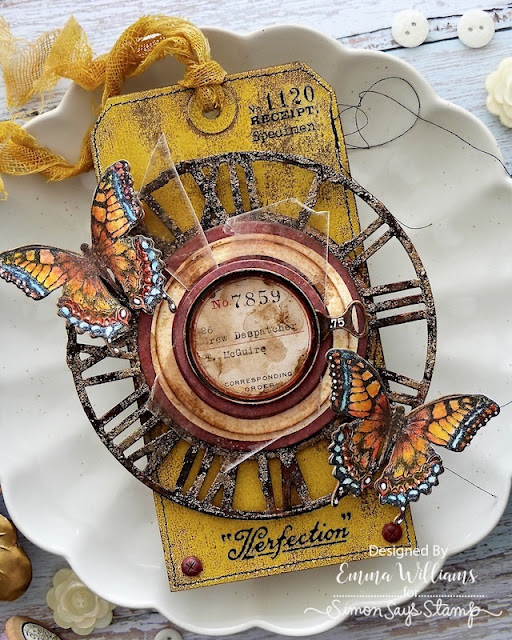
I love using circles within my makes, I think it's such a strong shape to create with and with the theme in mind, I chose to make the focal point all about the circle, and I layered one on top of another to build up the centre of this tag project.
For this make, I used a Size 8 Etcetera Tag and chose to use yellow as my background colour. Yellow isn't a colour I usually work with...except for flowers, and then it's rare, I just never seem to gravitate towards it that much but today, I thought I would give it a go as it's been a bit of tough weekend with family health problems, and I thought it would be perfect to bring a little sunshine into our lives...
TAG BACKGROUND
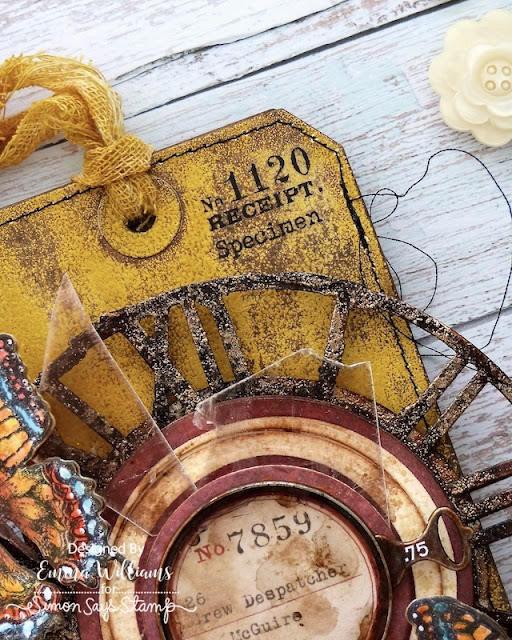
To begin with I made the background for my tag and using a size 8 Mixed Media Heavystock card, I created a faux enamelled finish to the surface with Distress Glazes.
To do this, I swiped the surface of the tag with Fossilized Amber Distress Ink, just allowing the ink to touch where the surface and not create a solid coverage ~ you want some of the original surface showing through.
I then sprinkled Fossilized Amber Distress Glaze over the inked surface and after tapping away the excess, I heat embossed the glaze until molten.
Once the glaze is cool, I blended Gathered Twigs Distress Ink over the entire surface, wiping away any ink from the enamelled areas.
I machine stitched a border around the edge of the tag before adhering the tag to a Size 8 Etcetera Tag.
CLOCK
To create the clock and my first circle for this make, I used the Timekeeper Bigz Die to cut two separate layers of the skeleton clock face from mat board. Discard the centre of the die cuts and the hands ~ keep those for another day.
I adhered them together to form one piece and applied a coat of black gesso over the surface.
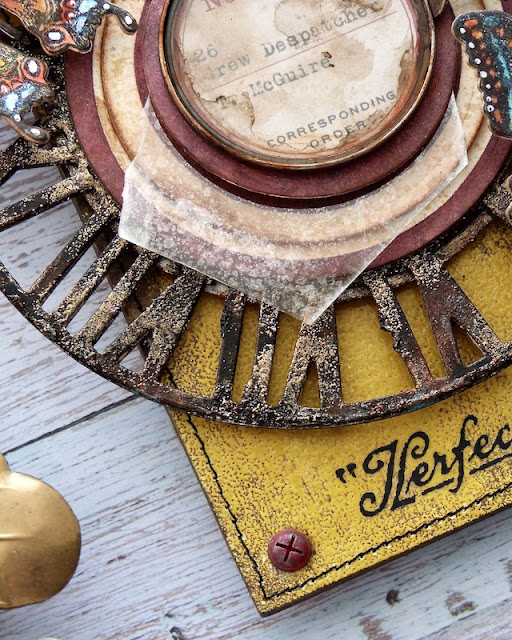
Once the paint was dry, I added touches of Translucent Grit Paste over areas of the clock face. Allow for the paste to set and become hard before adding a coverage of Black Soot Distress Paint. We're now ready for the next layer, the embossing powder and I used a Seth Apter Wow Embossing powder from my stash called Weathered Gold. This does have more of a vintage finish but any gold embossing powder will do for this make.
Apply the embossing dabber roughly over the surface of the clock and then sprinkle with the powder. As with the background, you don't want a solid finish, just allow the powder to touch random areas. Tap away the excess and heat emboss.
If you need to add more, then just repeat the process and if it becomes to shiny, then you can always knock it back with some Black Soot Distress Paint.
On the back of the clock, I cut a circle of black chipboard, slightly larger in size than the open centre of the clock and adhered this into position before mounting the clock on the centre of my tag using foam pads.
TARGET
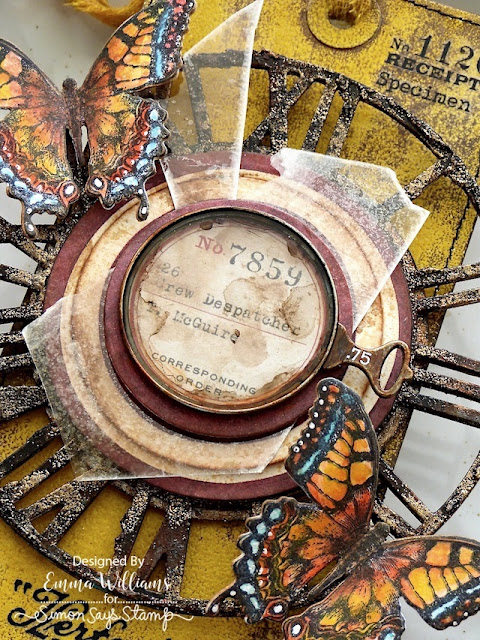
Now for the next circular layer and for this I used the target from the Tim Holtz Inquisitive Stamp Set by Stampers Anonymous.
I stamped three targets onto mixed media heavystock card using Barn Door and Black Soot Archival Ink. Blending the two colours together on the stamp, creates more of a deeper weathered shade of red.
I then cut the three targets using three sizes from a circles nesting die. Layers the circles over one another using foam pads and then attach to the centre of the clock.
In the centre of the target, I attached an Optical Lens, which I altered using Black Soot and Crackling Campfire Distress Paint to create more of a rusty finish to the metal. I placed a Field Notes Ephemera piece behind the lens and attached it with Matte Collage Medium. I then dribbled Mushroom Alcohol Ink over the glass to create a vintage feel.
I placed the lens over a piece of Mica and then attached to the centre of the target.
BUTTERFLIES
For the fluttering butterflies that sit on either side of the clock, I used the Flutter Stamp Set by Tim Holtz to stamp the image onto Distress Watercolour card using Black Soot Archival Ink. I stamped two images before I water coloured them using Distress Watercolour Pencils and a waterbrush.
I then used the corresponding Flutter die set to die cut each butterfly before shaping them and lifting the wings, and then attaching them to the clock face.
FINISHING DETAILS
We're nearly there and all that's left is the finishing details.
I added some Labeled and Specimen Remnant Rubs to the top right hand corner of the tag....
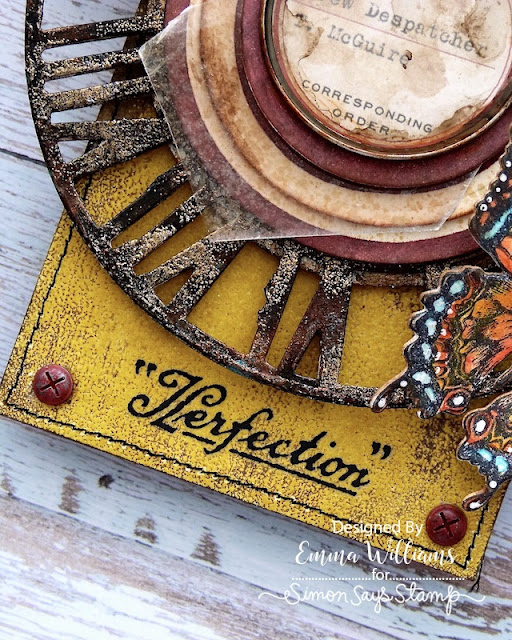
...and then finished with the "Perfection" Remnant Rub, which I placed underneath the clock.
I then added some Hardware Heads on the bottom left and right hand corners, which I painted with Candied Apple Distress Paint.
Finally, I colour tinted a strip of Mummy Cloth using a combination of Mustard Seed, Frayed Burlap and Fossilized Amber Stains, and once the cloth was dry, I threaded it through the hole at the top of my tag.
So that's my project finished and I hope you love what I've made...
Don't forget that every week, one lucky random participant has the chance to win a $25 gift voucher from Simon Says Stamp and you can join in up to 5 times, which means you could have 5 chances to win. You have until next Monday at 8am Ohio time. 1pm UK time, 2 pm CET to join in and good luck....
Recipe for project:









The detail is amazing, the art is beautiful!
ReplyDeleteSorry to hear about your family health issues. This is just what the Dr. ordered with its sunshine filled yellows. Marvelous tag and the finishing touch of the "Perfection" is in the right place. Love it.
ReplyDelete