Hey everyone...
Hope you all had a great weekend and as another new week begins, so does a brand new Simon Says Stamp Monday Challenge and this week our theme is all about SUMMER and the DT are also showcasing Brutus Monroe products within their designs! So back to the theme, and with all the gorgeous seasonal products that are available, I'm sure you'll be spoilt for choice but if you do need some extra inspiration, then our lovely teamie, Macarena has designed a mood board which you can see HERE!
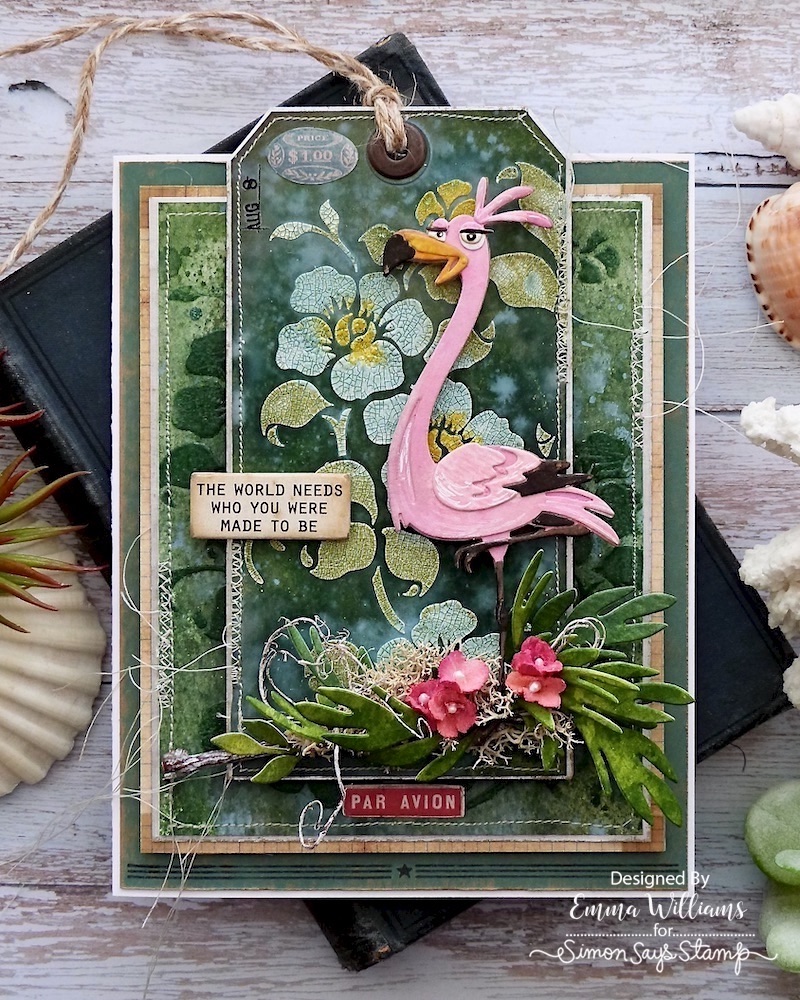
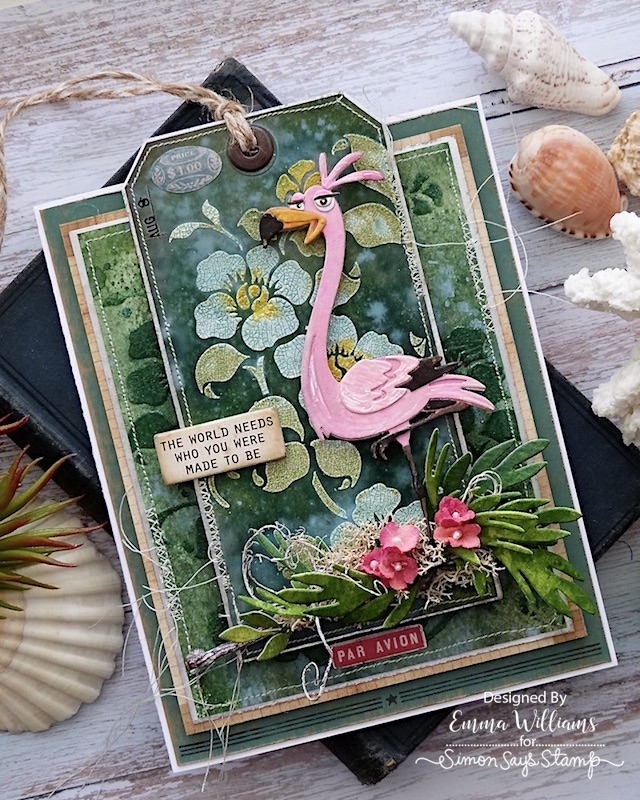
For my make, I decided to say hello to Gladys the Flamingo to create a card with a tropical, summery vibe and combined the Brutus Monroe Flowering Vine stencil with products from Tim Holtz, Sizzix and Ranger Ink to bring this fun scene to life.

So let's get started, it's time to say aloha to Gladys....


If you ever watch the Tim Holtz lives then you will know that Tim ofter refers to an "Emma sized card", which is slightly larger in size than the standard size card but here in the UK, we do tend to make slightly larger cards, and this is one of them...
CARD BLANK
I began by making a white card blank measuring 14 x 18cm and I matted a piece of kraft cardstock onto the front. I sanded the edges of the card to reveal the kraft core, and for this I used a sanding disk, attached to the blending tool.
Along the bottom edge of the kraft card, I stamped a decorative border in black Archival Ink and this is taken from The Inspector stamp set.
LAYERS
Now to start building up the layers and for the next layer, I cut a panel of Watercolour card, 11.5 x 15cm, spritzed it with a light mist of water before applying a blend of the following Distress Sprays and Oxide Sprays:
Distress Spray Stains: Rustic Wilderness, Antique Linen, Speckled Egg
Oxide Sprays: Speckled Egg
Once I was happy, I dried the card and then placed the Brutus Monroe Flowering Vine Stencil in the centre. Using a palette knife, I applied some Distress Translucent Texture Paste through the design. After removing the stencil, I sprinkled Rustic Wilderness Distress Glaze over the top, tapped away the excess and then allowed for the paste to dry thoroughly.
Once the paste is touch dry, I then heat embossed the glaze until shiny and molten but always move the heat gun around and be careful not to apply too much heat in one spot as this will cause the paste to bubble.
I completed the panel by adding a machine stitched border around the edge and then matted it onto silver metallic kraft card, followed by a layer of card, that has a border of Journey Design Tape applied around the edge.
I then mounted the panels onto my card blank.
TAG
Moving onto the next layer and this is a size 8 tag which features the same stencil as I used on the backing layer but this time used Crackle Paste.
To start with I placed part of the stencil directly onto the tag and then applied Crackle Paste through the design.
After removing the stencil, I used Distress Glazes to add colour:
Speckled Egg for the petals, Fossilized Amber for the centres and Peeled Paint for the leaves. I then set to one side and allowed for the crackles to appear and the paste to become touch dry. Once that happens, then just as I did for the previous layer, I heat embossed the glaze.
I then spritzed the tag with the same colours of Distress Sprays and Oxide Sprays as I used on the previous layer before I allowed the inks to dry.
Ink the edges of the tag with Walnut Stain Distress Ink before machine stitching a border around the edge and then matt the completed tag onto silver metallic kraft cardstock. I finished the tag by adding an eyelet through the hole reinforcer and fixing it with my crop-a-dile tool.
Before I mounted the tag onto my card, I applied a Remnant Rub date in the top left hadn't corner, together with an Ephemera Label taken from the Keepsakes pack.
I then mounted the tag onto my card blank using foam pads...
...placing it in the centre of the card, but allowing it to slightly overhang the top edge of the card blank.
GLADYS
We're now ready to introduce the star of the show...say hello to Gladys!
Using the Gladys Thinlits Die Set, I cut all my pieces and layers from Mixed Media Heavysotck Card inked with Picked Raspberry, Saltwater Taffy and Kitsch Flamingo Distress Inks. The beak is cut from card coloured with Mustard Seed and Fossilized Amber and the remaining pieces are cut from black kraftstock and white card. I then assembled the pieces to bring Gladys to life.
I placed Gladys onto the tag, placing her on the right hand side and attaching it with foam pads.
FOLIAGE and FLOWERS
Around the base of Gladys' feet, I added an arrangement of Funky Foliage.
The leaves and foliage are all cut from Mixed Media Heavystock card using dies from the Large Funky Florals dies set. The card panels are coloured with Rustic Wilderness and Peeled Paint Spray Stains, and once dry, I cut each leaf before blending Forest Moss around the edges and then shaped them before arranging them onto my card, attaching them to a real twig that I adhered across the tag.


To add some more texture, I placed moss and curly moss into the arrangement. This moss is from my stash but can be bought from many craft stores and finsihed the arrangement with some bouquet findings, which I dyed using Taffy Saltwater and Kitsch Flamingo Spray Stains.

We're nearly there and all that's left is to add the quote chip that I placed on the left hand side...

...and the tiny Par Avion label from the Field Notes Snippets pack, that I adhered with Matte Collage Medium across the bottom of the card panels.

Finally, I threaded some rope from my stash through the hole in that tag to complete my make for this week, which I hope you love!
Don't forget that every week, one lucky random participant has the chance to win a $25 gift voucher from Simon Says Stamp and you can join in up to 5 times, which means you could have 5 chances to win. You have until next Monday at 8am Ohio time. 1pm UK time, 2 pm CET to join in and good luck....
Thank you so much for taking the time to stop by today ~ stay safe and keep well.
Love Emma xxx
Recipe for project:
Distress Glaze: Speckled Egg, Peeled Paint, Fossilized Amber, Rustic Wilderness


This is so gorgeous, I am without words! Your work is stunning!! Layer by layer, each is attractive unto itself, but all together it is a fabulous piece of art with Gladys as the show stopper!!
ReplyDeleteThis is just the inspiration I needed for a very special card for my daughter’s birthday. Love your work.
ReplyDeleteHello Gladys!!!
ReplyDeleteAs always very impressive and full of inspiration. I look forward to everything you post. Thank you Emma.
ReplyDelete