
Hello friends and Happy New Year!
I hope you all had a wonderful Christmas and a safe festive season and you're ready for 2023 ~ let's hope it's a magical year because I think for so many people 2022 has been such a challenging year with so many changes.
So as we head into the new year we have the the first Simon Says Stamp Monday Challenge and this week, our theme is called, LIGHT UP THE NEW YEAR and the DT are showcasing the products of Studio Light within their makes.
For my project, I chose to make a tag and took the theme literally, adding Tim Holtz's tiny lights to make sure this make will shine bright. Of course one of the biggest changes here in the UK was adjusting to the loss of our beloved Queen Elizabeth II, and of course the new year will bring the coronation of King Charles III, which was what inspired my project. This historic event is something that many of us haven't witnessed but as I started to think about my make, I decided there was only one person who could feature and who better to watch over our new King, than Harvey who is standing guard as we march into 2023.


TAG
To begin with I took a Mini Etcetera Tag and painted the surface with a coat of Black Soot Distress Paint. Once dry, I sanded the edges to create a more worn look to the surface.

BACKGROUND
Now to move onto the background and for this I used a combination of Distress Spray Stains and Mica Spray Stains; Broken China, Uncharted Mariner and the Winter Frost Mica Spray Stain from Tim's Holiday Mica Stain Set 3.
I cut a rectangular panel of Watercolour Card that was slightly narrower in size than the tag and I spritzed the card with a light misting of water before applying the stains. Once I was happy with the mix, I then dried the cardstock before randomly stamping with Black Soot Archival Ink, onto the background using the music score stamp from the Stampers Anonymous Department Store Stamp Set by Tim Holtz.
Placing the card panel in front of me, I placed the Studio Light Wallpaper Pattern Essentials Stencil over the top and applied Translucent Paste through it.
After removing the stencil, I sprinkled Gold Embossing Powder over the top, tapping away the excess and set the panel to one side to dry, which should take about 30 mins. Once that has happened, I then heat embossed the powder until it turns molten and looks enamelled.

Machine stitch a border around the outside of the embossed panel and then adhere to the tag, placing some Design Tape around the outside to create a border.

TRIMS
Once Harvey is ready, I will need something for him to stand on and for this I used the smallest length of Bracket Etcetera Trims in two different widths. I had some cardstock left over that I trimmed away from the background, before I added the paste and because I don't like to waste a thing ~ I used these offcuts to cover the trims. I used the co-ordinating dies to cut the trim, but this isn't necessary if you don't have them ~ it just gives a much nice finish.
To complete the trim, I painted the edge with gold acrylic paint.
Attach the trims to the tag, placing them in a "L' shape to form the ledge.

TINY LIGHTS
It's now time to set up the lights and I drilled a small hole through the tag, and then threaded the lights through.
I applied a panel of the inked card from the background and added Translucent Crackle Paste through the stencil to create a subtle background pattern. Once dry, and the paste has crackled, I placed and attached the panel behind the aperture of a Curio Frame. On the back of the frame, I placed some foam pads to raise it from the tag.

Taking the lights, I wrapped these around the edge of the Curio frame, buffering them against the foam pads, so that they won't show from the front. I used hot glue to secure the lights into place and then attached the frame to my tag, placing it above the trims.

HARVEY

We're now ready to make the star of the show. I made Harvey using a combination of the following cardstock which has Sizzix Adhesive Sheets attached to the back:
Jacket: Mixed Media Heavystock card coloured with Candied Apple Distress Spray Stain
Body (main section) and Belt: Mixed Media Heavystock
Trousers, Trims and epaulettes on jacket, Boots: Black Kraft Card
Hat: Black Felt
Moustache: Inked brown cardstock from my stash

Once I'd die cut all the pieces I needed, I inked the edges of each piece with Frayed Burlap Distress Ink, before layering them to assemble Harvey, the Kings Guard adding the final detail of the feather in his busby and some metallic droplets to highlight the buttons on his jacket.

SCENE
We're now ready to build the scene and I placed Harvey in the centre of the frame using foam pads and then added some small die cut stars around him.

These are always in a pot on my desk, cut using the Falling Stars Die and leftover from previous projects.

I then placed a metal fence on either side of the frame. I broke the fence in two smaller pieces, painted them with a little Crackling Campfire and Black Soot Distress Paint to create the look of rusty metal. and then attached them with Matte Collage Medium.
Once the adhesive was set and the fences were secure, I attached the lamp posts.
LAMP POSTS
I cut these from four separate layers of black card, using the lamp-post die from the Christmas Vaults Die Set 2021. I layered each die cut to form the two lamp-posts and then I applied the embossing dabber over the surface and embossed each post using a Black Embossing Powder that I have in my stash. Mine does have a white fleck running through it but you can use whatever you have to hand.
I added gold highlights and added acetate brackets to form the 'glass' which i coloured with Alcohol Ink. I then attached the bracket to each of the die cuts before attaching them to either side of the frame.

To complete the posts, I added silver metallic droplets to each one.

FINISHING DETAILS
I added some moss around the base of the trims and added some dry grasses.

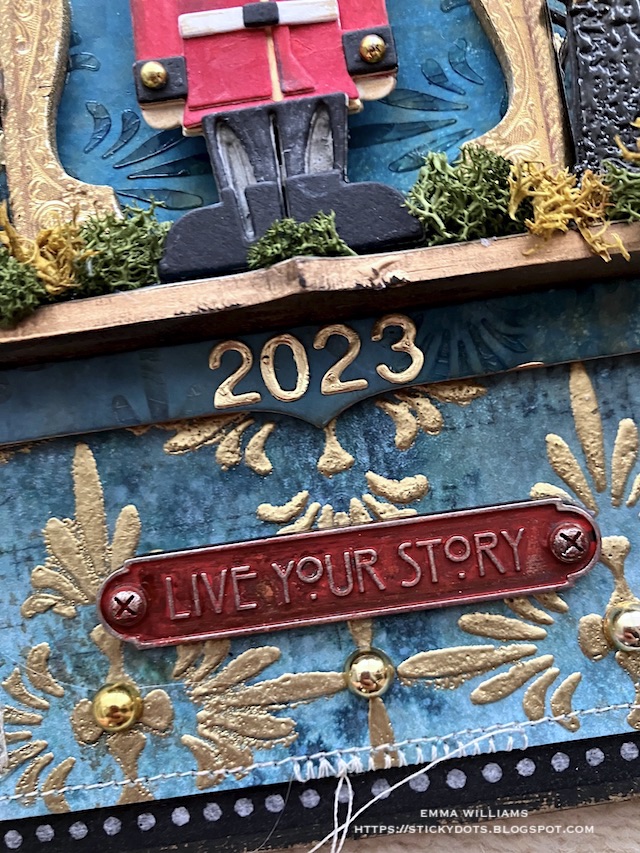
To complete the tag, I die cut the numbers, 2023 from gold metallic kraft card using the numbers from the Postal Thinlits die Set, and attached these to the trim.
I added a word plaque ~ "Live Your Story" underneath the trims, painted with Candied Apple Distress Paint before wiping away the excess paint to reveal the wording. I then added a touch of gilding wax over the top to accentuate the lettering.
After attaching the plaque with Collage Medium, I added two Hardware Heads either side and then completed the tag with Metallic Droplets to accentuate the stencilling on the background.
Finally, I added a Machinery Head to complete the tag. I painted this with Candied Apple Distress Paint and adhered it over the hole at the top of the tag, using Matte Collage Medium.

So that's my first make of 2023 completed and I hope you love this piece and enjoyed the techniques I've used for inspiration.

As always, if you make anything, or if you've been inspired by anything that you've seen here on my blog ~ then please, let me know by tagging me on social media or leaving a comment here and I will be right over to take a look!
Don't forget that every week, one lucky random participant has the chance to win a $25 gift voucher from Simon Says Stamp and you can join in up to 5 times, which means you could have 5 chances to win. You have until next Monday at 8am Ohio time. 1pm UK time, 2 pm CET to join in and good luck....


Recipe for project:


Happy New Year Emma! You always make the most beautiful and so intricate pieces! It is always such a joy to see you work and I am always looking forward to your next post. Thank you for all the inspiration. All the best in 2023!
ReplyDeleteHugs,
Samra