Hello everyone, and Happy Christmas Eve, Eve!
Today is the last Simon Says Stamp Monday Challenge of 2024, because the DT are having a two week break over Christmas, but we will be back on the 6th Jan. This week's challenge is all about being COLD & FROSTY and whatever you choose to make, you have 2 weeks to join us, and play along.
For my make, I chose to make some favour boxes for the Christmas table and embraced the cold and frosty theme using old and new Sizzix dies by Tim Holtz, before adding a touch of vintage sparkle with Mica Flakes and Rock Candy Glitter.


So, let's get started and let's make some favour boxes, just in time for Christmas...

To make these boxes, I used the Sizzix Curio Box die set by Tim Holtz and cut the top and bottom from White Mixed Media Heavystock card before assembling them.

FROSTY THE SNOWMAN
BOX
We'll start with the snowman box and for this I cut panels of woodgrain card that will fit the sides and top of the box. I actually used Tim's Grey Woodgrain cardstock which I have stockpiled in my stash but if you haven't got any of this, then you can use the white woodgrain card and ink the surface with Lost Shadow Distress Ink to create the same look.
After inking the edges with Pumice Stone Distress Ink, I adhered the side panels to the box. For a touch of added sparkle, I brushed some Sparkle Paste over the surface. You can see the subtle twinkle in the photo below.

Taking the top panel, I machine stitched a border around the edge before I adhered the panel to the top of the box.

I then applied some Grit Paste through the Speckles Layering Stencil to create the look of snow and allowed this to dry, whilst I moved onto my die cut elements.

SNOWFLAKE
For both of these makes, I used dies from the Vault Winter Wishes die set by Tim and on this particular make, I used the Snowman, and the Snowflake, which is where we'll begin.
I cut 6 separate snowflakes from Mixed Media Heavystock card and then I layered and adhered three of those pieces together to form two snowflakes. After applying a coat of Speckled Egg Distress Paint over the surface of each die cut snowflake, I dried them with a heat tool before using my Distress Embossing Dabber which I applied very lightly over random areas of each piece. I then sprinkled White Embossing Powder over the top, tapping away the excess before heat embossing the powder until molten. You will see that I have left some of the painted areas untouched, so that it creates a two tone look.

With both snowflakes embossed, I layered them over one another using foam pads, slightly offsetting the top one. I then attached the snowflake to the box, again using foam pads for some extra dimension.

ICY BASE
For the base, I used a die that is included in an older die set, Oliver the Bunny. I cut the base from Watercolour card that I spritzed very lightly with a combination of Weathered Wood, Speckled Egg and Faded Jeans. I then smeared some Glossy Accents across the base and sprinkled it with Rock Candy Glitter for a touch of sparkle before attaching it to my box using foam pads.

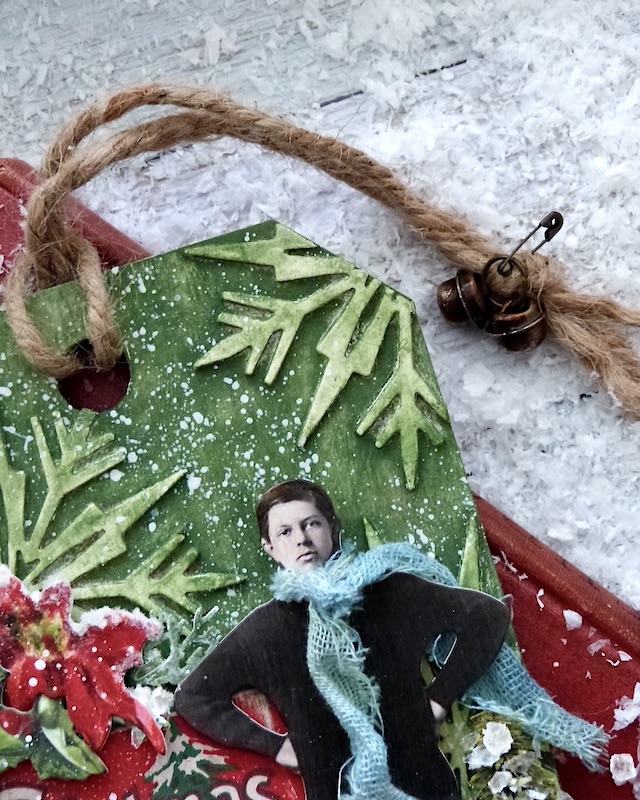
SHRUB THE SNOWMAN
Moving onto little Shrub the Snowman and once again, this die is included in the Winter Wishes die set and for this little man, I cut all the pieces from Watercolour Card before adding the colour and assembling him.
SCARF: Cut from plaid Backdrops paper
HAT: Lumberjack Plaid Distress Ink
NOSE: Spiced Marmalade and Crackling Campfire
ARMS: Gathered Twigs
Once he was assembled, I placed him onto my box.

I added some greenery around the base, cut from card inked with Peeled Paint Distress Ink and then I added the Mica Flakes. I used Glossy Accents for these, as I think it helps to keep the sparkle once dry and after I applied the Glossy Accents to the areas on the base, and also on the surface of the snowflake, I sprinkled the Mica Flakes over the top and allowed to dry.

Finally, I added some snowy touches to Shrub using Snowfall Grit Paste.
WISH
To complete the box, I added the word "Wish". This is a die in the Holiday Classic Die Set and I cut multiple layers, 4 in total from from gold metallic kraft stash card. After I'd layered the pieces to form one substantial die cut, I wanted to give it more of a vintage feel and knock back the bright gold ~ so, for this I applied some Black Soot Distress Paint over the surface, allowed it to go slightly tacky but not dry and then wiped away the excess paint with a paper towel. I then dry brushed the surface with Burnt Sienna Acrylic Paint, before setting this to one side to dry.
...and once it was dry, I attached it to the centre of my snowflake, adding a metallic droplet as a finishing touch.

To complete the box, I added some Cello Stickers around the edges...
...and then a silver metallic droplet to the top and bottom side panels.

As an added surprise, I also created a hidden message on the inside of the box...


ICE SKATES MERRY CHRISTMAS
BOX
For this box, I used panels of Mixed Media Heavystock card that I inked with the following colours of Distress Spray Stain and Oxide Spray:
DISTRESS SPRAY STAIN: Speckled Egg, Uncharted Mariner, Walnut Stain
OXIDE SPRAY: Speckled Egg

I misted the cardstock with water before applying the spritzes. I then gave the surface another spritz of water to blend the colours before heat drying the cardstock and cutting it into panels that will fit the sides and top of the box.
I wanted to add some texture to those side panels, and for this I used the texture fade embossing folder in the Celebrate Sidekick Die and Texture Fade Set and ran these pieces through my die cutting machine. I attached each panel with Matte Collage Medium before applying a coat of Sparkle Paste over the surface.

Taking the top panel, I used clear Versamark ink to stamp some little starbursts from the Christmastime 3 stamp set. I then sprinkled gold embossing powder over the top, and heat embossed until molten.

Along the bottom of the panel, I stamped the wording "Merry Christmas', which is also taken from the same stamp set, and this time heat embossed it using white powder.

I machine stitched the onto a piece of felt, which I cut using pinking shears and then adhered the completed layers to the top of my box.
Finally, I added the ruler ephemera piece across the bottom of the panel.
ICE SKATES
Using Cracked Leather Cardstock and the die from the Winter Wishes die set, I cut the main part of the skate and then cut the heel from black kraft card and the blade from silver metallic kraft card.

I then inked the leather cardstock with Walnut Stain Distress Ink, and sanded the heel and blades before I assembled the skates, completing them by using a needle to thread cotton through the holes and create the laces. Once I'd threaded these, I cut two separate pieces of twine, tied them into small bows and adhered these in position on the boots.
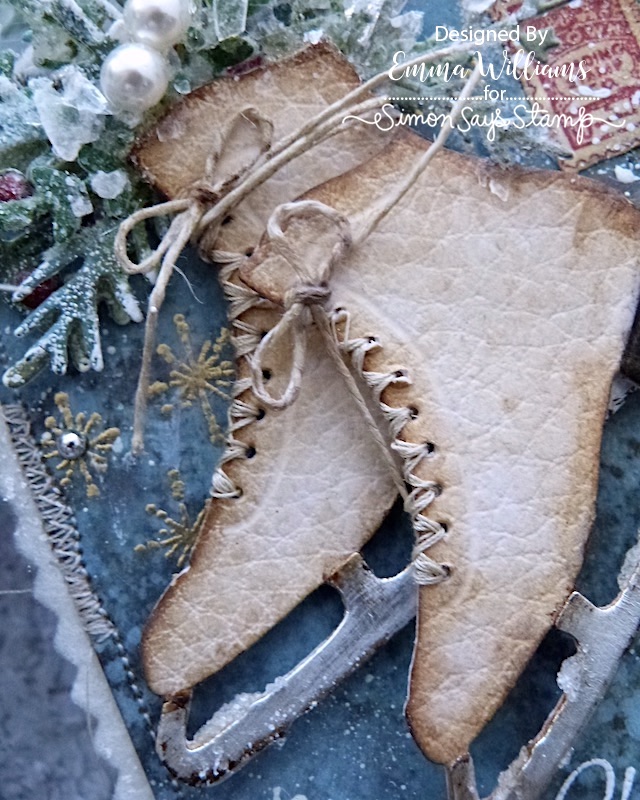
I attached my ice skates to the box using foam pads and slightly offset them from one another. To complete the boots, I added some hints of Snowfall Grit Paste to the blades.

GREENERY
Using the Sizzix Vault Festive Wreath die set by Tim Holtz, I cut the card which I coloured using the following colours of Distress Spray Stain:
- Greenery: Iced Spruce, Evergreen Bough, Peeled Paint and Rustic Wilderness
Once all the pieces were cut, I wanted to add some extra frosty sparkle to each of these pieces and for this I used white embossing powder. I just gently dab the ends of each piece into a clear embossing ink pad, and then sprinkle the white powder over the top, tapping away the excess. After heat embossing the powder, I take one piece at a time and begin to build up the foliage at the top of the skates.

To complete the arrangement, I used a brush to very gently apply touches of Glossy Accents over the tips before sprinkling Rock Candy Glitter and Mica Flakes over the finished piece, tapping away excess glitter before allowing it to dry. I then added two of the smallest sized baubles.

FINISHING DETAILS
We're nearly there and all that's left is to add the finishing touches....
I placed some silver metallic droplets in the centres of the stamped starbursts on the background.

A few of those cello stickers around the edges of the box....

...and I finished the piece by adding some crinkle ribbon from my own stash, dyed with Speckled Egg and Antique Linen Distress sprays and then just threaded through a punched hole in the top of the box. I then pinned some Holiday Bells, that I altered with Black Soot and Crackling Campfire Paint for a rusty, vintage effect.

So that's my make for this week's challenge complete and I hope you love what I've created and the techniques I've used and as always, if you are inspired by any ideas or any of my makes, then please remember to tag me on any of my socials ~ Facebook, X or Instagram ~ or even leave a message here on my blog and I will pop over to take a look!

Don't forget that every week, one lucky random participant has the chance to win a $25 gift voucher from Simon Says Stamp and you can join in up to 5 times, which means you could have 5 chances to win. You have until next Monday at 8am Ohio time. 1pm UK time, 2 pm CET to join in and good luck....


Recipe for project: