Hello friends and Happy Thursday!
This week is flying by again, where do the days go? But today, I'm stopping by to say hello and share a mini tutorial of a technique that I have had so many requests for and as I sat in my craft room creating another project that will be shared at a later date, I thought this was the perfect time to share the details of how I create rust effects using Tim Holtz Distress products.
I don't think I will never tire of the magic of Tim’s Distress products and how they can take the ordinary, to the extraordinary, and even beyond!
So let's get started and here's how I use Ranger Ink Distress Paints, Foundry Wax and Paste to turn pewter into rust....
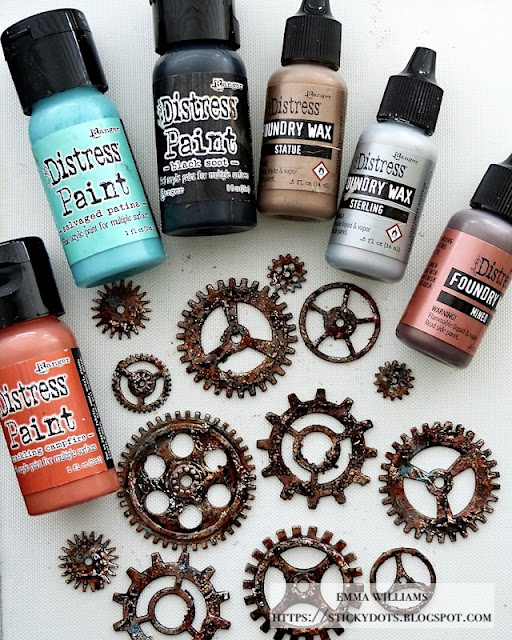
1. Supplies: Distress Paint, Foundry Wax, Black Opaque Texture Paste and a few of your favourite idea-ology metal embellishments. I’m using Industrial Gears, Sprocket Gears and Gadget Gears.
3. Always shake your bottle of Statue Foundry Wax Foundry Wax to mix, and then squeeze a small amount onto your mat. Use either a brush or your fingertip to apply the wax to the metal. If you need more wax, just repeat but always make sure you place the cap back onto the bottle between applications.
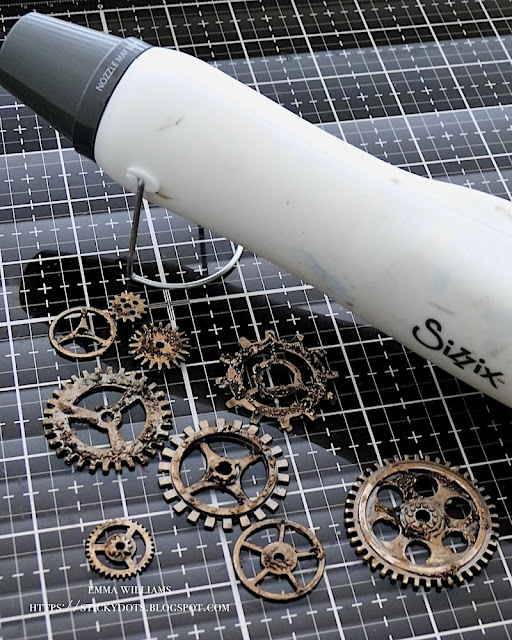
4. Set the wax with a heat tool until it becomes molten and shiny.
5. Repeat the process using Sterling Foundry Wax but this time you don’t need to add so much, just a few highlights here and there, ensuring the previous layer of Statue Foundry Wax can still be seen in areas. Heat emboss to set.
6. Use a dry brush, (or you can use your fingertip if you don’t mind getting messy), to apply Crackling Campfire Distress Paint to the surface of the metal. Dry the paint thoroughly between each application.
7. Using a clean brush, apply Black Soot Distress Paint, followed by Salvaged Patina. If you need to add more of any one colour, to help build up the intensity, just repeat the process until you’re happy.
8. Finally, apply Mined Foundry Wax to accentuate the texture created on the metal. You don’t need a solid coverage, just the lightest of touches. Heat set the final layer.
9. If necessary, use a dry brush to apply more paint to highlight areas and add some more rusty, crusty goodness to complete the technique.
My gears are now transformed from the original pewter finish to a rusty metal, and are ready to use on a future project…


These look amazing!! … and I look forward to giving this technique a go. Thanks for sharing!
ReplyDeleteAbsolutely crushed it! Love them!
ReplyDeleteI love this & very informative. Thank you 😊
ReplyDeleteThank you so much for sharing!
ReplyDeleteThanks Emma this is wonderful
ReplyDeleteLove this technique thanks for sharing x
ReplyDeleteI am glad you posted this to give me some inspiration for the gears! Brilliant! paula
ReplyDeleteThank you so very much for sharing your process on how you create the rusty, crusty goodness on your gears Emma 🤗 🇨🇦
ReplyDeleteThank you for this amazing tutorial Emma. These cogs and their rusted aged reliced look is just amazing! I need to get braver at trying some of your wonderful mixed media techniques. A bit of a challenge for a girlie who doesn't like to get her hands dirty! Hehe, a bit hopeless for a crafter right?! But oh how I love how these look and your stunning creations with them! xoxo
ReplyDeleteThank you! Such a great tutorial.
ReplyDelete