
Hello friends...
First of all, I wanted to say a huge thank you to everyone who has reached out to say how much they loved my previous post, the Winter Village ~ I am truly blown away by the love you've given this make and from the bottom of my heart, thank you to each and every one of you, it means the world!
So back to today and this week's Simon Says Stamp Monday Challenge! The theme is all about ATC's and we would love for you to join in, play along and share your miniature pieces of art!
For my make, I've created a couple of ATC's with a Christmas theme and used plenty of Tim Holtz products to make them and don't think of these just as an ATC, they would also make wonderful tags for presents, or you can use the ideas to make tiny cards ~ the list is endless!


To begin with I'll start with my ATC bases and the layers that I used to create them...
ATC BACKGROUNDS
The outer layer of my ATC's measure 7 x 10cm (2.75" x 4"), but the inner layer measures approx 6 x 8cm (2.3" x 3.2").
Starting with the outer Collage Paper layer ~ for this I cut a piece of white Sizzix felt approx. 7 x 9cm and then cut a four layers of the Christmas Collage Paper. I just used a pair of scissors to cut this and didn't worry too much about straight lines. I then placed two layers of the collage paper with the design face down, a layer of felt and the remaining layers of collage paper, design facing upwards before I machine stitched the layers together in red cotton thread.
This has given me the base of each ATC and you can see the backs of each ATC in the photo below.

For my next layer, I covered a piece of Mixed Media Heavystock card with the Collage Paper and adhered it with Matte Collage Medium. Once it was dry, I then used the Sizzix Stacked Postage Die by Tim Holtz, which is an older die from my stash and cut the shape for each ATC.
After machine stitching a border around the outside of each panel, I inked the edges of the postage stamp die cuts. They are now ready to embellish....
BOY
You'll probably notice that in some photos, the little boy's scarf is covered in snow...this was actually a happy accident when I was taking the photo, I breathed out in the wrong place, lol and the fake snow blew everywhere but I loved it so much, I've left it in!

For this ATC, I took the postage stamp die cut and one of the borders from the Christmas Worn Wallpaper set. I cut this in half, and for this ATC, I will be using the 'JOIN HERE" wording. Set the remainder of the strip to one side.

I machine stitched the border into place down the left hand side of the postage stamp die cut and then used foam pads to layer the die cut over the top of my Collage Paper layers.
For the next layer, I used the mistletoe branch from Tim's Christmas Ephemera Pack. I wanted a frosty look to the surface of this layer and to achieve this I applied the Distress Embossing Dabber over the top of the ephemera piece, before sprinkling the Frosted Crystal onto the surface. Tap away the excess powder and then heat with a heat gun to melt the powder.

I attached the frosted ephemera piece onto my ATC with foam pads to add some height, placing it across the bottom section of the layers.
After selecting my Paper Doll, I always apply a layer of clear gesso to prime the surface, allow to dry and then, I colour tint it with a waterbrush and Distress Crayons. I used Faded Jeans on his coat, Peeled Paint on his hat, Gathered Twigs for his boots and Fossilised Amber for the coat buttons.
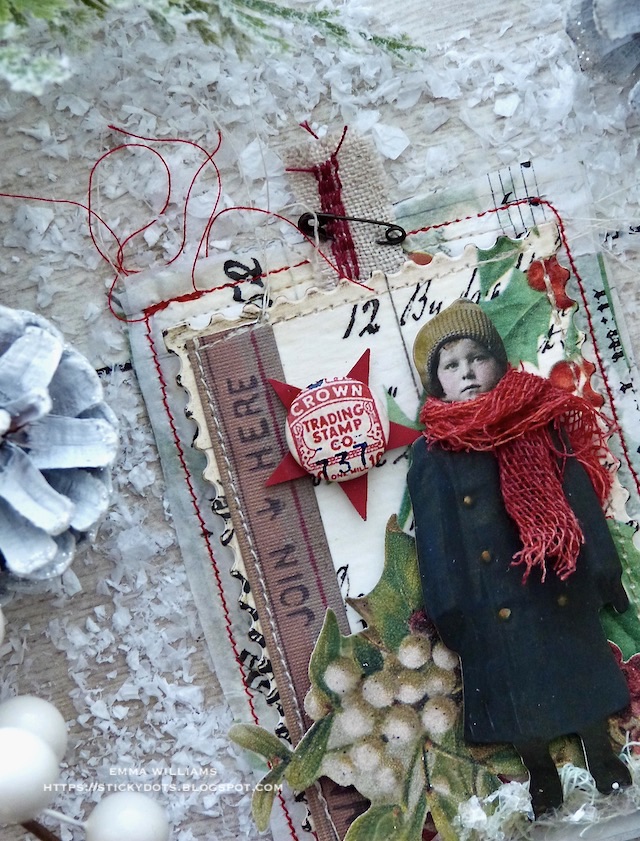
Whilst the coloured doll is drying, I made him a warm and cosy scarf using Mummy Cloth that I dyed with Candied Apple and Aged Mahogany Distress Spray Stains. I cut the cloth into a small strip that would wrap around his neck and secured it into place with hot glue on the back.

I then layered the paper doll onto the ATC, placing him over the top of the Mistletoe. Underneath his feet, I added a small strip of Mummy Cloth, this time coloured with Antique Linen and Speckled Egg Spray Stains and attached it with Matte Collage Medium. I added a good amount of Glossy Accents over the top of the cloth and sprinkled Mica Flakes over it to create the sparkle around his feet.

The red star is taken from the Christmas Layers pack and after inking the edges with Walnut Stain Distress Crayon, I attached it to the left of the paper doll, and finished with a Mini Flair Embellishment.
Finally, I added a stitched scrap at the top of the ATC, complete with a Mini Pin.

GIRL

As with the first ATC, I took the Postage Stamp die cut and machine stitched a border around the outside and inked the edges with Walnut Stain. I then used foam pads to place it onto the Collage Paper background.
On this layer, I adhered a Flash Card from the Christmas Ephemera pack, "wish" onto the top left than corner of the postage stamp layer. In the top left hand corner of the flash card, I added a small label with the number 12 written on it. The label is taken from the Christmas Stickers Book, and I cut the label into half, attached it in the top left corner of the flash card, added the number and applied a coat of medium over the top to seal it.

Using a holly brand ephemera piece from the same set as before, I frosted this in exactly the same way as the Mistletoe piece before layering it onto my ATC with foam pads.

Remember the remaining border strip, from the previous ATC...this was the section with Made In England written across it?!? Well now you can use it and I cut an inverted 'v' into one end, machine stitched a border across the strip and then layered it onto my ATC, placing it across the holly branch but leaving it to slightly overhang the edges.

Place a red star from the Christmas layers pack in the top right corner of the flash card and after adding a layer of gesso, I coloured the paper doll using the waterbrush and Distress Crayons.

Attach the paper doll to the ATC with foam pads, placing her to sit on top of the Made In England banner strip, adding another strip of that neutral coloured Mummy Cloth underneath her.

With the cloth in place, I adhered some more Mica Flakes around her and then attached the Mini Flair Embellishment.

Finishing touches for this one, was a length of candy cane twine attached to the top of the ATC...
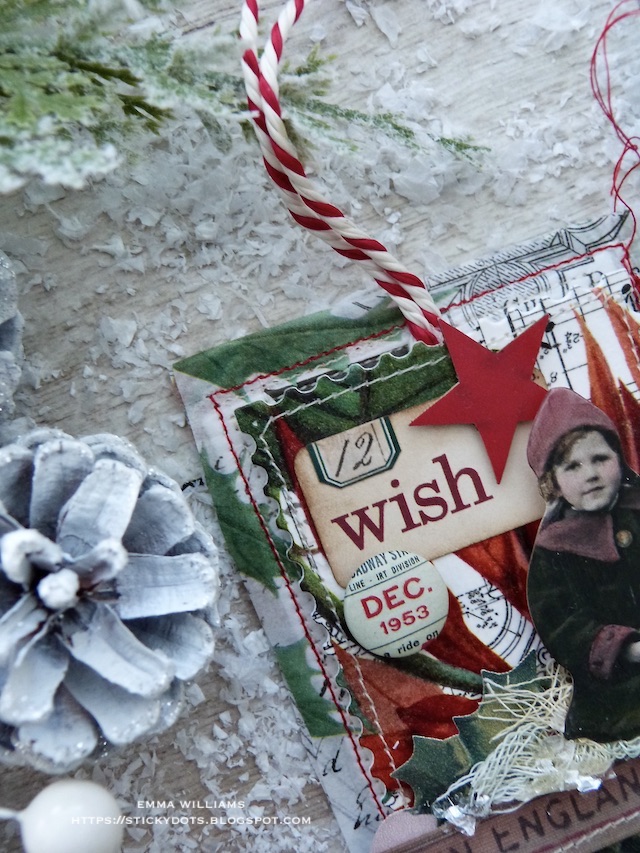
...and a Tiny Clip, painted with Candied Apple Distress Paint, clipped onto the Made in England border strip.

So that completes this week's makes for the challenge and I hope this has given you some ideas...

...as always, if you make anything, or been inspired by anything that you've seen here on my blog ~ then please, let me know by tagging me on social media or leaving a comment here and I will be right over to take a look!
Don't forget that every week, one lucky random participant has the chance to win a $25 gift voucher from Simon Says Stamp and you can join in up to 5 times, which means you could have 5 chances to win. You have until Monday 8am Ohio time. 1pm UK time, 2 pm CET to join in and good luck....


Recipe for project:


