
Hello everyone...
As another month flies by, it's time for a brand new Simon Says Stamp Monday Challenge and this week our theme is all about being INSPIRED BY THE MOVIES.
Now when it comes to movies, together with music and books ~ these are a passion of mine and I really felt that I was spoilt for choice with ideas! Decisions, decisions ~ should I go for one of my favourite classic black and white movies, Audrey Hepburn or Cary Grant or maybe something fun and frivolous such as Disney? My head was literally having one of those popcorn moments but there was one film that I kept coming back to, because I have probably seen the first film in this franchise more times than I would like to admit ~ let's just say, I can probably recite the script better than actors, lol and now with the sequel currently showing at cinemas across the world, it's time to share my inspiration!
So without further delay, grab your snacks because you are invited to my movie night....

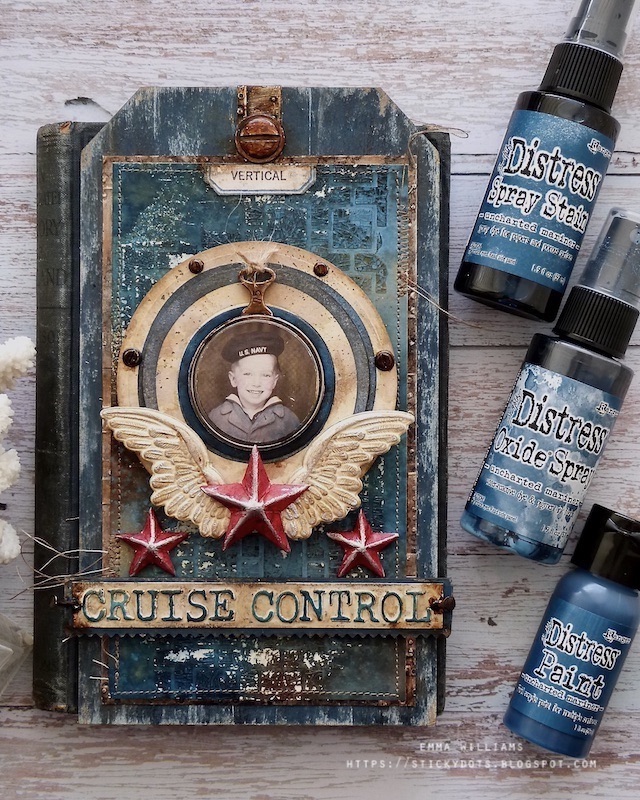
...and a walk through my project that was inspired by TOP GUN and TOP GUN MAVERICK!


So let's get started and this make was also inspired by the one and only, Tim Holtz and his brand new colour that joined the Distress family last week ~ Uncharted Mariner. This was perfect for the background to my tag and went so well with the Navy theme, so thank you Tim!
TAG BACKGROUND
To begin with I used a Mini Etcetera Tag and painted the surface using Uncharted Mariner Distress Paint. Once dry, I sanded the edges of the tag before I swiped the surface with Antique Linen Oxide Ink. I just took the pad directly to the painted tag and dragged it down ~ it just created more of an aged look.
Heat set the ink.
Moving onto the next layer and I began by applying Translucent Crackle Paste through the Linked Squares Layering Stencil onto a panel of Mixed Media Heavystock card. Set this aside and wait for the crackles to appear before adding the colour. For this, I used a combination of Distress Sprays and Oxide Sprays ~ Uncharted Mariner, Walnut Stain and Antique Linen with Uncharted Mariner Oxide Spray.

I spritzed the entire card panel with the sprays and then added a mist of water over the top to blend them. I then heat dried the card surface.

After machine stitching around the edge of the panel, I matted it onto a second layer. This was a piece of silver metallic kraft card that I embossed using the Foundry 3D Texture Fade. I then applied Alcohol Inks over the surface of the metallic panel ~ Rust, Mushroom and Pitch Black to create more of a rusty effect. I cut the embossed panel slightly larger than the inked background which I then mounted over the top. Adhere the panels to the tag.

Using an offcut of the metal panel, I wrapped that piece around the top of the tag to disguise the hole and attached it with Matte collage Medium. I then adhered a Machinery Head over the top, that I altered with the same alcohol inks as I used before.

CIRCLE TOPPER
I began by stamping the target from the Inquisitive Stamp Set using Prize Ribbon Archival Ink onto the Heavystock card. I then cut the target into a circle, using a circle nesting die from Simon Says Stamp that measures approx 3.5". Stamp a second target in the same colour and either cut around the solid outline to create a smaller circle that can be layered over the top of the larger one, or you can use a smaller nesting die to create the perfect circle.

I inked the two circles with Antique Linen, Old Paper, and Frayed Burlap Distress Inks before spritzing with water to blend the inks and heat drying. Finally I inked the edges of each piece with Walnut Stain Distress Ink.
Layer the circles with foam pads and add Hardware Heads around the outside of the larger circle.

In the centre of the circle, I attached an Optical Lens. I applied a small amount of Statue Foundry Wax to alter the metal and before heat setting the wax.
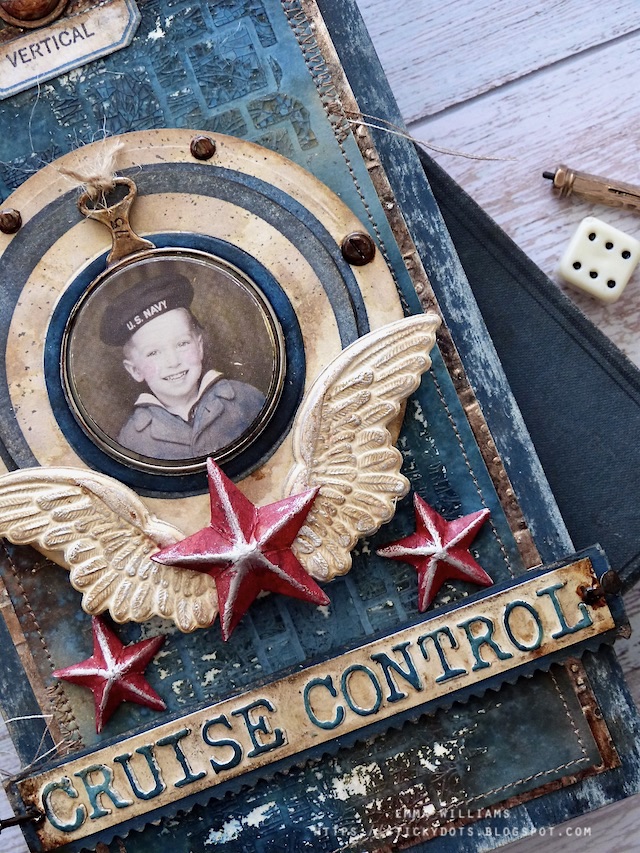
In the centre of the Optical Lens, I added a photo ~ this is from Tim's Photo Booth set and I cut it into a circle that would fit the lens.

I coloured the photo using Distress Crayons and a water brush and then attached it to the glass with Matte Collage Medium.
WINGS
For the wings, I used the Winged 3D Impresslits Cut and Emboss Folder to cut Heavystock card.

Once cut, I inked the die cut with Antique Linen, Old Paper and Frayed Burlap before I applied a small amount of Sterling Foundry Wax over the top to accentuate the detail on the die cut. I heat set the wax and attached the wings just below the photo.

STARS
For the three stars, I used more of the Heavystock card. I actually had this in my card stash and I think it would've been inked with Candied Apple, Aged Mahogany and Barn Door.
I cut the stars, two small and one larger size, using the two dies in the Holiday Vault 2021 die set and after folding along the scorelines, it gave me my dimensional stars.
Along each of the folded edges, I applied some Sterling Foundry wax which I then heat set before attaching each star to my project ~ the larger star in the centre of the wings, and the smaller stars either side.

In the photo below, you can see the dimension of these stars.

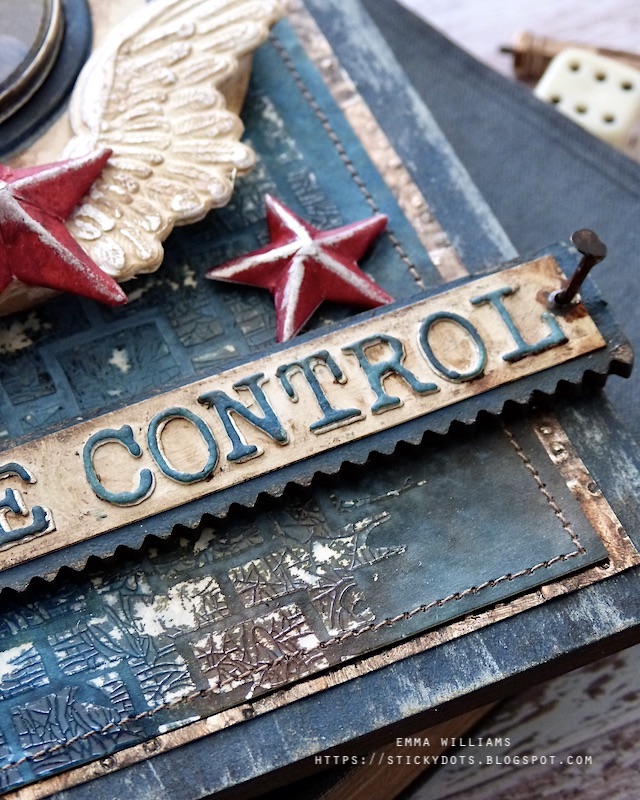
WORD STRIP
We're nearly there and all that's left is the word strip ~ CRUISE CONTROL
I used a Pinked Etcetera Trim which I painted with Uncharted Mariner.
After cutting a strip of card which I inked with the same neutral tones as the wings, I began die cutting the letters ~ the first layer from silver metallic card and the second layer from card coloured with Uncharted Mariner, using the Upper Alpha Type Die Set.
I adhered each of the blue letters over the top of the silver layer and then attached them to my strip.

After adhering the strip over the top of the pinked trim, I attached the trim to my tag, placing it underneath the circle before hammering a couple of tack nails into either side of the trim.
Finally, and with a very subtle nod to one part of the movie, I stamped the word 'Vertical' from the Eccentric stamp set onto a label that I cut in half and then attached to the top of my tag.

So that completes my make for this week and whether you love the movie, or hate this movie ~ I hope you love the project I've made!

Now, at the beginning of my post, you might have seen something else that I created and this was the little RETRO TV that I made into a freestanding ornament.
I used the die to die cut multiple layers of card that would form the front and back of the tv ~ four layers of each and all cut from card that I prepped using the Barn Door Distress Ink and Fired Brick Distress Glaze. I inked the edges of the die cuts with Walnut Stain Distress Ink and then placed one of the domes in the aperture of the die cut that I will use on the front.

After I placed the "TOP GUN' logo in the dome, (I used a copyright free logo that I found on the internet), I then attached the front and back die cuts to the smallest sized vignette box, that I also covered with the same prepped card that I used on the tv itself, so that it matches. To complete the TV, I used Sterling Foundry Wax to add some shine to the antennae and then completed it with the front section on the right, which was again cut from card and then embossed with Bone Mixed Media Embossing Powder before I added the controls, cut from silver metallic kraft card.

Once assembled, this formed my little TV that sits alongside the tag, and also a keyring that I made featuring the star of the movie ~ Mr Tom Cruise!

As always, if you make anything, or if you've been inspired by anything that you've seen here on my blog ~ then please, let me know by tagging me on social media or leaving a comment here and I will be right over to take a look and if sometimes I miss it ~ just keep nudging me!
Don't forget that every week, one lucky random participant has the chance to win a $25 gift voucher from Simon Says Stamp and you can join in up to 5 times, which means you could have 5 chances to win. You have until next Monday at 8am Ohio time. 1pm UK time, 2 pm CET to join in and good luck....


Recipe for project:


Awesome make! Great movies
ReplyDelete