
Hello friends...
The brand new Simon Says Stamp Monday Challenge has begun and this week we want you to make ANYTHING BUT A CARD! So, with this fun theme in mind, what will you create? Whatever you choose, whether it be a tag, a box or maybe a gift bag ~ we'd love for you to join us and play along!
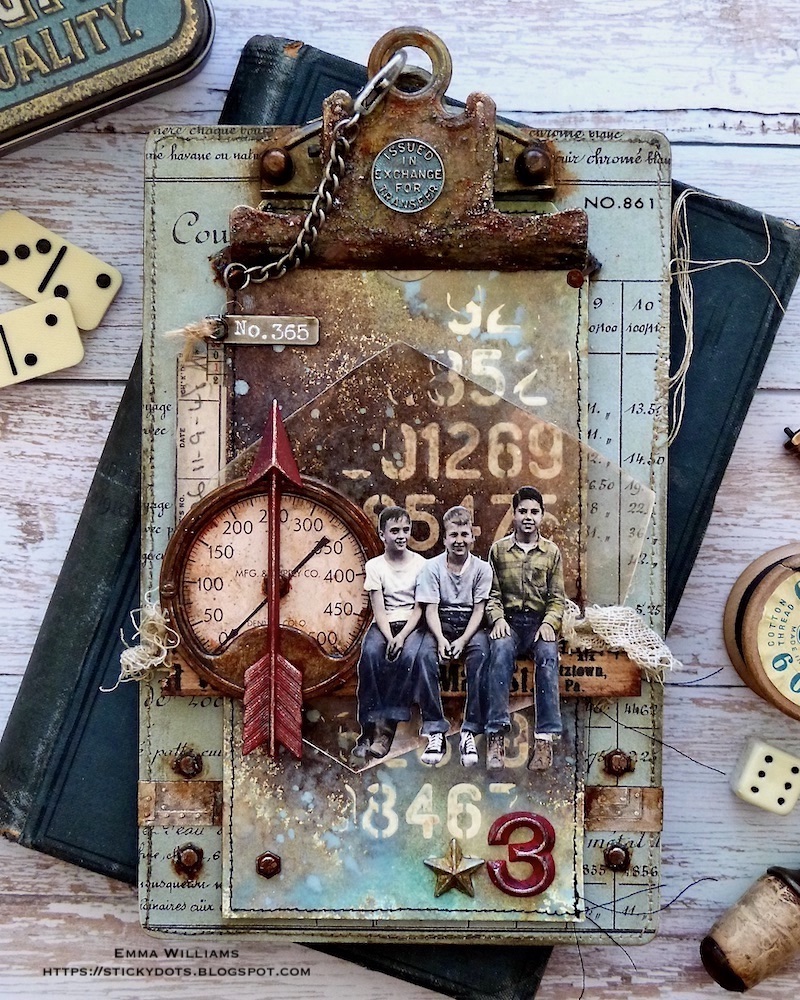
For my make, I created a clipboard but also chose to use a Size 8 Etcetera Tag that I layered over the top to create depth and dimension and if you want to find out how I created this piece, then here we go because it's time to get started and get creative!


CLIPBOARD
To begin with I used a Tim Holtz idea-ology Clipboard and covered the surface with a panel of paper from the Backdrops Volume 3 stash. I removed the clip from the top of the board, and then cut a panel of the paper to size before machine stitching a border around the edged. I adhered the paper to my board using Matte Collage Medium, applied a coat over the top to seal the paper and then ran Walnut Stain Distress Crayon around the edge, blending out any harsh colour using my fingertips.

For this piece I wanted to created a really vintage feel to the metal and started by ageing the clip. For this, I began by adding a layer of Gilded Foundry Wax over the metal surface, and the fasteners. I then heat set the wax using a heat gun. At this stage, I fitted the clip back onto the board.
The wax creates quite a bright, intense gold colour so to knock that back slightly and create the rust effect, I used added a smear of Translucent Grit Paste over the top. Once dry, I used the dry brushing technique and applied layers of Black Soot and Crackling Campfire Distress Paints over the top of the pasted areas, drying the paint in between each application. If you use too much of any colour, just dab away any excess with a dry cloth.
Build up the colour as much as you want and once happy, allow for the paint to completely dry before attaching the 'Exchange Coin' in the centre of the clip. I altered the coin, which is from the Odds and Ends idea-ology set, using a little Salvaged Patina Distress Paint and then rubbed away the excess paint with a soft cloth before adhering it with Matte Collage Medium.

The board is now ready for the next layer ~ the tag.
TAG
Using a size 8 Etcetera Tag and a Size 8 Mixed Media Heavystock tag, I started by applying a layer of Translucent paste through the Digits Layering Stencil, applying the paste onto one side of the card tag, and then setting this to one side to dry.
Once the medium is dry, I spritzed a combination of Ground Espresso, Salvaged Patina, Speckled Egg, and Frayed Burlap Distress Spray Stains and Speckled Egg Oxide Spray before machine stitching the border around the outside of the inked tag.

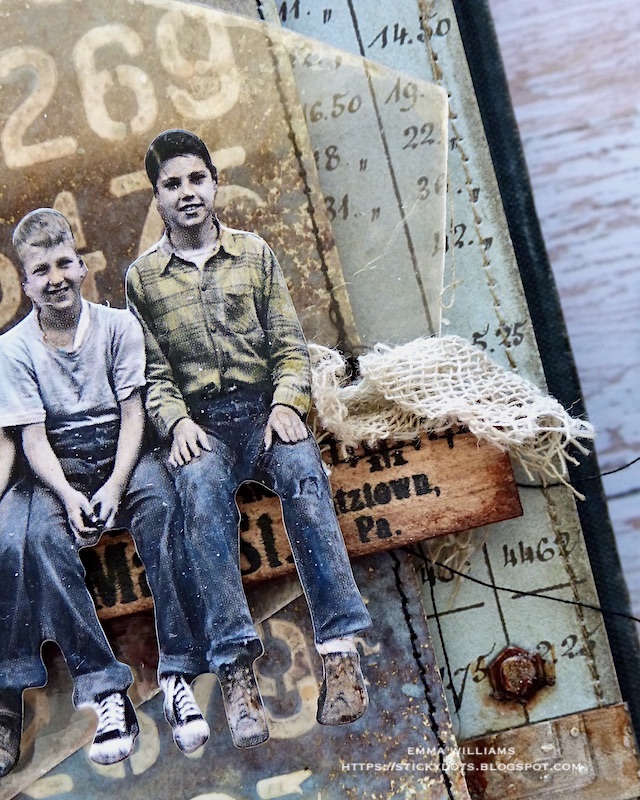
I adhered the inked tag to an Etcetera Tag to form a thicker base to work on and then attached the completed tag to the clipboard, using Matte Collage Medium. You can see the dimension and layers in the photo below.

With my tag in place, I adhered a snippets Ephemera Number Strip on the left hand side, which I placed vertically down the side of the tag.

To complete the board, I added some strips of embossed metal to either side of the tag. This was actually sitting on my desk from a previous project, so I cut a few strips down to size and adhered them to the clipboard, adding some Distress Paint to create more of a rusty appearance.

LAYERS AND EMBELLISHMENTS

Now to build up the layers and starting with the ruler piece. I broke one end of the ruler so it would fit the board. After swiping Walnut Stain Distress Ink across the surface of the ruler piece, then blending the ink with a baby wipe, I adhered the ruler piece to a piece of Mica and attached this to my tag, placing the adhesive so it will be behind all the embellishments and you won't see it on the finished piece.
On left hand side of the Ruler piece, I added a Gauge Frame, complete with a Gauge Dial inside. The metal frame is altered with Crackling Campfire and Black Soot Distress Paint to create the rusty colour tone and I attached it over the top of the dial. I then attached a hardware Head in the centre and using foam pads, placed it onto my board.
In the centre of the dial, I added an arrow. This comes from the Quill and Arrow Adornments set and all I did was paint it with Candied Apple Distress Paint before attaching it to my metal frame.

After colour tinting the Mini Paper Doll by watercolouring them with Distress Crayons, I then attached the boys, using foam pads to add height, and placed them so that they sit on my ruler piece. Look at that dimension and layers that the foam brings to this piece.

Finally, I added some Mummy Cloth, dyed with a little Frayed Burlap distress Stain, and placed this either side of the embellishments.
FINAL DETAILS
Now for those all important details...
At the bottom of the tag, I added a Numeric number 3, painted with Candied Apple Distress Paint and placed a star adornment next to it. I altered the colour of this piece using the Gilded Foundry Wax, applying it the same way as I did when I altered the clip on the board.

I then adhered a Story Stick, No.365 to the top left hand corner. The number is highlighted with Picket Fence Distress Crayon before I wrapped some twine around the hole.
At the top of the tag, I hammered some Tack Nails into the board. I didn't hammer them all the way, just so they are secure and when I was doing this, the nails bent ~ I obviously don't know my own strength ~ but I did like the look of them wrapping around the tag, so I purposely did the same on the other side.

I attached some Hardware Heads in the bottom corners of each side of the board, and one on the bottom left corner of the tag...

...and then, altered all the metal I've attached using Black Soot, Salvaged Patina, Antiqued Bronze and Crackling Campfire Distress Paints.
Finally, I attached a Hook Clasp to the clip at the top of the tag.

So, that completes my make and I hope you've enjoyed the walk through of how I created this piece and all the techniques I've used!
As always, if you make anything, or if you've been inspired by anything that you've seen here on my blog ~ then please, let me know by tagging me on social media or leaving a comment here and I will be right over to take a look!
Don't forget that every week, one lucky random participant has the chance to win a $25 gift voucher from Simon Says Stamp and you can join in up to 5 times, which means you could have 5 chances to win. You have until next Monday at 8am Ohio time. 1pm UK time, 2 pm CET to join in and good luck....


Recipe for project:


An absolutely stunning piece, Emma - lovely to hear all about how you made it.
ReplyDeleteAlison x
Love all those yummy details!
ReplyDelete