
Hello friends...
How was your weekend? Hope you all had a great one and ready for the week ahead and a brand new Simon Says Stamp Monday Challenge. This week, we are showcasing the amazing products of the one and only Tim Holtz with our MASCULINE theme and we hope you'll join us and play along!
For my make, I chose to create a plaque that is actually an altered Etcetera Tag and I will be taking you through how I made this piece using idea-ology and Ranger Ink products.

So let's get started, it's time to get creative!


TICKET SHAPED PLAQUE
We'll begin with the substrate that I used and for this you will need a Small Etcetera Tag. In the pack you get three tags but you will have already noticed that this surface isn't just a regular tag, it's been turned into a ticket shape plaque. To create this shape, I took two of the tags and placed one over the top of the other, flipping it 180°, so that the top of each tag is opposite one another and the tag on the top will form a template.
Holding the tags firmly in place, I used a pencil to mark where I will need to cut away the corners of tag on the bottom so that I can create the ticket shape. Using a craft knife, I cut the corners off the tag ~ this will take a little bit of effort to get through the layers but but you will get there in the end.
After sanding the edges of tag to smooth them down, I painted the surface with Black Soot Distress Paint.

Once the paint was dry, I sanded back the edges to create more of a vintage feel before I applied Statue Foundry Wax, using my fingertip, (or a brush as recommended if you have skin sensitivities) and just added smears of the wax to the board. Heat set with a heat tool.

My surface is ready and now I moved onto the next stage ~ background!

BACKGROUND LAYERS
For the first layer, I used Distress Spray Stains to create a patina effect for the background. I cut a panel of Distress Watercolour Card approximately 16cm in length, but slightly smaller in width, so it will allow for a border around the edge.
After spritzing the cardstock with a light misting of water, I then applied and layered my sprays ~ Salvaged Patina, Crackling Campfire and Vintage Photo Distress Stains and Salvaged Patina Oxide Spray. Spritz a little more water over the top and allow for the colours to blend before heat drying, or allowing to dry naturally.
I inked the edges of my panel with Walnut Stain and Rusty Hinge Distress Inks.

After cutting away the corners at the top, I machine stitched around the edge and then adhered the tag to my plaque. I used Matte Collage Medium as my choice of adhesive throughout this make.
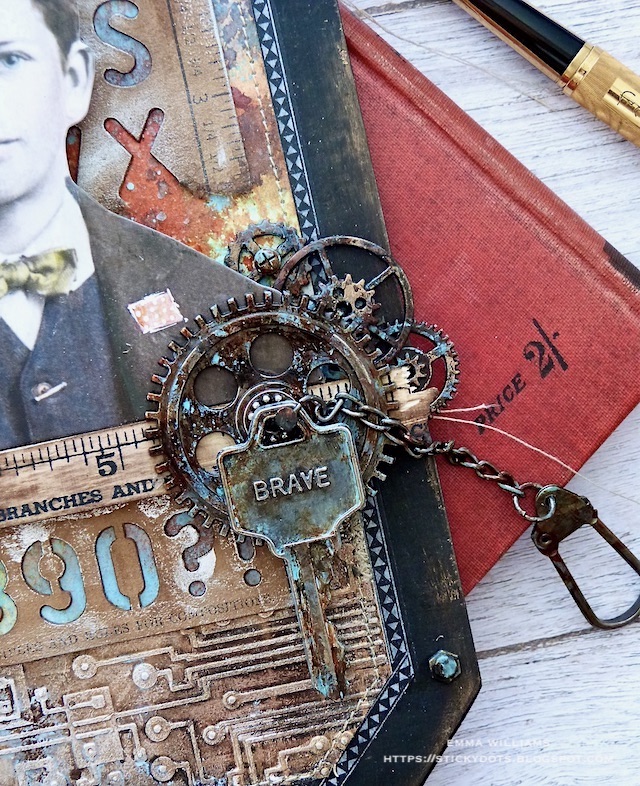
Across the bottom section, I wanted some texture, so I used the Circuit 3D Embossing Folder to emboss a panel of silver metallic kraft stash. I cut this down to size, again cutting the corners away so that it will reflect the shape of my plaque. To add the rusty appearance to the embossed panel, I applied some Black Soot Distress Paint, allowed it to go slightly tacky before wiping away the excess. Some of the paint will remain and accentuate all the detail of the folder. I then repeated this using Ground Espresso Distress Paint, again wiping away the excess and always drying the layers between applications. Finally I applied a very light layer of Antiqued Bronze Distress Paint, just dry brushing this over the top.
I machine stitched around the edge before attaching it to my plaque.

To frame the background layers, I used Design Tape Trims, which I just applied around the edge of the inked panels.

For my final layer, I used one of Tim's Stencil Cards. I tore off the bottom section of the card, about two thirds down and then applied some Sterling Foundry wax over the surface of both pieces. I heat set the wax and then inked over the top with Walnut Stain Distress Ink.

Attach the torn Stencil Cards to the background, placing the two pieces so that they do have a slight gap in the middle to elongate the appearance.
We're now ready for...
EMBELLISHMENTS
I used a Paper Doll Portrait, (I called him Johnny, just because I always love to give these images a name, it makes them come to life for me), which I colour tinted with Distress Crayons and added white pen work to highlight the handkerchief in his pocket.
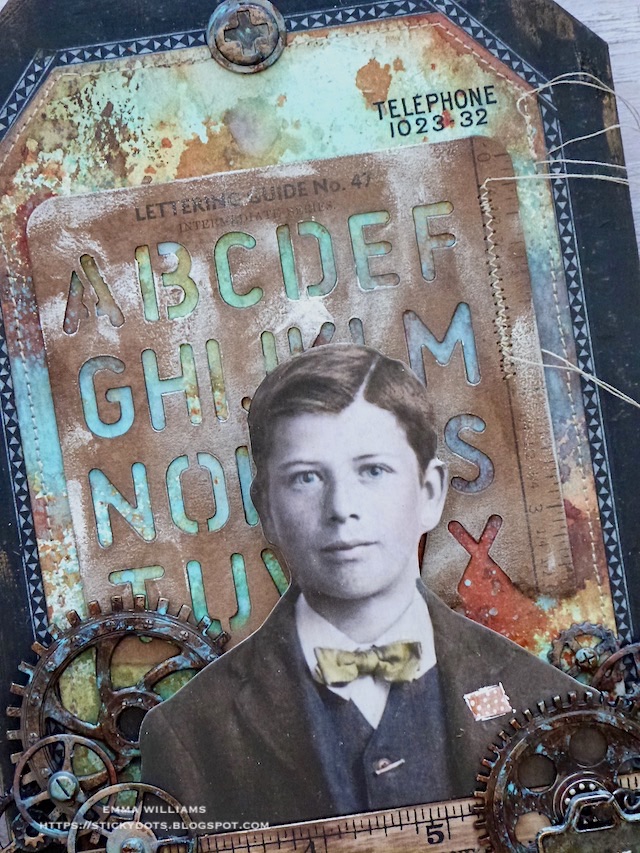
I then took a Ruler Piece, snapped off both ends and ran the Walnut Stain Ink Pad over the surface of the wood to colour it. Using a baby wipe, I blended the ink to create the stain.

I attached the ruler and Johnny, the Paper Doll portrait to my background layers, using foam pads to add height and then surrounded the image with a combination of Industrial Gears Sprocket Gears and Mini Sprocket Gears.

Each of the gears are given a rusty appearance using a combination of Black Soot, Salvaged Patina, Rusty Hinge and Antiqued Bronze Paints, before I applied a touch of Statue Foundry Wax over the surface.
I then layered each gear to create the clusters around the image.

In the grouping of gears on the right, I also attached a Word Key, BRAVE to the arrangement.
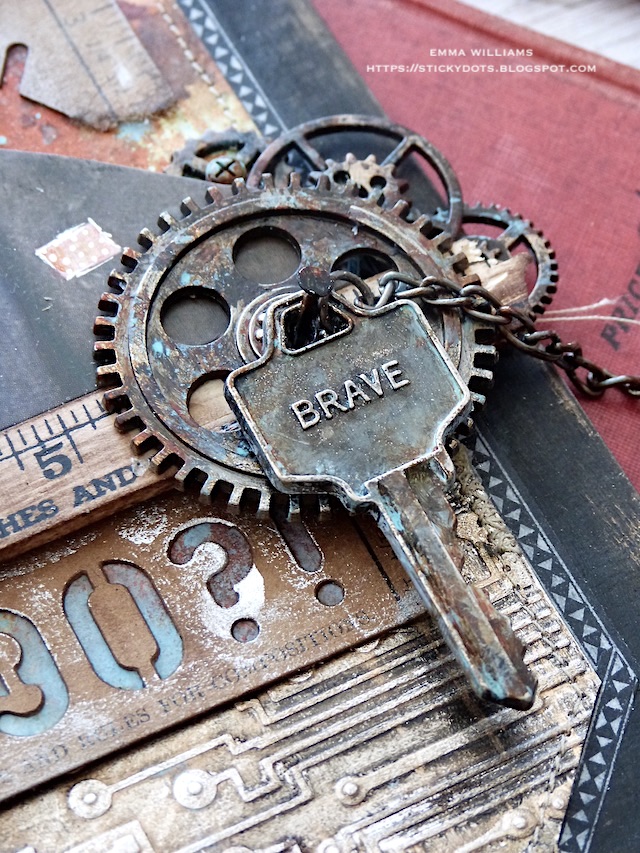
Again I added the rusty appearance before attaching it to a Swivel Clasp, that I just let hang loosely on the side.

Finally, I added some tiny details...
...a clippings sticker with the quote "be happy'.

A Tel No. Remnant Rub from the Eccentric Set in the top right corner.

One of the Machinery Heads was attached at the top...

...and Hardware Heads on either side towards the bottom.
As a finishing touch, I used a Vintage Clip, altered with a little Black Soot Distress Paint and the Statue Foundry Wax. I clipped this to the bottom edge of the tag.

So that's my make finished for this week, and I hope you love what I've done and the techniques I've used. which can also be used with a family photo, to make it more personal, the ideas are endless and I hope you'll give it a try.
As always, if you make anything, or if you've been inspired by anything that you've seen here on my blog ~ then please, let me know by tagging me on social media or leaving a comment here and I will be right over to take a look!
Don't forget that every week, one lucky random participant has the chance to win a $25 gift voucher from Simon Says Stamp and you can join in up to 5 times, which means you could have 5 chances to win. You have until next Monday at 8am Ohio time. 1pm UK time, 2 pm CET to join in and good luck....


Recipe for project:


No comments:
Post a Comment
Thank you for all your comments and messages, they are all appreciated and I hope you'll come back and visit again soon...
Emma ~xx