
Hello everyone...
Happy Monday and welcome to the start of a brand new week over on the Simon Says Stamp Monday Challenge. This week our theme is celebrating ANY HOLIDAY OCCASION and the DT are showcasing Visible Image products within their makes, which I combined with Tim Holtz!
So as we say a sad goodbye to Halloween, it's time to start concentrating on all things Christmas and yes, the weather outside is truly frightful, at the moment we have rain, rain and more rain and the wind is howling but here in my own little crafty space, it's time to let it snow and with this in mind, I decided to create an Stampers Anonymous Etcetera tag that features the gorgeous Mr Frost and his little feathered friend, Woody the Woodpecker!


So let's get started and here's how I created my tag to celebrate the start of the festive season...

To begin with I'd like to introduce you to Mr Frost and Woody...

To make this I cut all the pieces of Mr Frost from Distress Watercolour card. I assembled the pieces adding colour to the layers as I built them up. On the base layer, I used Speckled Egg Distress Ink to add a touch of blue, layered the next die cut piece over the top.
For the next layer, which has the little die cut eyes and buttons cut into it, I applied some of the Snowfall Grit Paste over the surface to create a snowy icy look and once dry, I placed the die cut over the top of my assembled layers, but don't attach it just yet ~ at this point, I just wanted to see where I needed to add some Black Soot Distress Paint so that they show through. I used a paint brush to apply the paint and then once dry, I attached the die cut over the top, before applying Glossy Accents over each of the black holes to add some shine.

Moving onto the hat, I painted this with Black Soot Distress Paint, and the band with Salvaged Patina before assembling it and attaching it to my snowman.

The arms which I cut three times, just to make them a little thicker and more substantial are inked with Walnut Stain Distress Ink, then attached to either side and now all that's left to do is add the carrot nose, inked with Spiced Marmalade and Fossilized Amber and attached at a slight angle.

Now, no snowman is complete without a scarf and you can of course use the die cut one that comes with the die set but I wanted a little more texture, so I created a Mummy Cloth scarf. Cutting a strip of the cloth and dying it with Candied Apple Distress Spray Stain. Once the cloth was thoroughly dry, I wrapped it around the snowman's neck and tied it with a knot, allowing the scarf to drape.

I then added a touch more grit paste around the nose and the armband also added some to his hat, together with Mica Flakes to create a frosty, icy feel.
For the adorable little woodpecker, I used the Cozy Winter Thinlits Die set and cut all my pieces from Mixed Media Heavystock card before inking and watercoloring them with Distress Inks and Distress Paints. Walnut Stain and Speckled Egg Distress Ink on the body, Candied Apple on his tail feathers and plume and Black Soot.
I assembled the little bird by layering all the coloured die cut pieces together and perched him on the snowman's arm, supporting him from behind with a little bracket so that he has dimension and really stands alone without bending.

Now that we have Mr Frost and woody finished...

...it's time to create the background and for this I used Mixed Media Heavystock card cut to the same size as the Mini Etcetera Tag. After I spritzed the card with a light misting of water I began misting the following sprays over the surface and blending them with another misting of water:
Speckled Egg Distress Spray Stain
Ground Espresso Distress Spray Stain
Antique Linen Distress Spray Stain
Frayed Burlap Distress Spray Stain
Tumbled Glass Oxide Spray
Speckled Egg Oxide Spray
After heat drying the background thoroughly, I machine stitched a border around the edge of the panel and inked the edges with Walnut Stain Distress Ink.
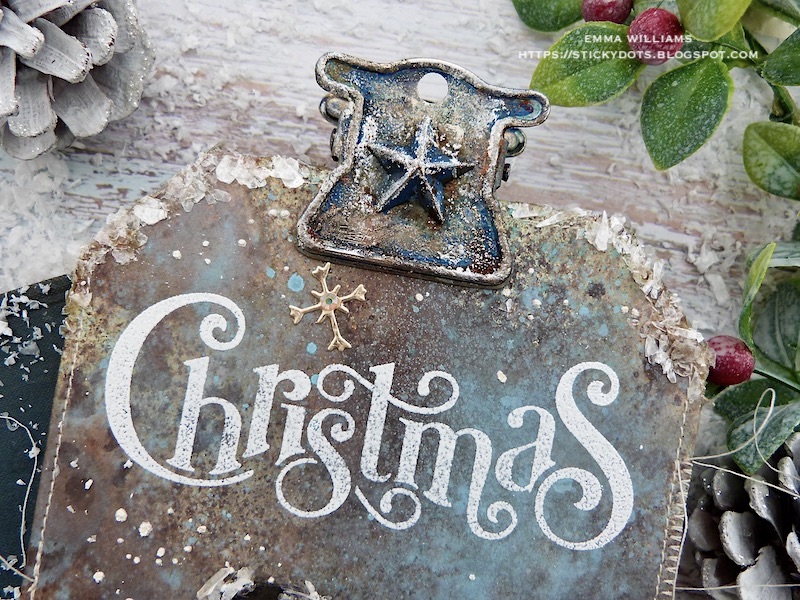
For the next step, I stamped the Christmas wording across the top and for this I used the Visible Image Classic Christmas Stamp Set and stamped just the Christmas stamp in Versamark Ink across the top of my panel. I then sprinkled with SSS Fine Detail White Embossing Powder over the top, tapped away the excess and heat embossed until molten.

I adhered the background to my tag with Matte Collage Medium and then to add the light dusting of snow, I applied Grit Paste through the Speckles Layering Stencil, adding it around the Christmas wording and then allowed it to dry.

Now to create those icy snow drifts and for this I used the die from one of Tim's older Sizzix sets, Home For the Holidays and I cut four layers of the hills from Distress Watercolour card. I then layered each of these over one another, slightly offsetting them to create more dimension and attaching each one with foam pads before attaching them along the bottom edge of my tag.
For the icy look to them, I used a combination of Mica Flakes and the Snowfall Grit Paste from the Holiday Texture Set and applied the paste along the tops of the hills, allowing this to dry before adding the Mica Flakes over the surface of each hill, attaching them with a thin smear of Matte Collage Medium.

At this point, I also added some Mica Flakes along the top edges of the tag, attaching them with Glossy Accents.
I nestled Mr Frost into the snowcapped hills and added Woody, attaching him to one of the snowman's arms, and placing a little support behind him for extra stability.
I added some die cut snowflakes to the background, once again these are from the Cozy Winter Thinlits set and cut from metallic kraft card. I then attached them with matte Collage Medium and added a gem to the centre of each flake.

To complete the scene, I added a clippings sticker, Let It Snow and placed this on the right hand side, adding a small touch of Grit Paste onto the top edge.

All that's left is to add the clip at the top.
For this I used one of the Vintage Clips. Finally, I wanted to use one of the gorgeous clips at the top but it needed a little bit of altering, so I started by adding a Star Adornment to the centre of the clip, attaching it with Matte Collage Medium. I then applied some Prize Ribbon Distress Paint to the surface, removing some of it with a paper towel but allowing hints of the remainder to add colour to the metal. Once dry, I then added a final touch of colour using Alchemy Waxes applied directly to the surface ~ I used Vintage Gold, Rusty Red and Pearl White.

So that completes today's project and I hope you love what I've made....it was such a fun make and I absolutely adore Mr Frost, he will definitely be coming back for a return appearance on a future project!

As always, if you make anything, or been inspired by anything that you've seen here on my blog ~ then please, let me know by tagging me on social media or leaving a comment here and I will be right over to take a look!
Don't forget that every week, one lucky random participant has the chance to win a $25 gift voucher from Simon Says Stamp and you can join in up to 5 times, which means you could have 5 chances to win. You have until next Monday at 8am Ohio time. 1pm UK time, 2 pm CET to join in and good luck....


Recipe for project:


this is just charming!!! So nostalgic!
ReplyDeleteLove it!!! I also like that you refered to the bird as Woody Woodpecker...I was begining to think no one else remembered him...LOL. Fun stuff and will deifinitely enjoy seeing Mr. Frost again soon on another project...
ReplyDeleteThis is so fabulous! The background with the sprays is so yummy!
ReplyDeleteI Love this tag! Such wonderful inspiration :)
ReplyDeleteLove absolutely everything about this tag!!! Incredible!
ReplyDeleteLove this tag and especially Woody Woodpecker. Thanks for the detailed instructions.
ReplyDeleteLove love your snowman n woody!! Background is terrific.
ReplyDeleteHi Emma! I created this tag and I was not able to tag you.
ReplyDelete