Showing posts with label new year. Show all posts

Monday, 1 January 2024

All That Jazz....

Happy New Year!

Hope you all had a wonderful Christmas and Festive Holiday season and I hope you're now ready for 2024, which I can guarantee is already going to be an exciting Tim Holtz making season!

Today the Simon Says Stamp Monday Challenge team are back after their break and we have a brand new challenge starting today, which is appropriately called A NEW START! So, whether you received new goodies for Christmas, want to make a new year card or just want to try a new technique, then this is the challenge for you and we hope you'll join us and play along! The DT are showcasing the products of Brutus Monroe.

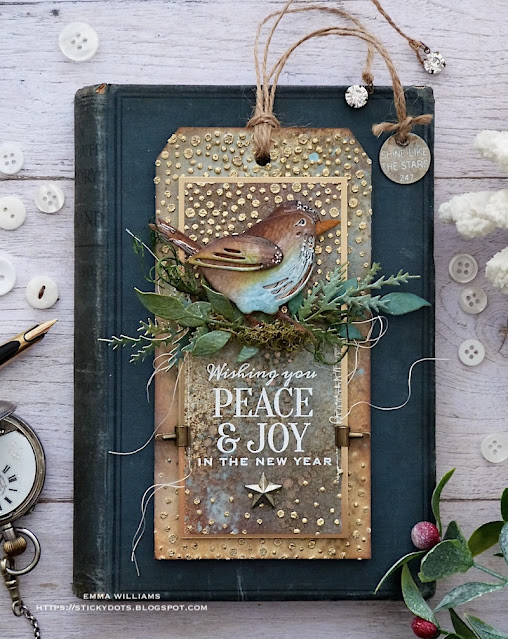
For my make, I chose to create a card to celebrate 2024 and all those new adventures that a new year, and new start bring with it and I combined products from Tim Holtz, Sizzix and Stampers Anonymous with a Brutus Monroe stencil to create my 1920's inspired card...

It's time for that new start, new year and a brand new challenge....

This gold card base measures 21 x 12.5cm and uses a Size 8 tag which I mounted onto the stencilled background panel. I'm hoping the photos do the gold embossing justice, but UK weather hasn't been the best and some of the shimmer and shine has been lost.

ENAMELLED STENCILLED BACKGROUND

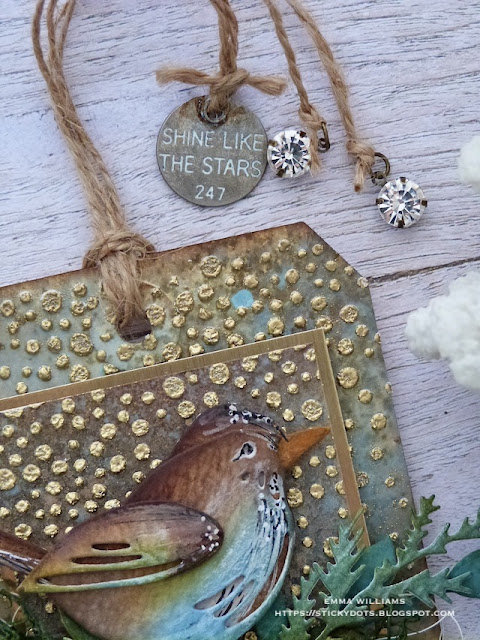
To begin with I cut a piece of Distress Black Heavystock card measuring 19.5 x 10cm and I placed the Macrame Stencil over the top before applying Translucent Grit Paste through the design. After removing the stencil and working quickly, I sprinkled Gold Embossing Powder over the top and set the panel to one side to dry.

Once the paste feel firm to touch, I heat embossed the powder on a very low setting. You can build up the heat if you want, but be careful not to overheat the paste as this will cause it to bubble.

Once the powder had become molten and glossy, I attached the panel to a piece of black card, followed by gold metallic kraft card. I used foam pads to mount this onto a further panel of black card, that had a border which I machine stitched around the edge and finally attached the panels onto my gold card blank. The background is now complete and ready for the tag.
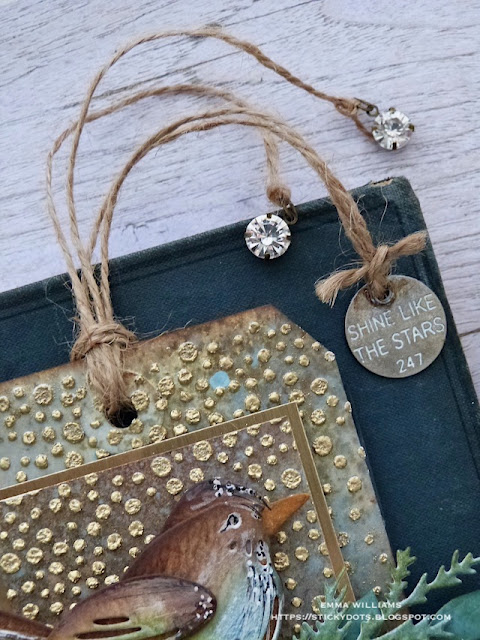
TAG

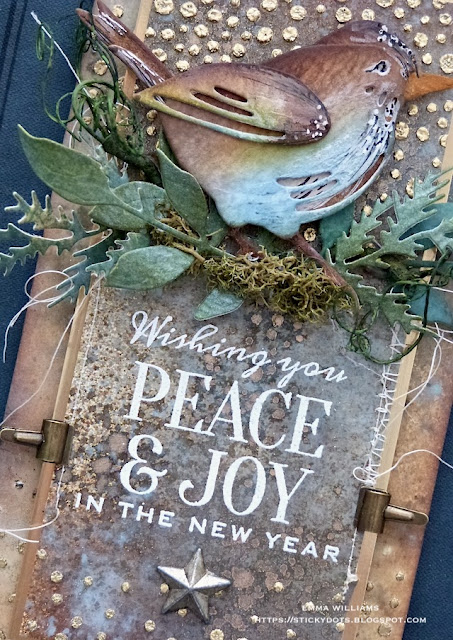
For the tag, I began by misting the tag with water and then adding the colour, and used Distress Spray Stains and Oxides Sprays in the following colours:

DISTRESS SPRAY STAINS: Speckled Egg, Uncharted Mariner, Walnut Stain and Stormy Sky

OXIDE SPRAYS: Speckled Egg, Broken China

MICA SPRAYS: Unravelled

After another mist of water, and a few flicks of both colours of Oxide Sprays, I heat dried the tag thoroughly.

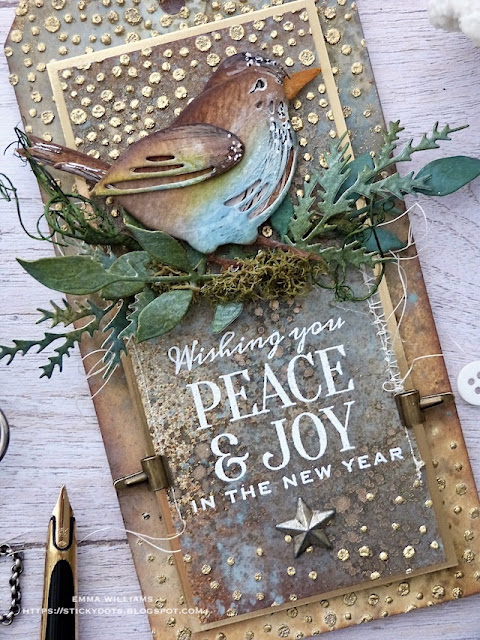
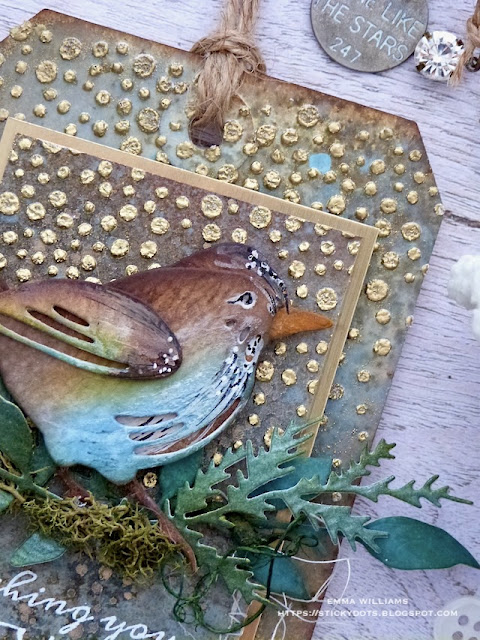
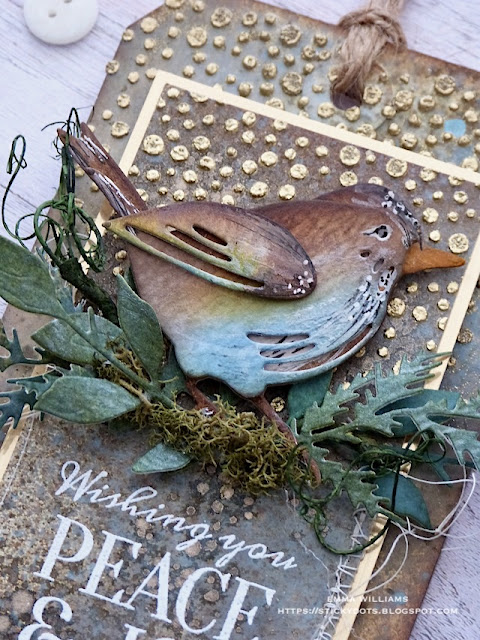
Making sure my tag was dry, I then applied Crackle Paste through the Stampers Anonymous Falling Stars Layering Stencil, and whilst the paste was still wet, I sprinkled a combination of Distress Glaze over the top. These include:

Fossilized Amber, Speckled Egg, Salvaged Patina and Broken China

I just randomly sprinkled each powder to create the colour on the background. Tap away the excess, and again set the tag to one side to dry before heat embossing the powder, until it becomes molten.

After inking the edge of the tag with Walnut stain Distress Ink, I then machine stitched a border and matted it onto black kraft card. I then mounted the tag onto the centre of my card blank.

At the top of the tag, I placed an Index Clip idea-ology piece and then added a Hardware Head to the centre. Both pieces are altered with a touch of Distress Paint; Black Soot, Crackling Campfire and Antiqued Bronze.

We're now ready to embellish the tag and to add all that jazz....
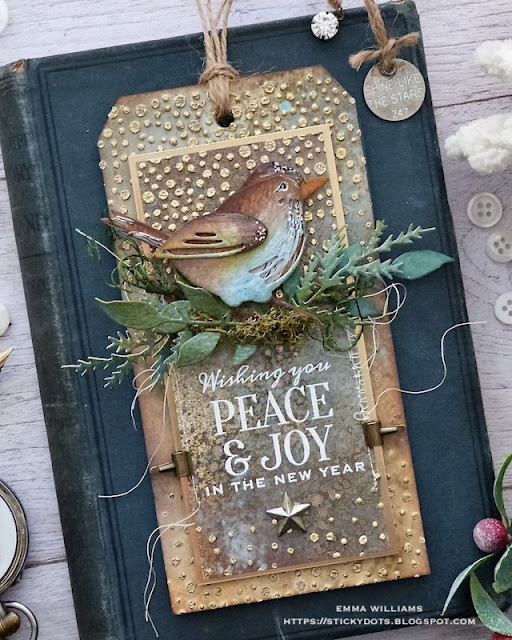
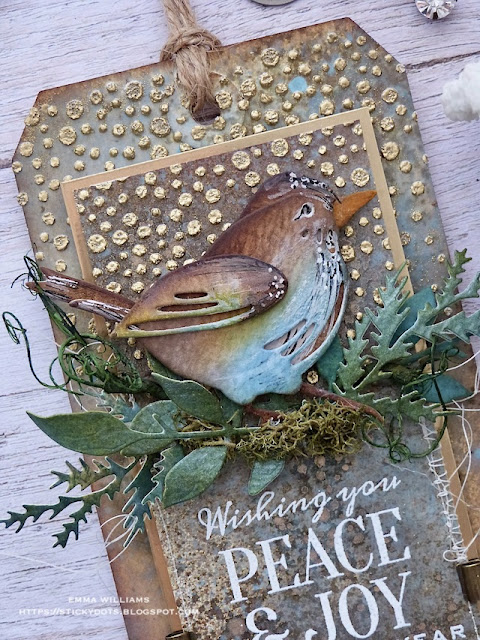
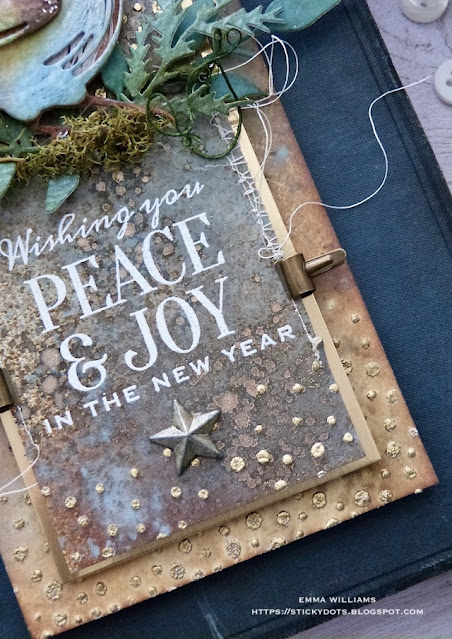
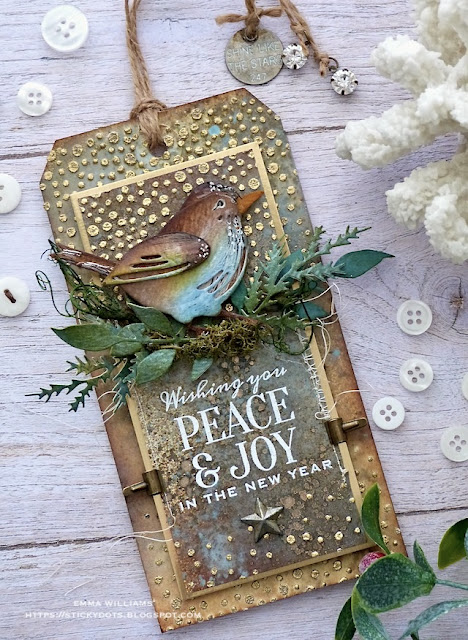
SENTIMENT

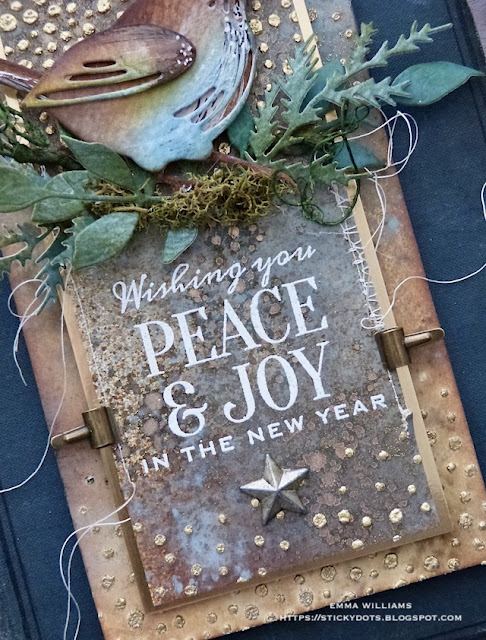
The sentiment is stamped onto a die cut circle of mixed media heavystock card which I coloured with the same sprays as I used on the background.

I then used clear embossing ink to stamp the sentiment from the Festive Overlay stamp set in the centre. You will notice that I masked off the 'in the new year' part from sentiment.

Sprinkle gold embossing powder over the top and then heat emboss until molten. I then flicked a light coverage of gold paint over the circle before matting it onto a mount which is cut from gold metallic kraft card, using the Seal Die and Switchlits Embossing Folder.

I then mounted the sentiment onto my tag, using foam pads.

TAILORED

For the hat and suit, I used the Tim Holtz Tailored Die Set from Sizzix and cut all of my pieces. I chose a black suit, black top hat and red accessories, but you can choose whatever colours you prefer. For the bow tie, I added polka dots with a white pen.

As a final touch I added a tiny vintage metal bead onto the shirt and a gold adornment star onto the hat.

I then used foam pads for height to attach the pieces to my tag.

2024 STARS

The stars across the bottom of the tag, are all cut using the largest die from more of the card that I used for the sentiment and I used the the Falling Stars die set. I then layered each star over gold metallic card again cut with the same die, to create a drop shadow and outline.

I then attached them in a swathe across the tag using various depths of foam pads.

On each star, I added the numbers, 2024, again cut from gold Metallic kraft card using the Alphanumeric Bold Thinlits dies and layered these onto the stars.

FINISHING DETAILS

For the final details, I added Hardware Heads painted with Candied Apple distress Paint for a chippy vintage look and placed these in each corner of the card....

...and finally I added the Metallic Sticker, The Adventure Begins beneath the 2024.


So, that's my card ready for 2024 and I hope you've loved the tricks and techniques I've used to create it.

As always, if you make anything, or if you've been inspired by anything that you've seen here on my blog ~ then please, let me know by tagging me on social media or leaving a comment here and I will be right over to take a look!

Don't forget that every week, one lucky random participant has the chance to win a $25 gift voucher from Simon Says Stamp and you can join in up to 5 times, which means you could have 5 chances to winYou have until next Monday at 8am Ohio time. 1pm UK time, 2 pm CET to join in and good luck....


Thank you so much for taking the time to stop by today and Happy 2024 ~ I hope it brings you everything you wish for!

Love Emma xxx

Recipe for project:

Tim Holtz/Stampers Anonymous: Falling Stars Layering Stencil, Festive Overlay
Distress Paint: Candied Apple, Black Soot, Crackling Campfire and Antiqued Bronze
Tim Holtz Oxide Sprays: Speckled Egg, Broken China
Mica Spray: Unravelled
Distress Spray StainsSpeckled Egg, Uncharted Mariner, Walnut Stain and Stormy Sky
Distress Glaze: Fossilized Amber, Speckled Egg, Broken China, Salvaged Patina
Distress Ink: Walnut Stain
Hot Glue Gun

****These are not affiliate links****

Monday, 3 January 2022

Happy New Year...

Happy New Year friends!

Well, I can't quite believe how fast Christmas seemed to go!!! It's crazy to think that it's two weeks since we were all so excited and now, it's all over and it's time to take all the decorations down and pack them away! 2021 was definitely a year that many of us will never be able to forget, one where we saw so much change in how we go about our daily lives and for some of us, it was a very challenging year. I just hope that 2022 brings everyone much more happiness and joy!

So with a brand new year, comes a brand new year of Simon Says Stamp Monday Challenges and here we go with the first challenge of 2022! This week our theme is called, Something New and the DT are showcasing Carabelle Studio products within their projects, which is something that you don't have to do to join us and play along.

For my tag, I wanted to celebrate what I hope will be a very happy and safe new year and used a stencil from Carabelle Studios, together with Tim Holtz and Simon Says Stamp products to make a project to wish all my followers Peace & Joy in the year to come!

So let's get started and here's how I created my tag that features a little bluebird of hope...

To begin with I took a Size 8 tag that I used as a base, misted it with a light shower of water and then used the following Distress Spray Stains and Oxide Sprays to add colour:

Old Paper, Antique Linen, and Pumice Stone Distress Sprays

Speckled Egg Oxide Spray

I added more water to blend the inks before I heat dried them ready for the next stage.

After placing the Constellation Stencil onto my tag, I used the straight part of the stencil, not the circular section, I applied Grit Paste at the top and bottom of the tag, using a palette knife. Whilst the paste was still wet, I sprinkled gold embossing powder over the top and then set the tag to one side, allowing the paste to dry and the powder to set slightly.

Once the paste is finger dry, I then heated the embossing powder ~ you need to do this very carefully, as you don't want to overheat the paste as this will cause it to bubble and the powder to disperse.

Once the gold embossing powder has become molten and shimmery, I inked the edges with Walnut Stain Distress Ink.

Moving onto the panel in the centre...

I inked a piece of Mixed Media Heavystock card using:

Speckled Egg Distress Spray Stain

Ground Espresso Distress Spray Stain

Antique Linen Distress Spray Stain

Frayed Burlap Distress Spray Stain

Tumbled Glass Oxide Spray

Speckled Egg Oxide Spray

A misting of water will blend the sprays and once the panel was thoroughly dry, I machine stitched down the sides of the panel and inked the edges with Walnut Stain Distress Ink.

Making sure the panel is complete dry, I stamped the sentiment with clear Versamark Ink, using the Festive Overlay Stamp Set and then sprinkled white embossing powder over the top before I heat embossed the powder until molten.

To complete the panel, I applied some more Grit Paste through the Constellation Stencil, again adding it to the top and bottom of the panel before sprinkling gold embossing powder over the top and repeating the same technique as I used on the tag.
I matted the panel onto a layer of gold card, before I mounted it onto the centre of my tag using foam pads.

On either side of the panel, I clipped two Tiny Clips.
For the adorable little birdie, I used the smaller bird from the Sizzix Feathered Friends Thinlits Dies by Tim Holtz. After cutting the pieces, I inked them to create my little blue bird of hope using Gathered Twigs and Rusty Hinge combined with Broken China and Stormy Sky. I inked the beak with Spiced Marmalade and then added highlights to the little birdie with a white pen.
Once I'd assembled the bird and attached the wing in place, I cut some foliage for him to sit on using the Festive Bouquet Die set. I cut my greenery from card that I had previous inked with various shades of green Distress Sprays. I always ink more card than I need and then have these spare pieces left over ready for another project and from memory, I think I used Peeled Paint, Rustic Wilderness and Evergreen Bough Spray Stains.
With my pieces, cut I arranged them underneath the birdies feet and added some moss to complete his little nest.
In the photo below, you can see how I shaped the foliage to create the dimension.

As the finishing touches, I added a Star Adornment underneath the sentiment, which I inked with Foundry Alloy Alcohol Ink and attached with Matte Collage Medium....
...and finally, I threaded some twine through the hole in the tag and attached some idea-ology embellishments from the ends of each piece. These included a Thought Token, "Shine Like The Stars", which I inked with a little Rust Alcohol Ink and then highlighted the wording with Picket Fence Distress Crayon, and two Antiqued Gems.
...and that completes my project for this week's Simon Says Stamp Monday Challenge!

As always, I hope you love my make this week, and enjoyed all the techniques I've used. If you make anything, or if you've been inspired by anything that you've seen here on my blog ~ then please, let me know by tagging me on social media or leaving a comment here and I will be right over to take a look!

Don't forget that every week, one lucky random participant has the chance to win a $25 gift voucher from Simon Says Stamp and you can join in up to 5 times, which means you could have 5 chances to winYou have until next Monday at 8am Ohio time. 1pm UK time, 2 pm CET to join in and good luck....


Thank you so much for taking the time to stop by today ~ stay safe, keep well and Happy 2022.
Love Emma xxx

Recipe for project:

Carabelle Studio: Constellation Stencil
Stampers Anonymous: Festive Overlay
Distress Ink: Walnut Stain, Gathered Twigs, Rusty Hinge, Broken China, Stormy Sky, Spiced Marmalade
Distress Spray Stain: Rustic Wilderness, Iced Spruce, Peeled Paint, Evergreen Bough, Speckled Egg, Antique Linen, Pumice Stone, Old Paper
Distress Oxide Spray: Speckled Egg Oxide Spray
Powered By Blogger

Total Pageviews