Showing posts with label collage. Show all posts

Monday, 25 May 2026

Love & Marriage...

Hello everyone and Happy Monday...

Hope you've all had a wonderful weekend and the sun has been shining wherever you are. As always, on a Monday, we have a brand new Simon Says Stamp Monday Challenge and this week, the DT are feeling some love in the air because our theme is all about WEDDINGS/ANNIVERSARIES. So, if you would love to join us and share your makes, then all the details are at the end of this post.

For my make, I chose to make something with a wedding theme using products from Tim Holtz, including idea-ology and Sizzix and even though I used a paper doll couple on this piece, it would be wonderful to personalise it with a precious photo and create a special gift for someone getting married, or a memory of someone who is now celebrating an anniversary of many happy years together.

So, let's get started because it's time to share how I created my tag...

TAG

To begin with I used a Mini Etcetera Tag and flipped it upside down, so the shorter edge is on the bottom.

I then covered my tag using a selection of pinks and blues from the Large Collage Strip pack. I cut these down to size, to ensure that they fit the tag and then adhered them directly onto the tag using Matte Collage Medium.

I applied a coat of the medium over the top to seal the paper and once dry, I ran my Walnut Stain Distress Crayon around the edges, and blended out any harsh colour with my fingertip.

I then attached a couple of idea-ology Ephemera pieces from the Field Notes Snippets and the Memoirs pack, adhering these to the covered tag. You can see the snippet in the top left corner...

...and the date, which I placed in the top right corner, placed vertically down the side.

I splattered the surface with some white acrylic paint, allowed this to dry and then added some gilding flakes around the edges of the tag.

The gilding flakes create a beautiful distressed look to the tag and are adhered to the project using Prima Gilding Flakes Glue. 

I applied the glue by stippling it down the edges of the tag using a fairly stiff paint brush. Allow for the glue to become tacky before applying the gilding flakes. Ensure the flakes cover all the sticky areas and buff any excess flakes away.

The tag is now complete and ready for the next stage...

LEDGE

For the ledge, I used two Etcetera Trims, one Pinked Trim and one Bracket Trim. I covered the pinked trim with some paper in my scrap box, I believe this offcut was from Backdrops Vol 5 and used the co-ordinating Sizzix die to cut the paper before adhering it onto my trim. I then painted the bracket trim with Speckled Egg Distress Paint. Once the paint was dry, I attached the bracket trim to the pinked trim to form a 'L' shape which will become my ledge.

I adhered the ledge to the tag with Matte Collage Medium.

I chose the bride and groom, from the Group Pack of Paper Dolls and colour tinted it using Distress Crayons. I attached the couple to my tag using foam pads.

Now to colour those beautiful shiny baubles around their feet and for this I used various sized baubles from the Bauble pack. 

I wanted three separate colours and used Aqua, Sherbet and Mushroom Alcohol Inks. With the selection of baubles ready, I then placed them one, by one onto the ledge using Glossy Accents to adhere them and hold them into position.

Once all the baubles were added, I walked away, had a coffee and allowed the medium to set and make sure those baubles were not going anywhere.

After my break, I added some moss and dried flower stems in amongst the baubles.

idea-ology ADORNMENTS

With the focal point completed, I moved onto my embellishments and started with the quote, 'my whole heart'. The quote token is from the Typed Tags set and I mounted this over the top of two Foliage Adornment pieces.

To add the bronzed effect to the metal, I began by adding Statue Foundry Wax directly onto the surface of the token and the foliage pieces. I then heat set the wax before applying a light touch of Sterling Foundry Wax and again heat set the wax. Finally, I applied some of the Gilded Foundry Wax to the raised areas only and heat set this.

I attached the foliage pieces to the tag, placing them so they mirror one another and then attached the token using a foam pad on the back. To complete the arrangement, I hammered a Nail Tack through the hole of the tag.

Beneath the ledge, I added a Salvaged Heart. I painted the surface of the heart with Spun Sugar Distress Paint and then once it was dry, I rubbed some Walnut Stain Distress Crayon over the top and added the word 'Love" from an older set of Tim's Remnant Rubs that I have in my stash.

I attached the heart to the tag with Matte Collage Medium and then added some Screw Heads to this bottom section, again altered with the same process as I altered the metal quote.

Finally I added some Cello Sticker Tape to the tag...

...and I completed the project by attaching a Hinge Clip complete with a Swivel Fastener and lock and key for the symbolism that he holds the key to her heart! All these metal pieces are altered with the Foundry Waxes as before.

So, that's my make complete and I hope you love the piece I've created.

Don't forget that every week, one lucky random participant has the chance to win a $25 gift voucher from Simon Says Stamp and you can join in up to 5 times, which means you could have 5 chances to win. You have until next Monday at 8am Ohio time. 1pm UK time, 2 pm CET to join in and good luck....


Thank you so much for taking the time to stop by today!
Love Emma xxx

Monday, 25 July 2022

School Days....

Hello everyone and welcome to a brand new Simon Says Stamp Monday Challenge!

This week our theme is BACK TO SCHOOL and we'd love for you to join us and play along and create a project inspired by anything that is school related.

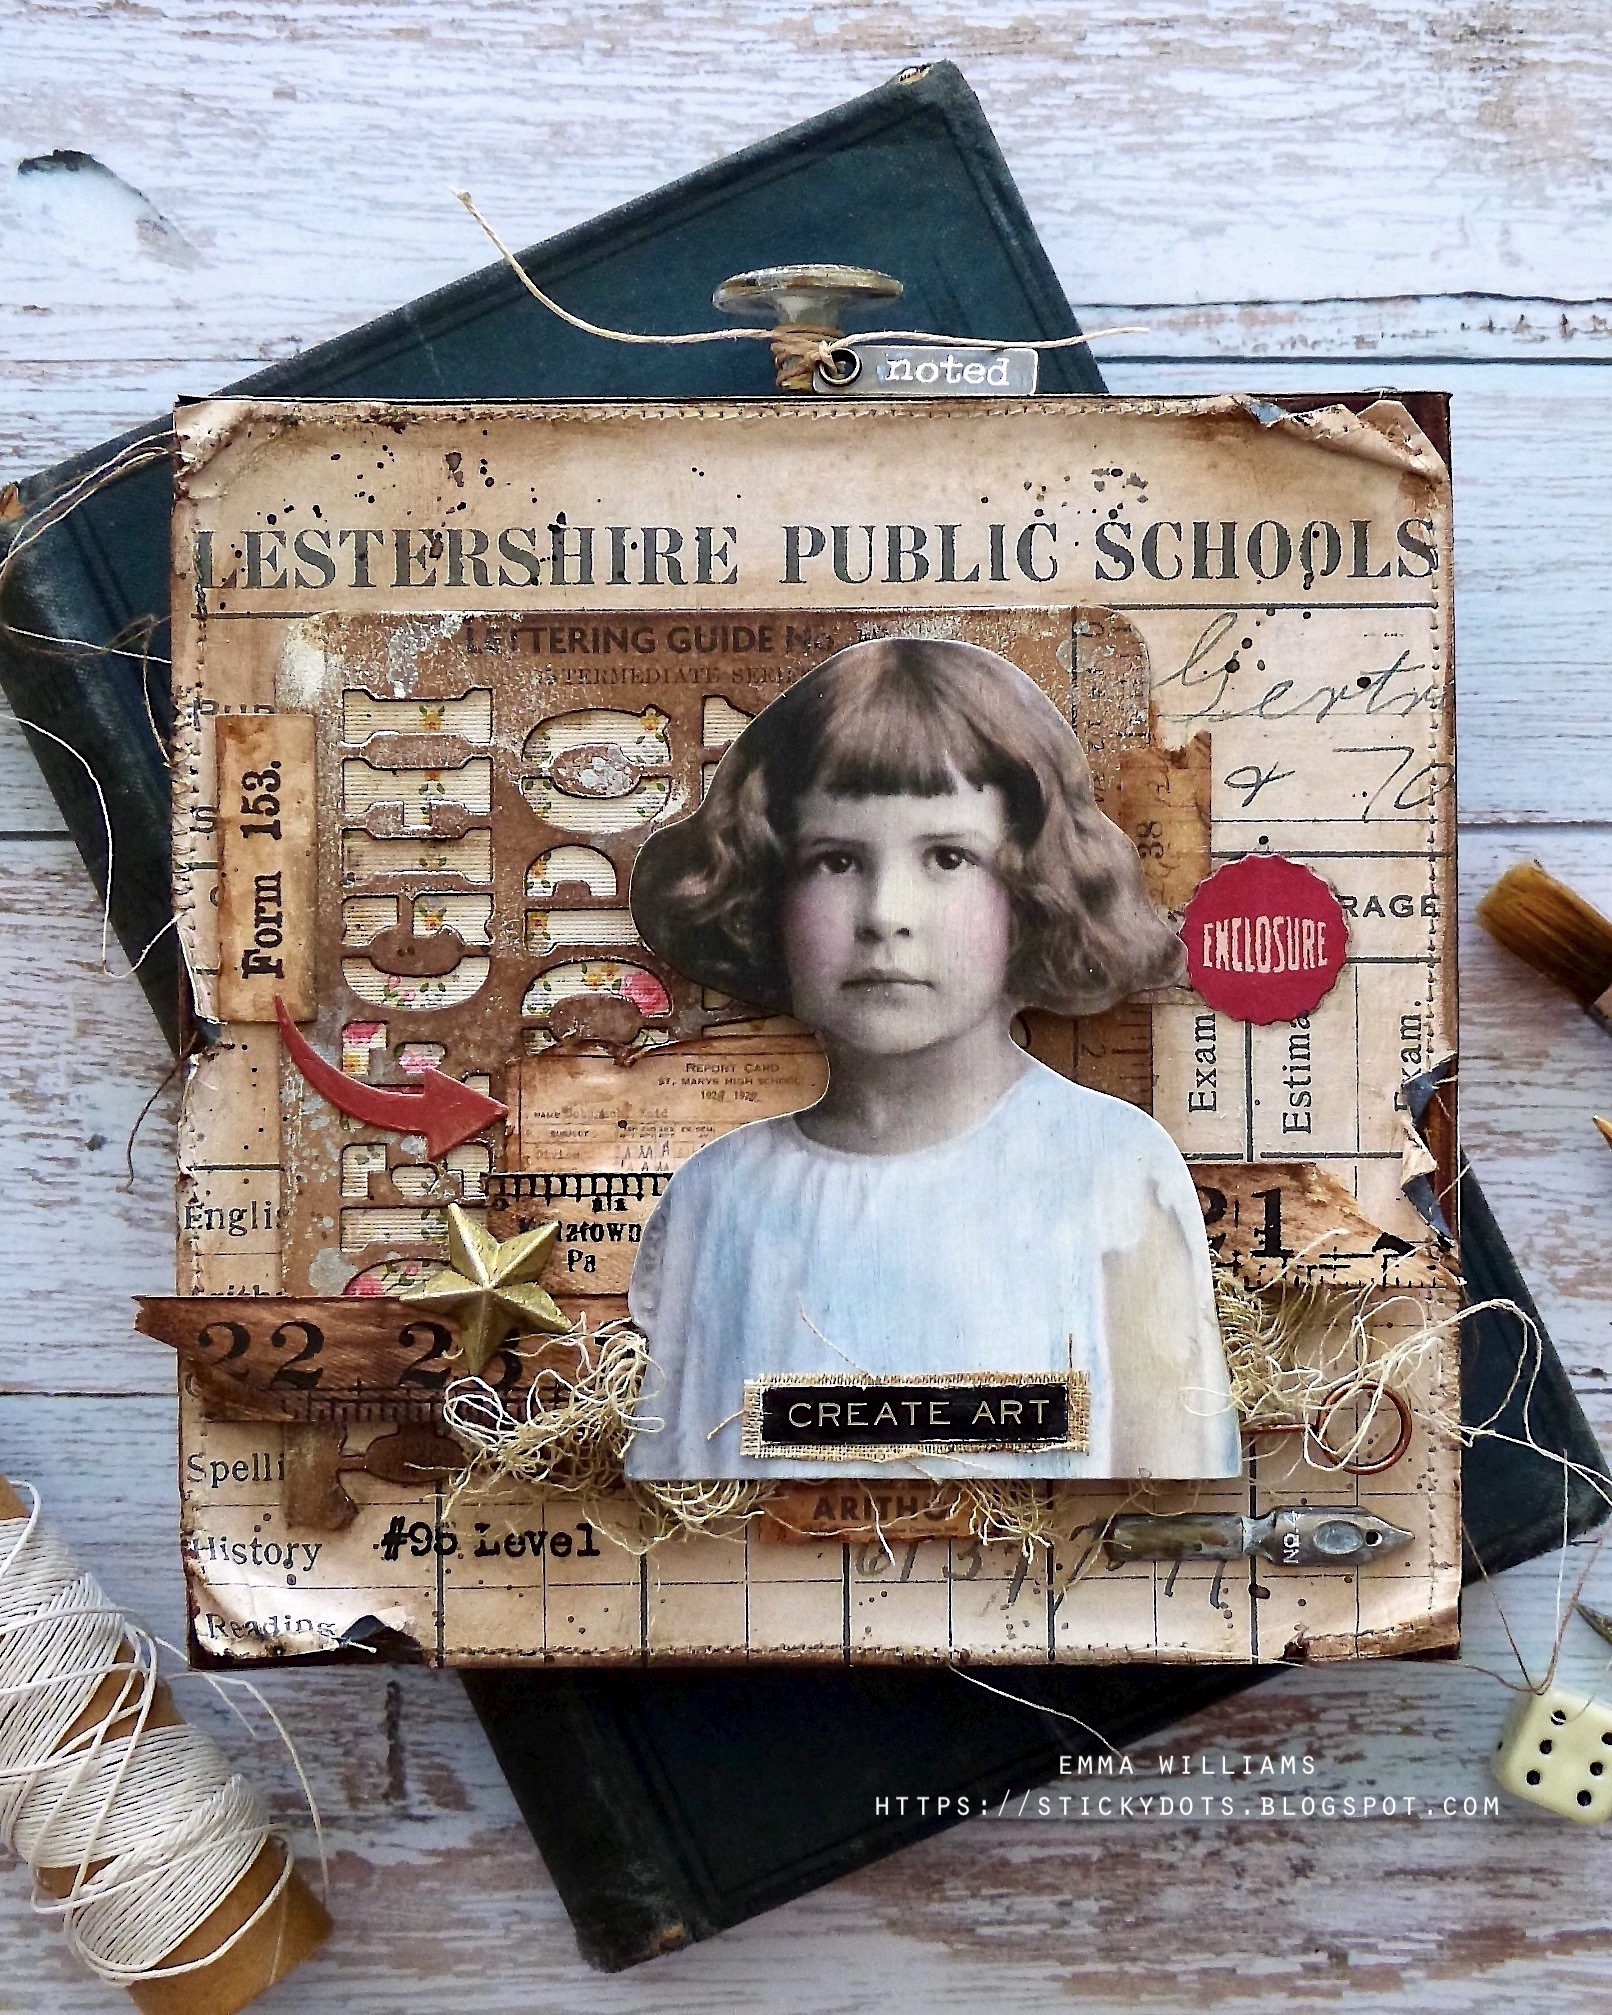
For my make, I used an idea-ology square vignette box to create my project and packed it full of everything I could find that had anything to do with this theme, from backdrop papers and rulers, to ephemera to paper dolls ~ it all came together perfectly to tell the story of one little girl who's favourite lesson was art...so, ring the bell, because it's time for class and here's how I made my vignette box...


VIGNETTE BOX

To begin with I covered the square vignette box, and this is the largest sized box of the set of 3. I cut a panel of backdrop paper, from Vol. 1 and cut the top section showing the Lestershire Public Schools heading.
I ripped and tore the edges of the paper, before machine stitching a border and adhering the panel onto the box which I flipped over to show the flat side uppermost. 

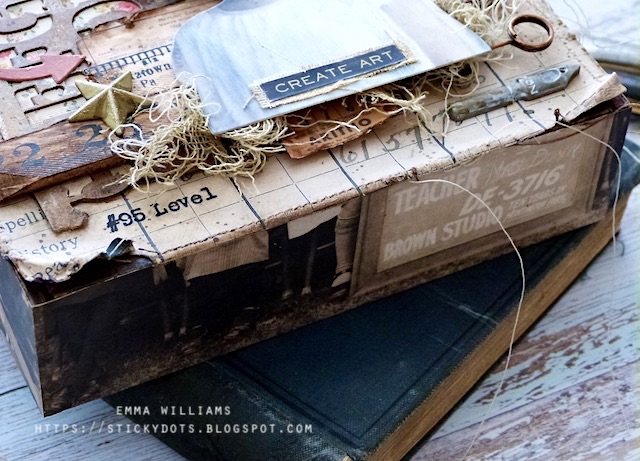
On the sides of the box, I chose another piece of paper, this time from Backdrops Vol. 3 and this showed a classroom of kids and their teacher. I'd used the reverse side on a previous project, so only had a portion of this paper left but it fit the sides and bottom edge of my box perfectly.

I adhered each of the panels into place, across the bottom...
This is the right hand side of the box....

...and this is the left.

On the top of the box, I used another strip of the Lestershire Public School paper. After applying a coat of Matte Collage Medium over the top of all the papers to seal them, I ran the Gathered Twigs Distress Crayon around the edges, and blended out any harsh lines before I splattered a little Black Soot Distress Paint over the top and front, and set it to one side to allow it to dry thoroughly.
With my box covered, I moved onto the next stage...the collage section on the front.

COLLAGE

As I mentioned, I sorted out all my school related idea-ology pieces and then just played with them to create the focal point.

I started with the stencil card that sits behind my image, and for this I used a stencil card. I roughly tore the bottom section of the card, to reveal a raggedy edge and then I applied a little bit of Sterling Foundry Wax over the surface, concentrating on the edges. After heat setting the wax, I flicked some Speckled Egg Oxide Spray across the surface, heat dried the droplets before using a blending tool to apply Walnut Stain Distress Ink. I then misted the card with water, dabbing away the excess.

I matted my stencil card over the top of some Worn Wallpaper and then mounted this onto the front of my box, placing it on the left hand side.
Next comes the rulers and the ephemera pieces...

I broke two rulers into pieces, and coloured them by swiping a Walnut stain Distress Ink pad across the surface. I then blended the ink with a baby wipe before I arranged them across the box, together with some Snippets Ephemera pieces that I placed at the top and bottom of the arrangement. All the ephemera is inked with Walnut Stain Distress Ink to add more of a vintage feel to the paper.

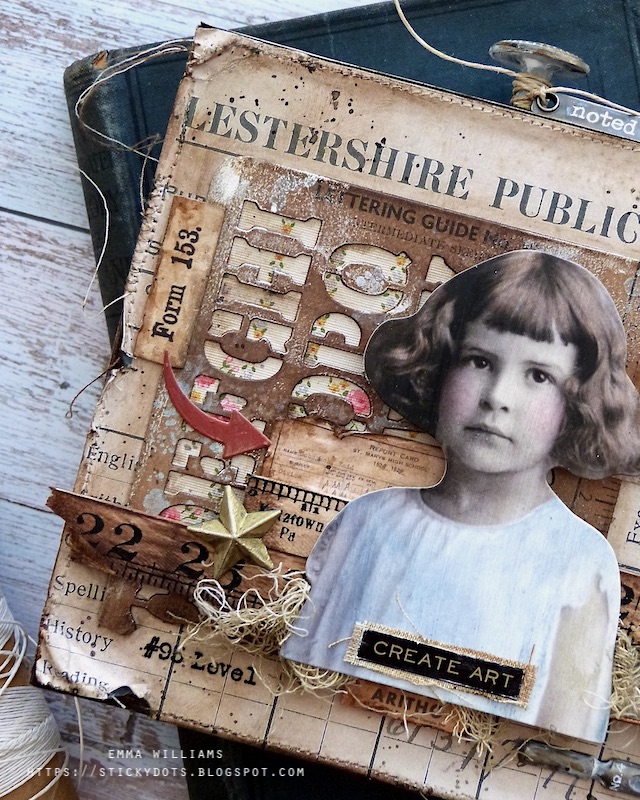
Now for the star of the school and I used my favourite Portrait Paper doll ~ I just think she is adorable and I've been waiting for the right project to use this one.
I applied colour to the paper doll by first adding a layer of clear gesso over the surface and then once dry, I watercolored the image with Distress Crayons and a water brush.
I then mounted the paper doll over the top of the rulers using foam pads to add a little more dimension to the piece and placed some threads of Mummy Cloth around the base of the image.

You can see the dimension in the photo below.

Together with a piece of torn design tape, I added a final ephemera piece to the background ~ placing the enclosure sticker just behind her head.

On the opposite side, I adhered a Numbers Strip, Form 153. Once again I inked these with Walnut Stain Distress Ink and then smeared a little Prima Burnt Sienna Liquid Acrylic Paint over the top. To complete this section, I added the "red swoosh" which is a die cut from the Postale Thinlits Die Set. I already had this cut and it was on my desk, and it was the perfect finishing touch to the collage.
To the left of the portrait, I added a gold star. I altered the largest sized Star Adornment with Gilded Foundry Wax and once I'd heat set the wax, I attached it to my ruler and then just beneath the ruler, I applied a Labeled remnant rub, #95 Level.

To complete the collage, I added a Metallic Sticker Quote "Create Art" and placed this on a piece of linen, before attaching it across the bottom of my portrait.
We're nearly there and all that's left is the finishing touches...

DETAILS

I placed a pen nib in the bottom right hand corner of the box, which I altered with white gesso and a little Mushroom alcohol ink and adhered with matte collage medium. I placed a memo pin above, sticking it into one of the foam pads to secure it into place.
Finally, I added the Mini Hardware knob on the top of my box. Again this is altered with gesso and Mushroom Alcohol Ink and attached to my box, together with Hardware Heads either side.

I completed the box by wrapping some twine around the neck of the knob and hanging a story stick.
So that's my project finished for this week and I hope you've loved what I've made and been inspired by the ideas.

As always, if you make anything, or if you've been inspired by anything that you've seen here on my blog ~ then please, let me know by tagging me on social media or leaving a comment here and I will be right over to take a look and if sometimes I miss it ~ just keep nudging me!

Don't forget that every week, one lucky random participant has the chance to win a $25 gift voucher from Simon Says Stamp and you can join in up to 5 times, which means you could have 5 chances to win. You have until next Monday at 8am Ohio time. 1pm UK time, 2 pm CET to join in and good luck....


Thank you so much for taking the time to stop by today ~ stay safe and keep well.
Love Emma xxx

Powered By Blogger

Total Pageviews