Showing posts with label Snarky Cats. Show all posts

Monday, 24 January 2022

Hey, Little Bird...

Hello friends!

The brand new Simon Says Stamp Monday Challenge is up, and running and this week our theme is all about FURRY FRIENDS and however you choose to show off your furry friends, we can't wait to see what you will be making when you join us for this week's fun challenge!

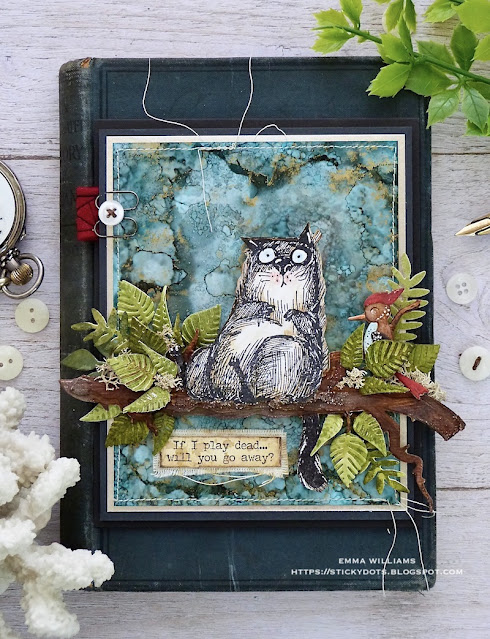
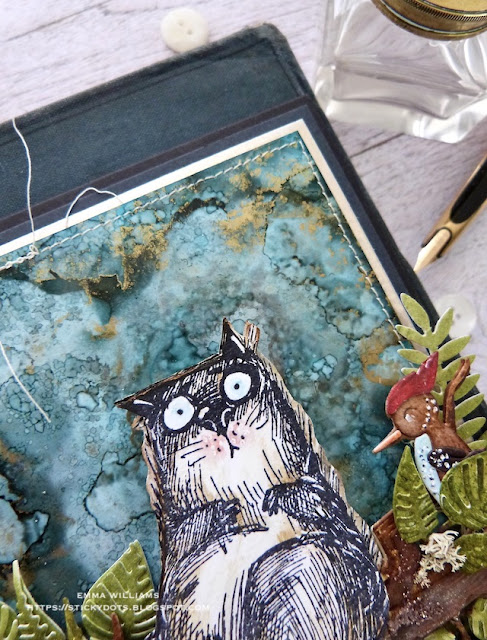
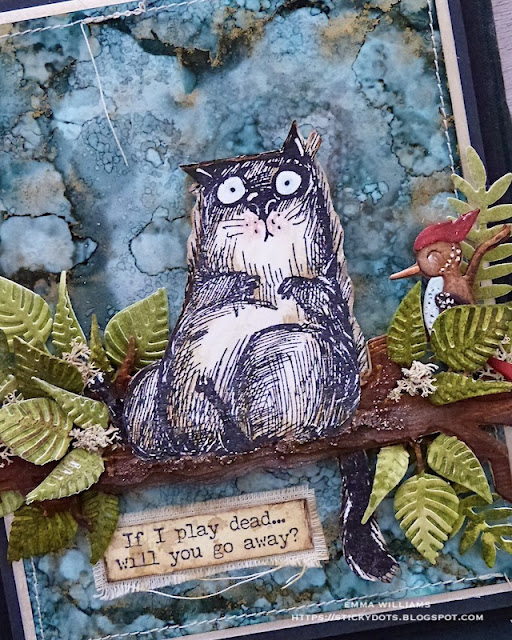
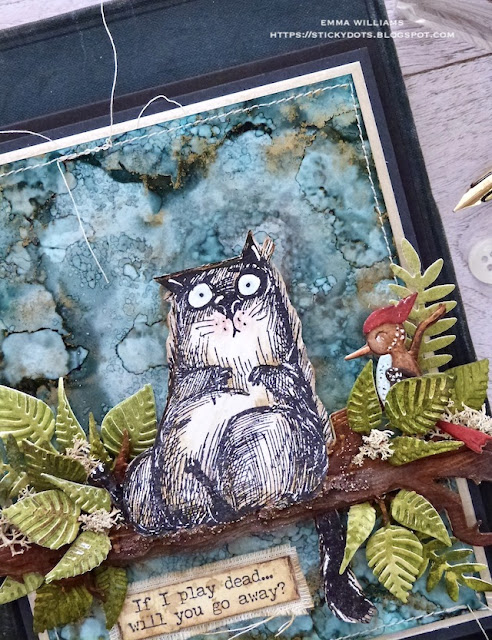
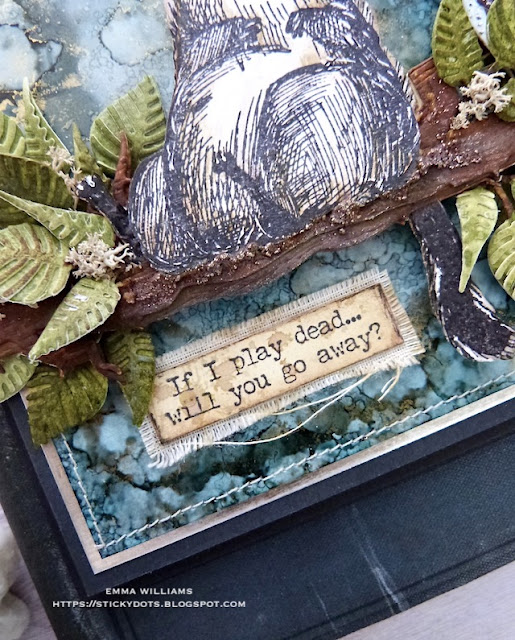
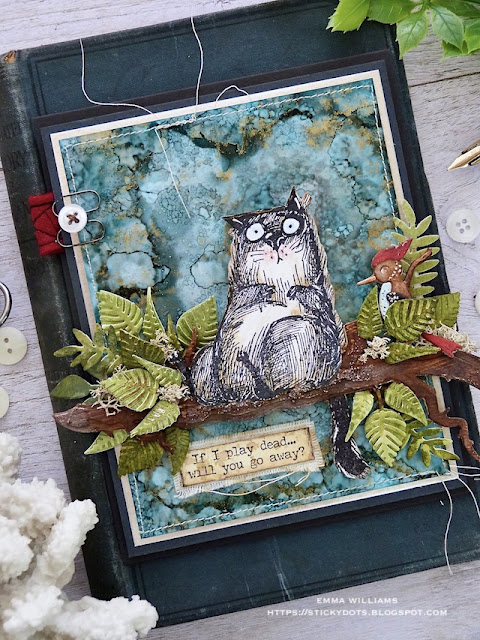
For my make, I chose to create a card using the Stampers Anonymous Halloween Snarky Cats set by Tim Holtz and nestled him on a branch covered in die cut leaves...but this little scaredy cat is slightly perplexed by something beside him and is wondering ~ if he plays dead, will his feathered friend decide to go away!?!?!


So let's get started and I'd like to introduce you to my furry friend, scaredy cat...

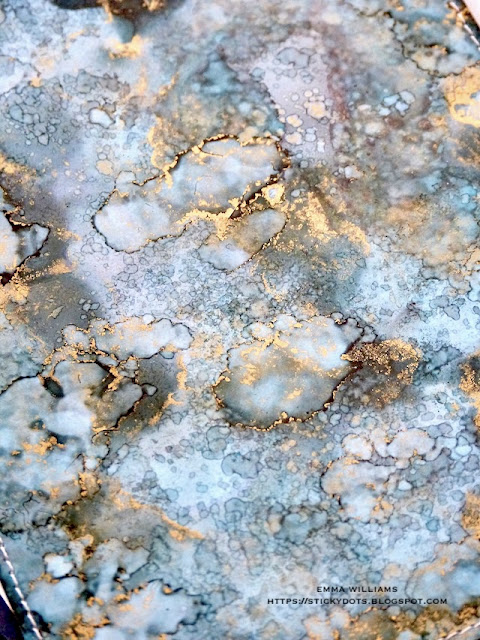
To begin with, and knowing that Tim was going to be launching some new alcohol inks, I felt inspired to get out some of the older colours, whilst I'm excitedly waiting for the new ones to arrive, and I would create a background for my card, using a panel of Yupo paper, measuring 10 x 13cm.

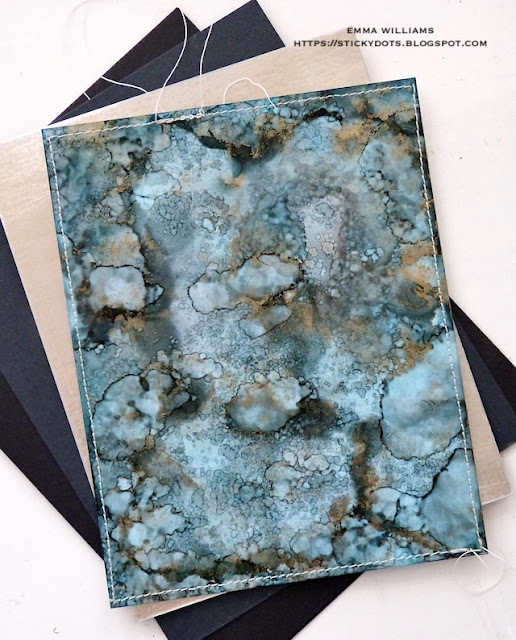
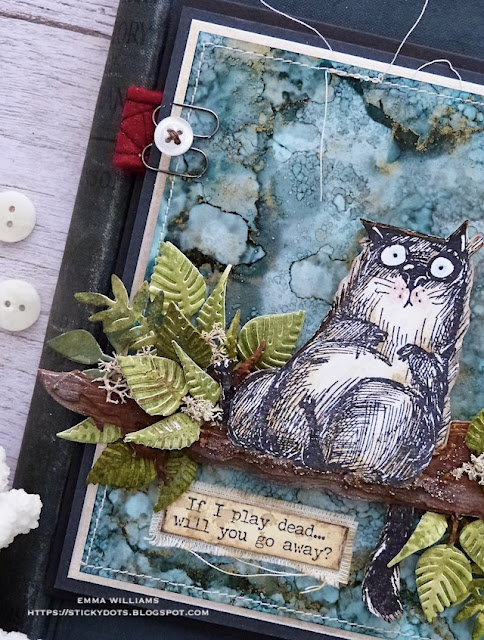
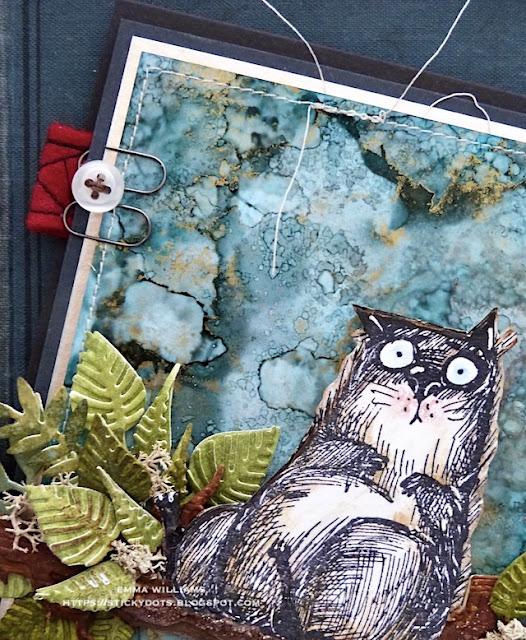
I then applied my alcohol inks to the paper, and used a combination of ~ Pitch Black, Gilded Alloy, Turquoise, Foundry Alloy, Monsoon and of course, Blending Solution to blend those colours together! I drop my inks onto the card, gradually building up the colour and this is how my finished panel looked.

I machine stitched a border around the edge of the panel and then layered it onto champagne metallic kraft stash, followed by a layer of slate card stock, which I then mounted with foam pads onto a black card blank.

I now have the base card ready to decorate and we'll start with the star of the show ~ scaredy cat!

SNARKY CAT

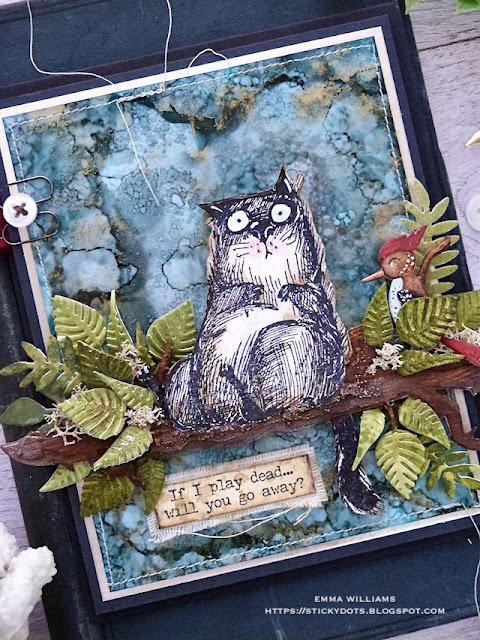
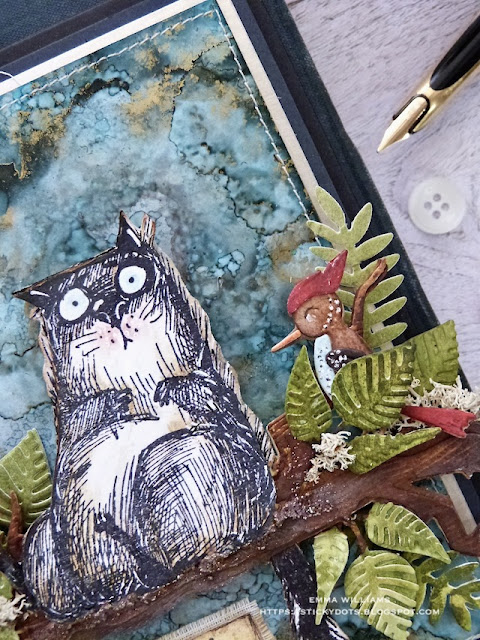
For this I stamped two images of my cat onto Mixed Media Heavystock card using Black Soot Archival Ink. I then coloured my cat by watercolouring with Distress ReInkers and adding highlights with Polychromos Pencils. I then fussy cut each of the images from the card. For the first image, I cut around the complete image, including the little lines around the edges of the outline. I then cut the second image but this time, I cut closed to the outline, cutting away the furry lines. I layered the second image over the top of the first with foam pads to complete scaredy cat.

BRANCH AND LEAVES

Moving onto the branch and for this I used the die from the Arthur Colorize Die Set and cut two separated layers of heavy stock mixed media card which I then sandwiched together to form one substantial, thick branch. For the final top layer, I used Woodgrain Watercolour card and after cutting this piece, I coloured the card with Gathered Twigs and then adhered it over the top of my chipboard branch. I inked the edges of the branch before attaching it to my background, placing it across the alcohol inked background using foam pads to add some height.

For the leaves, I inked some more of the mixed media heavystock card by spritzing Peeled Paint and Bundled Sage Distress Spray Stains. I used a couple of the leaf dies from the Funky Floral 3 Thinlits Die Set and cut a selection of foliage from the inked card.

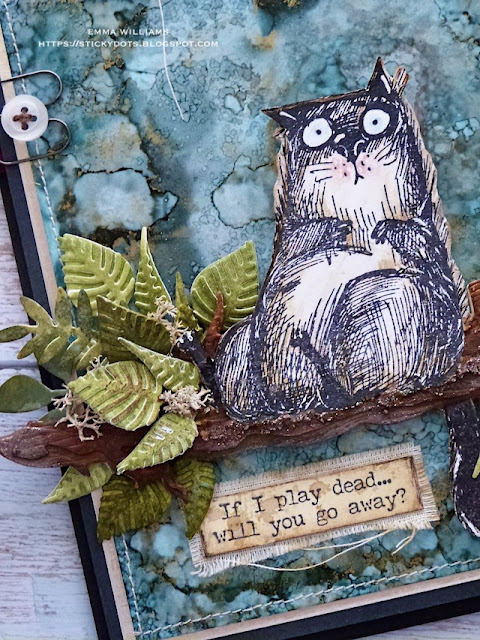
After layering the pieces to form the textured leaves, I inked the edges with Peeled Paint Distress Ink and then arranged and attached them to my branch, attaching scaredy cat in the centre using foam pads.

WOODPECKER

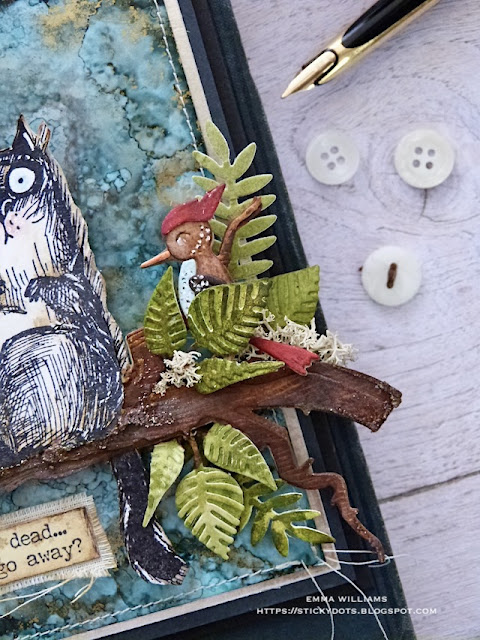
Now comes the final little detail, hiding amongst the foliage is Woody! Yes, that gorgeous little woodpecker from the Cozy Winter Thinlits die set by Tim has made his return from hibernation and is trying to make friends with scaredy, but to no avail because this particular cat is slightly intimidated by his feathered friend.

The woodpecker is die cut, inked and coloured with Distress Inks and paints and then layered before I attached him amongst the leaves!

We're nearly there and all that's left is the finishing touches...

...underneath my cat, where he's sitting on the branch, I added some Translucent Grit Paste. This just nestles him into position and makes him grounded, so he's not floating on the branch. I then just painted over the paste, using Gathered Twigs Distress Paint, so it would be the same colour as the branch.

On the side of the card, I added two Mini Paper clips, a button which I threaded with cotton, and a red Stitched Scrap.

Finally, I stamped the sentiment, "if I play dead, will you go away?", which is from the same Snarky Cats stamp set. I stamped this onto a piece of card that I had in my stash, which was already inked and after cutting the sentiment down to size, I layered it onto a scrap of linen, frayed the edge of the linen and then stuck this to my card, placing it just underneath the branch.

So that's my card finished and I hope you love what I've made...

...as always, I hope you love what I've made, and enjoyed all the techniques I've used. If you make anything, or if you've been inspired by anything that you've seen here on my blog ~ then please, let me know by tagging me on social media or leaving a comment here and I will be right over to take a look!

Don't forget that every week, one lucky random participant has the chance to win a $25 gift voucher from Simon Says Stamp and you can join in up to 5 times, which means you could have 5 chances to winYou have until next Monday at 8am Ohio time. 1pm UK time, 2 pm CET to join in and good luck....


Thank you so much for taking the time to stop by today ~ stay safe and keep well.
Love Emma xxx

Recipe for project:

Stampers Anonymous: Halloween Snarky Cats
Sizzix/Tim Holtz: Cozy Winter, Arthur, Funky Floral 3
Distress Ink: Walnut Stain, Peeled Paint
Distress Spray StainPeeled Paint, Bundled Sage
Distress PaintCandied Apple and Black Soot
Alcohol InksPitch Black, Gilded Alloy, Turquoise, Foundry Alloy, Monsoon, Blending Solution
Tim Holtz Idea-ology: Mini Clips, Stitched Scraps 

Monday, 17 May 2021

Mission:Impossible...

 Hello friends...

As another Monday comes around, it's time for the brand new Simon Says Stamp Monday Challenge and this week we are showing the love with our fun theme which is all about our FOUR LEGGED FRIENDS!

Now when you mention four legged friends, the first thing that came to my mind was Snarky Cats and I decided to create a fun piece, inspired by a favourite movie franchise and a very famous actor who I replaced on this occasion with one of those mischeivous cats who seems to be up to no good but...on this occasion, I have a feeling that no matter how hard he tries, he just can't quite make it and this mission, might be impossible! *cue mission impossible theme tune*

 So, let's get started and let me introduce you to TC...no, not Tom Cruise, this is Tom Cat!

To begin with I am using a Mini Etcetera tag as my base and I started by inking my background. I cut a panel of Distress Watercolour card the same size as the tag and I spritzed the card with a light mist of water. I then spritzed the card with Salvaged Patina, Antique Linen, Bundled Sage and Tumbled Glass Distress Spray Stains.

After another light mist of water that allowed the colours to blend, I then spritzed a little Salvaged Patina Oxide Spray over the top before another spritz of Salvaged Patina Distress Spray Stain. The colours blended beautifully and left me with this gorgeous background with a fresh feel to it.

I machine stitched a wiggly border around the outside and then attached the panel to my etcetera tag using Matte Collage Medium.

Moving onto the scene and after inking one of the cats from the Snarky Cats Stamp set, I stamped the image onto Distress Watercolor Card with Black Soot Archival Ink and then watercolored the image using a waterbrush and Distress Re-Inkers. I then used the matching die set that I have in my stash (you might've been lucky enough to get one of these before they sold out at the end of the year), to die cut my image.

With the background and star of the show ready, it's time to start building up the scene and I began with the branch.

BRANCH

For this I used the branch from the Arthur Colorise Die Set. The branch consists of two die cut pieces, which I cut twice from Woodgrain Distress Card before layering them to make one substantial die cut branch. I then applied some Translucent Grit Paste over random areas of the branch and allowed this to dry.

Once completely dry, I layered Distress Paints over the top and used a combination of Ground Espresso, Walnut Stain, Black Soot and Antique Bronze.

With my branch ready, I attached it to my tag using foam pads before adding some leaves. 

The selection of leaves and foliage are all cut using the Sizzix Garden Greens Thinlits Die Set by Tim Holtz from Mixed Media Heavystock Card, inked with Peeled Paint and Bundled Sage Distress Inks. I cut all the foliage pieces down into smaller sections so that I could arrange them onto the branch and then attached them with hot glue.

I then attached Tom Cat, using foam pads and placing him to hang from the branch.

Now for the next step...

FISH SCENE

The scene is made up of Etcetera Trims and Mummy Cloth and starting with the trims, I took one of the deepest Pinked Trims to place across my tag. It does slightly overlap the sides but I like this effect.

I then applied a coat of gesso to the trim, allowed it to dry before adding a good layer of Crackle Paste over the top. Once the paste was dry and had done it's thing I added Walnut Stain Distress Crayon which I watered down and allowed this to sink into the crackles.

After attaching the trim to my tag, I then cut a strip of Mummy Cloth which I coloured with Speckled Egg and Antique Linen Distress Spray Stains. I arranged the cloth to cascade across the tag to give the effect of water before tucking small amounts of moss in between the layers and attached it all with Matte Collage Medium.

The seaweed is die cut from the card that I used for the leaves and I used one of the dies in the Funky Nature set. I attached and tucked my die cut pieces into the Mummy Cloth and once again, I cut them down to make them slightly smaller in height.

In amongst the green fronds, I also cut some more of the same pieces from gold metallic kraft stash card to give a slight glisten and shimmer and then finished with some moss that I have in my stash.

Now for the fish, and this adorable little fish is die cut using the Under The Sea 1 Thinlits Die Set. I inked each the main body with a blend of Spiced Marmalade and Crackling Campfire.

After assembling the little fish and adding his white stripes and the little eye which is cut from black card, I placed him onto foam and attached him into his new home.

We're nearly there and all that's left is the lettering and the finishing details.

I attached a few Little Things From Lucy gems to the background to look like bubbles floating up.

For the lettering I used the Label Alphanumeric Die Set and cut each of the letters from Blackout card with a self adhesive sheet attached to the back. The colon is made from the dots on the question marks. I attached the letters underneath my water scene.

Finally, I added the little details ~ some Hardware Heads placed on the crackled Etcetera Trim and altered with a little Rusty Hinge and Black Soot Distress Paint to make them look rusty.

A remnant rub in the top right hand corner.

I then completed it with some tiny brackets of embossed metallic kraft card that I wrap around the edges of the tag to form brackets. You might have seen these on some previous projects that I've made and I just think they had an extra touch without too much fuss. These tiny pieces are usually the offcuts that I have left over from previous projects and these particular pieces were embossed using the Sizzix Foundry 3D Texture Fade by Tim Holtz. They are then altered with Distress Paints to add the rusty colour tones.

I then placed some more Hardware Heads over the top.


So that's my project finished for today and I hope you've enjoyed the step by step of how I made it.

As always, if you make anything, or been inspired by anything that you've seen here on my blog ~ then please, let me know by tagging me on social media or leaving a comment here and I will be right over to take a look!

Don't forget that every week, one lucky random participant has the chance to win a $25 gift voucher from Simon Says Stamp and you can join in up to 5 times, which means you could have 5 chances to winYou have until Monday 8am Ohio time. 1pm UK time, 2 pm CET to join in and good luck....


Thank you so much for taking the time to stop by today ~ stay safe and keep well.
Love Emma xxx


Recipe for project:

Distress PaintRusty Hinge, Ground Espresso, Walnut Stain, Black Soot and Antique Bronze
Distress Spray StainSalvaged Patina, Antique Linen, Bundled Sage and Tumbled Glass
Distress Oxide Spray: Salvaged Patina
Distress InksPeeled Paint, Bundled Sage, Spiced Marmalade and Crackling Campfire
Tim Holtz Idea-ology: Hardware Heads, Halloween Trimmings

Monday, 16 November 2020

Naughty or Nice?

Happy Monday everyone...

Hope you've all had a good weekend and ready for the new week! Can you believe we're half way through November already and there's less than six weeks to go until the big day? Where has 2020 gone? Well, I'm sure that many of you will have started your Christmas makes by now and if you haven't then this week's Simon Says Stamp Monday Challenge will definitely help to get you in the mood because we are celebrating the festive season with our new challenge...HAPPY HOLIDAYS! So whether you want to create something for Thanksgiving, or Christmas, it's time for the new challenge to begin and we hope you'll play along!

For my project I decided to have a little bit of fun this week and created a project perfect for all those Snarky Cat lovers and made a double layered frame full of festive fun.

So, let's get started and here's how I made this piece!

For this project I used a mini framed panel as my substrate ~ these come in a pack of two and each frame has two separate pieces, a backboard and a wooden frame. I began by painting the frame and the sides and back of the baseboard with Candied Apple Distress Paint. Once the paint was dry, I then dipped a dry paintbrush into Black Soot Distress Paint, removed the excess paint from my brush on a dry paper towel and then dry brushed the surface with the black paint. If there's any areas that you feel you have applied too much black paint, don't worry as all you need to do is go over those areas with a little more Candied Apple and this will knock back the darkness of the black paint. Once I had the colour I wanted, I set the framed panel to one side and started work on the smaller, inner frame.

For this I used the largest Vignette Frame in the set of 4 and primed the surface with a coat of Picket Fence Distress Paint. I then used the same dry brushing technique as I did on the larger red frame but this time applied Frayed Burlap paint over the top. Again if you feel you have areas that are too dark, allow the paint layer to dry before applying the lighter colour over the top. Once the smaller frame was dry, I added some touches of gold foiling, just to make it sparkle slightly. I used Transfer Foil from Ranger Ink but you can use any foil you have to hand.

The smaller frame won't quite fit snugly inside the framed panel, so the way that I got around this was by using a Etcetera Scallop Trim and painting it with the same coloured paints as I painted the smaller frame and this will then sit directly beneath the inner frame, covering up any gaps. 

At this point, I also cut a second trim down to size, painted it with Speckled Egg Distress paint and this is eventually going to sit on the inside of my white frame, along the bottom to form a ledge, again hiding any gaps that I didn't want to be seen on the project.

Now for the main focal point, the Snarky Cat and I chose to use my favourite from the set. I began by cutting a panel of watercolour card, slightly smaller in size than my framed panel and then stamped one image onto the centre of the cardstock, and a further two images onto separate pieces of watercolour card. The first image is going to be my base image and I decoupaged the second and third over the top. Cut around the outline of the second and third image, each time cutting away areas of image so that you can eventually layer these pieces over the top of one another and form a decoupaged, 3D image. You can see from my cat, that I cut around the outline of the first image, and then cut just the cat from the second image. I then watercolored each separate stamped image using Distress Inks, which I smooshed onto my glass mat and a water brush. To add shadows and detail to the images, I used Polychromos Pencils over the top of watercoloring.

Set aside the watercolored fussy cut images and taking the image stamped directly onto the card panel, I added colour to my background. For this I used a combination of Speckled Egg, Pumice Stone, Old Paper and Iced Spruce Distress Inks and blended the inks directly onto the paper. Place a piece of kitchen towel over the artwork to protect it and then lightly spritz the inked background with water, allowing the inks and water to create gorgeous little inky pools. I then heat dried the background, dabbing away any excess water. You can continue building up the colour of your background by applying more ink but I was quite happy with how mine looked.

For the snowflakes, I inked up the stamp that is on the same stamp sheet using clear embossing ink and then stamped around the top section of the card before heat embossing with white embossing powder.

Layer the second and third snarky cat image over the top of one another using foam pads and building up the dimension.

To complete the image, I stamped the quote directly underneath the cat and also added some shading around the base of the present to create some grounding to the image.

Attach the image onto the baseboard, ensuring that once you place the red frame over the top it will be in the right place and adhere to the baseboard.

Adhere the red frame over the top using Matte Collage Medium and then attach the white painted frame inside the red frame, adding the scallop etcetera trim directly beneath it so that it hides any gaps.

Attach the speckled egg smaller trim onto the inside of the white frame to form a ledge.

At the top of the frame, I added a Tim Holtz Icicle piece. These come in a set of four, and you get two of each size and I used the larger size. To created an icy look, I painted the back of the icicle with Picket Fence Distress Paint and once it was dry, I flipped it over, applied a layer of Matte Collage Medium and sprinkled it with Rock Candy Dry Glitter. Allow for the glitter to dry and then attach the icicle by aligning it to the top of the white frame.

I placed some die cut foliage onto each corner of the icicle. These are cut from Mixed Media Heavystock Card which I spritzed with Rustic Wilderness, Peeled Paint and Bundled Sage Distress Spray Stains. The dies I used for the foliage are: Holly Leaves from the Large Funky Festive Die Set and I just cut away the berry section from the die cut, and the little fern pieces are die cut using dies from the Winter Wardrobe set and also a few sprigs from the Merry and Bright Thinlits set. The tiny berries on some of the foliage are created using Tonic Nuvo Crystal Drops and then sprinkled with some of the Rock Candy Dry Glitter.

Once you have all the foliage pieces cut, I then smeared a thin layer of Matte Collage Medium over the top and dipped each piece into Rock Candy Glitter, allowed them to dry before arranging them in the corners. I then added a Tiny Bell to each corner.

In the centre, I placed a Christmas Bottle Cap, (which has been so popular, I'm sorry to say has now sold out) but if you have one of these, I just attached the piece directly onto the icicle using Matte Collage Medium.

Along the top of the icicle, I applied a good amount of Matte Collage Medium before sprinkling Mica Flakes over the top and setting aside to dry. 

I also added some Mica Flakes on the inside of the frame, where I placed the small scalloped etcetera trim.

We're nearly there and this is the final bit of stamping that needs to be done ~ the "special delivery' label which I stamped with Barn Door Archival Ink using the label from Vintage Holidays Stamp Set. After cutting around the outline for the label, I adhered it to a strip of the red Christmas Velvet Trim, (unfortunately, this has now sold out but hopefully, some of you might have this in your stash already). I then attached the ribbon and label along the bottom of my frame using red tape to secure it into place and taking it around the back of the panel, so that it looked neat on the sides of the frame.

I then attached two Mini Pins to either side of the ribbon strip.

Finally, I added a Hardware Head to either side of the larger Etcetera Trim, both of which I altered to make them look rusty using Rusty Hinge, Antiqued Bronze and Black Soot Distress Paints and to complete the project, I added a Hinge Clip, painted with Candied Apple Distress Paint and clipped this to the top of the frame!

I hope you love this piece and it's inspired you with some ideas of Christmas projects. Of course, you don't have to make a framed panel, this project would work equally as well on a card, or a tag if you prefer...it's entirely up to you but I would love to see what you create if you do make anything!

Don't forget that every week, one lucky random participant has the chance to win a $25 gift voucher from Simon Says Stamp and you can join in up to 5 times, which means you could have 5 chances to winYou have until Monday 8am Ohio time. 1pm UK time, 2 pm CET to join in and good luck....


Thank you so much for taking the time to stop by today ~ stay safe and well, and see you again soon.
Love Emma xxx

Powered By Blogger

Total Pageviews