Hello friends and welcome to the brand new Simon Says Stamp Monday Challenge!
This week out challenge theme is called LIGHT AND AIRY, and we would love for you to use pastel colours within your makes and alongside this theme, the DT are also showcasing the products of Studio Light...
Now, I will admit that when I saw this challenge, I did panic just a little bit because pastel colours are not my thing, lol but I rose to the occasion and because I had chosen to use these funky tags from Studio Light, I thought how I could complement them and also incorporate these soft, gelato colours into my make, and with summer just around the corner, I thought it would be perfect to say hello to Gladys and take her to carnival!
So, with this in mind, I hope you'll join Gladys at the Copacabana...
For this make I used the smaller sized Rectangular Etcetera Panel and covered the panel with a piece of Backdrops Vol 1 paper. The paper is cut to size and I machine stitched a border around the edge before adhering to the panel with Matte Collage Medium.
To complete the panel and create a nice finish, I always add some Design Trim Tape along the sides of the board.
I finally added Hardware Heads to each of the four corners of the board, which I altered with a little Crackling Campfire and Ground Espresso Distress Paint.
ROSETTES
You might have noticed that the theme for this make is all about ~ dots, and both the rosettes that sit on the panel, and the tag have the same stencilled dots, in the same colours, so there is continuity throughout the piece.
I'll begin with the rosettes, and for these I cut two panels of Mixed Media Heavystock card. Using the Spots Mini Layering Stencil from Set 59, I placed this at the top of the first panel and then used separate blending tools to apply Speckled Egg, Fossilized Amber, and Kitsch Flamingo Distress Inks through the stencil. To cover the entire panel, just keep moving the stencil down the card until you're happy with the coverage. I repeated the stencilling on the second panel.
To knock back the 'clean' look of the cardstock, I lightly spritzed Antique Linen Distress Spray Stain over the top of the stencilled panel, dabbing away any excess ink before heat drying the card.
Using the rosette die from the Vault Rosettes Die Set, I cut three individual pieces for each of the two rosettes and after folding each die cut along the scorelines, I assembled them. I then cut the circles that are also in the die set and using hot glue I secured these circles to each rosette.
After inking the edges with Pumice Stone Distress Ink, I attached the rosettes to the panel using collage Medium and placing them so that the overlap the edges and form a fan shape on either side.
TAG
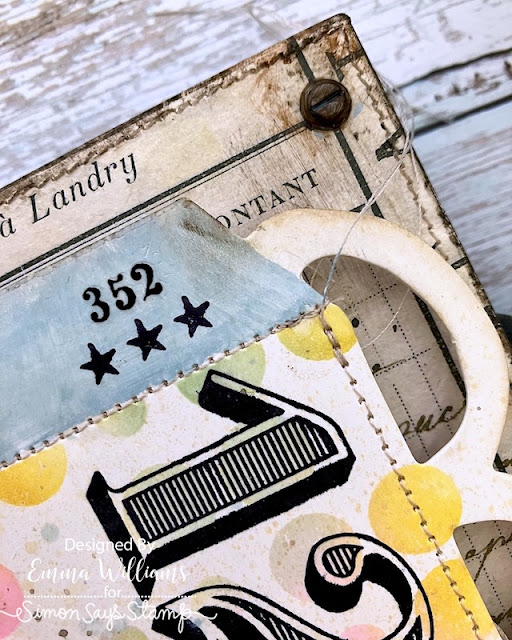
Now to create the background on the Studio Light Tag and to begin with I used the numbers strip from the Curiosity Shop stamp set and stamped the numbers 1 -5 down the right hand side of the tag.
I then applied the stencilling, and as I mentioned before I used the same stencil and the same colours as I used on the Rosettes, and then spritzed with the Antique Linen Distress Spray Stain to knock back the whiteness of the surface before I inked the edges with Frayed Burlap Distress Ink.
Once I'd finished covering the surface of the tag, I applied Speckled Egg Distress Paint to the top section and the funky edge along the bottom.
After I had heat dried the paint, I added the small dots using a white pen and some tiny pearls.
To add some more layers to my tag, I used stamps from the Eccentric stamp set, stamping *TAG NO. onto the tab...
....the three stars at the top...
...and the word "Perfection" along the bottom left corner.
I also added some stamped layers using the Botanical Collage stamp set, which is visible down the left hand side.
Finally, I machine stitched a border around the edge of the tag....
...before I completed the tag with a yellow eyelet from my stash, that I secured with the Crop-A-Dile tool.
GLADYS and FOLIAGE
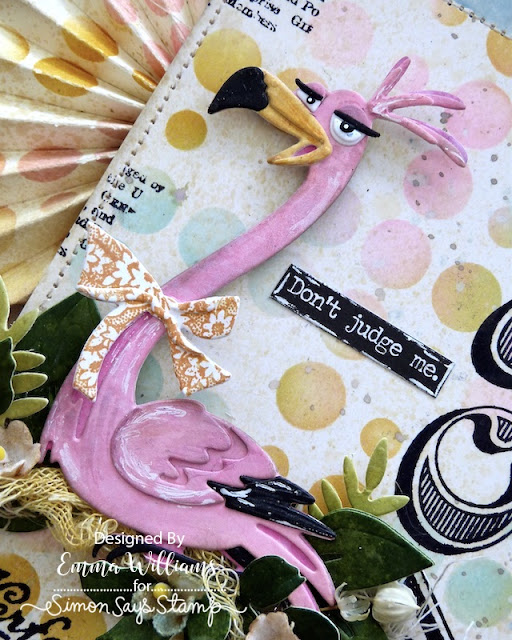
So the tag is ready for the star of the show, Gladys and for this piece, I chose to have her seated on a bed of die cut foliage, and just used her upper body, not her standing leg.
I cut all the pieces I needed to make Gladys from Mixed Media Heavystock Card using the Colorize die set from Tim Holtz and Sizzix. All the card I used for each layers has been coloured with Distress Spray Stains:
SPUN SUGAR, KITSCH FLAMINGO, SALTWATER TAFFY, FOSSILIZED AMBER
I also used black and white cardstock for the eyes, beak and wing feathers.
After assembling my image, I then added a bow, which was cut from a piece of cardstock found in my stash box, leftover from a previous project. For this piece I used a die from the Winter Wardrobe die set.
This die set is actually discontinued but I'm sure that many of you have it in your collections and if not, there are plenty of Tim's dies that you can use to create small bows.
Setting Gladys to one side until she's ready to position on the tag, I moved onto the foliage and cut all my pieces from cardstock that I coloured with Shabby Shutters, Peeled Paint and Rustic Wilderness Spray Stain.
I used a selection of foliage from the Bloom and Funky Florals 3 die sets.
I attached Gladys using foam pads to add some dimension and placed her to sit in the foliage. I also added some fibres to create texture. I then used a few Bouquet Findings Flowers, that I snipped from the stems to create individual flowers and spritzed with Antique Linen Distress Spray Stain before arranging them in amongst the foliage.
To complete the tag, I added the Snarky Quote, "Don't Judge Me" which is from the idea-ology Snarky Stickers Book. I cut the quote down a little and then added some white pen detail around the edge.
We're nearly there and all that's left is to add some twine through the hole at the top of the tag....
...and then mount my tag over the top of the rosettes, placing it centrally onto the board. Where the tag doesn't sit on the rosettes, it didn't have any support...so for this, I used some small wooden blocks and placed these underneath. You can also use foam pads.
So, that's my project finished and I hope you love the piece I've made and will be inspired by my interpretation of the challenge theme!
Don't forget that every week, one lucky random participant has the chance to win a $25 gift voucher from Simon Says Stamp and you can join in up to 5 times, which means you could have 5 chances to win. You have until next Monday at 8am Ohio time. 1pm UK time, 2 pm CET to join in and good luck....
Recipe for project:


A fabulous make, Emma!!!
ReplyDelete