
Hello everyone...
After a couple of weeks away, it's so good to be back and as always, at the start of a new week, we have a brand new Simon Says Stamp Monday Challenge and this week, our theme is all about making something FEMININE! So, whatever you choose to create, we are looking forward to seeing what you make and how you will interpret our theme...
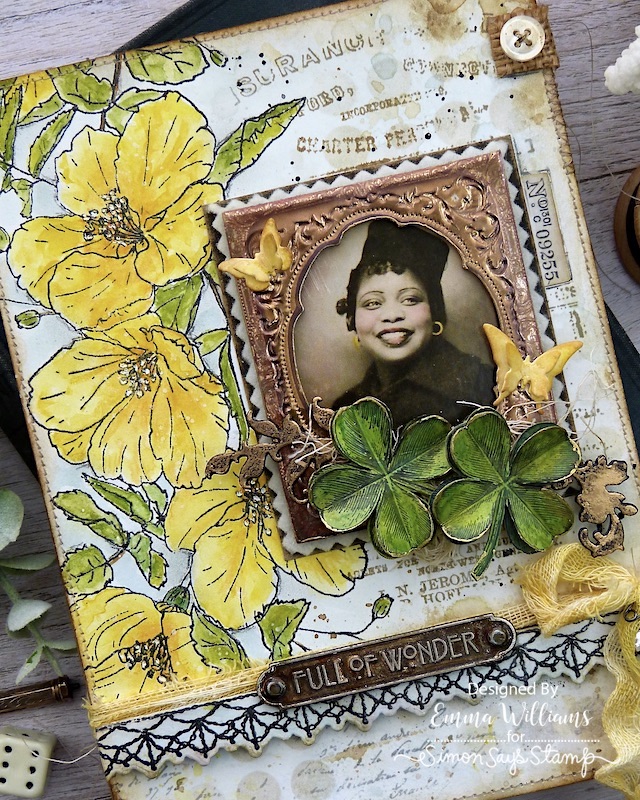
For my make, I made a project using products from Tim Holtz, Stampers Anonymous and Sizzix and created a vintage style Etcetera Panel. I used a beautiful photomatic image as my main focal point, she actually reminds me of a young Ella Fitzgerald, (my Dad's favourite singer) and with the feminine theme in mind, I surrounded her with watercolored flowers and foliage. Also, I thought this layout would also be perfect if you had a treasured photo of a family member.

So, let's begin and hope you enjoy how I made this piece.


STAMPED BACKGROUND PANEL
Now to begin and I started with the background panel and cut a piece of watercolour card the same size as the panel.
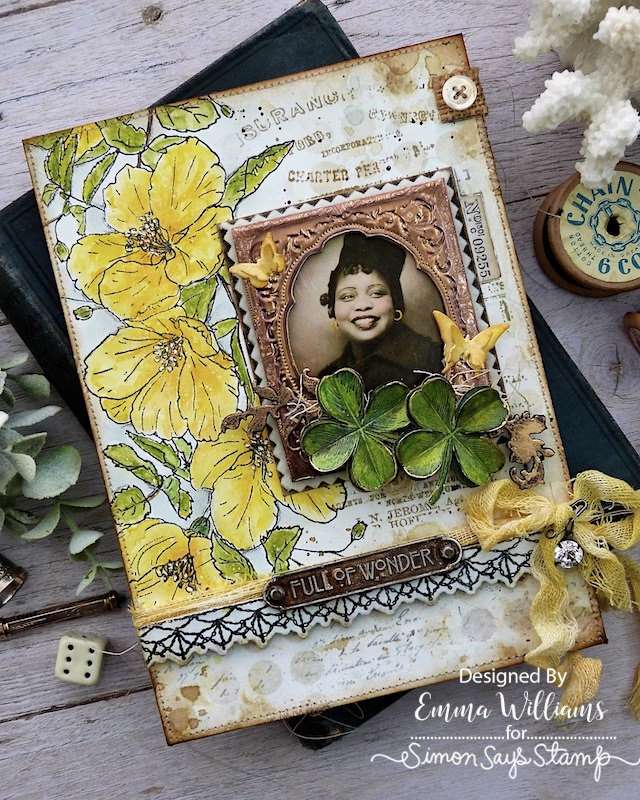
I then inked up one of the Floral Trims stamp in Black Onyx Versafine Ink, and stamped the outline down the left hand side of my card panel. I sprinkled clear embossing powder over the top and heat embossed the outline of the image, until molten and glossy.

I used the following colours of Distress Watercolour pencils to hand paint the image, using a paint brush to blend the colours and add light and shade.
COLOURS USED: Mustard Seed, Scattered Straw, Fossilized Amber, Peeled Paint, Rustic Wilderness, Shabby Shutters

Once dry, I moved onto the right hand side of the card panel and to begin with I used Lost Shadow Distress Ink to ink through the Stencil Spots Mini Layering stencil from set 59, adding the dots down the right hand side and across the bottom section of the panel.

With the stenciling complete, I then added more layers, this time stamped, using the advertising stamp from The Professor 2 stamp set and stamping the image in Frayed Burlap Oxide Ink.
To complete the panel, I added shading around the floral trim stamp, some white pen detail to the stamens and inked the edges of the panel with Walnut Stain Distress Ink. Finally, I added some script stamping using the small stamp from Tiny Toadstools and machine stitched a border around the outside edge.

With the background complete, I adhered it to my Etcetera Panel using Matte Collage Medium, ready to move onto the next stage, the photo frame and image!
PHOTO AND FRAME
The photo that I used is taken from Tim's idea-logy Photomatic set of images and I placed this behind a Curio Frame.

To create a nice finish to the raw edges of the curio frame, I always apply a little Statue Foundry Wax around the outside edge and around the inside edge of the aperture before heat sealing the wax. This colour is the perfect match for the frame.

I mounted the frame onto a piece of felt, that I cut using my Nan's old pinking shears and I then mounted the layered frame onto a piece of black kraft card, lightly sanded around the edge before adhering the completed frame onto my panel, placing it on the right hand side.
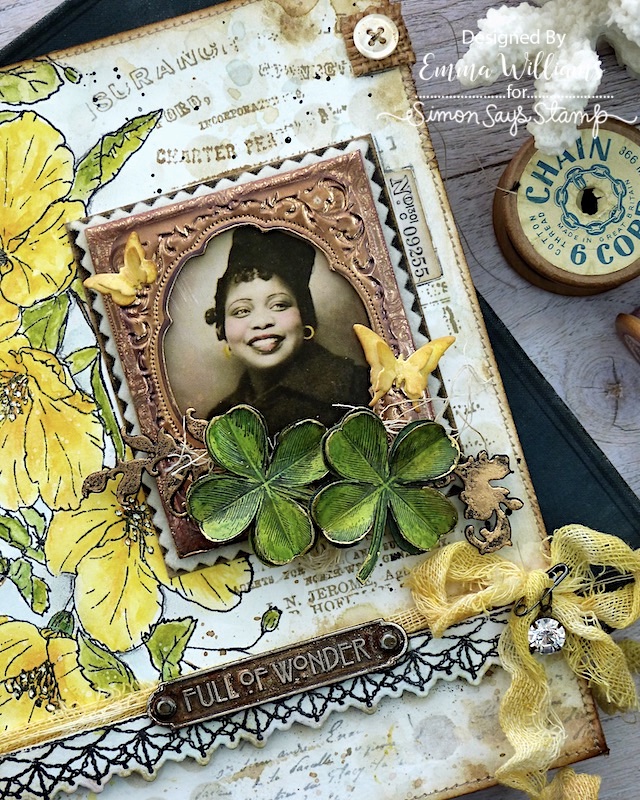
To the side of the frame I added a small Numbers Strip...

...and in the top right hand corner of the panel, I placed a piece of burlap from my stash, and added a stitched button.
FRAME EMBELLISHMENTS

Moving onto the embellishments for the frame and I began with the clover leaves. This is a stamp from the Curiosity Shop stamp set and to make them dimensional, I stamped the image twice onto Mixed Media Heavystock card, and watercolored it with Peeled Paint, Lucky Clover and Shabby Shutters Watercolor Pencils, before fussy cutting around the outline of each image.

Using my fingers, I pinched along the centre of each of the four leaves to form the dimension before layering the one clover over the top of the other. I then added a smear of Gilded Foundry Wax to the edge of the clover leaf and heat set the wax. I repeated the process to make a second four leaf clover before attaching them onto my curio frame, placing them over a bed of Mummy Cloth.

On either side of the clover leaves, I placed a small flourish which I die cut using the Boutique Vault die Set by Sizzix. I cut four layers of each flourish from black card and after layering them over the top of one another to form two solid flourishes, I applied a smear of Statue Foundry Wax over the top and once again heat set the wax.
I then attached each flourish to my frame.

BUTTERFLIES
The tiny butterflies that are fluttering around the panel, are all die cut from some inky yellow card that I have in my stash box. I cut each butterfly using the dies in the Vault Boutique die set and shaped the wings to add dimension, lifting them slightly from the centre of the body.

I then layered the tiny die cut butterflies, using two different sizes, placing a smaller one over the top of a larger one, to form double wings. I then attached the two butterflies to my panel, adding two to the frame.

LACE BORDER AND MUMMY CLOTH
Moving on down, and across the bottom section of the panel, I created a lace effect trim using the Crochet Trim stamp set and the matching Simon Says Stamp die set.
I stamped the trim onto watercolour card using Black Onyx Versafine Ink and embossed it with clear embossing powder before using the co-ordinating die from SSS to cut the trim.
I then inked the trim with Speckled Egg Distress Ink and used foam pads to attach it to my panel.

To add even more feminine touches, I used Mummy Cloth to add texture to the piece and cut a strip of the trim which I then dyed with Mustard Seed, and Scattered Straw Distress Spray Stains. After heat drying the mummy cloth, I wrapped it around the panel, placing it so it sits nicely above the crochet trim and then I fastened it with a bow on the right hand side.
I added a Antiqued Gem to the centre of the bow, securing it into position with a Mini Pin.

We're nearly there and all that's left is the finishing details....
FINISHING DETAILS
Over the top of the crochet trim, I attached the "Full of Wonder" word plaque. To alter the metal surface, I used a combination of Statue and Sterling Foundry Wax, applied to the surface individually and heat setting between each application and then I used a drizzle of Mushroom Alcohol Ink over the top. Finally to reveal the lettering, I gently sanded the raised areas before I attached the plaque to my panel.
On either side of the plaque, I added a Hardware Head, again altered with the same technique as above.

So, that's my project for this week finished and I hope you love the piece I've made and it's inspired you to create.
Don't forget that every week, one lucky random participant has the chance to win a $25 gift voucher from Simon Says Stamp and you can join in up to 5 times, which means you could have 5 chances to win. You have until next Monday at 8am Ohio time. 1pm UK time, 2 pm CET to join in and good luck....


Recipe for project:


Stunning make Emma! Thnx for sharing xxx
ReplyDeleteI just LOVE this piece!! Would love for you to teach in a class!
ReplyDeleteI absolutely love your style. I wish I had the time to look through your entire blog. This piece is gorgeous! Your creativity is exceptional!
ReplyDeleteI want to make this again and again! It is so beautiful!
ReplyDelete