
Hello everyone...
Can you believe just two weeks to go to the big day?!?! If you're like me, it's crazy busy getting ready for Santa's visit! There's still so much to do but the list is getting a little less day by day and the trees are up, and the house is all decorated!
In the meantime, we have 3 more Simon Says Stamp Monday Challenges before the end of the year and this week's challenge is all about "USING DIES IN DIECEMBER" and of course, the DT are using are very own SSS dies on their makes!
For my project, I chose to make an Etcetera Tag and used the beautiful Fretwork Snowflake die to make my background for this vintage style make.
So, let's get started, it's time for Santa to start checking his list to see who's been naughty or nice!


TAG BACKGROUND
We'll begin with making the background for the tag and as I've mentioned already, this uses that gorgeous Fretwork Snowflake Die. I meant to take a photo of the background before I covered it, I always hate doing that but you know me, I love to layer and it had to be done!
I started by die cutting the snowflake and all the separate pieces that I've used are cut in one pass. You will only use the snowflake for this make, but I just saved the negative waste part to use another time.
After I had cut enough of the separate pieces, and at this stage, I did cut extra of the tiny snowflake in the centre ~ I layered all the individual snowflake pieces over the top of one another to form the background. Each of the snowflakes has three layers which I adhered over one another to form this raised design on the tag.

Once dry, I applied a layer of white gesso over the entire tag, allowed to dry and then painted the tag with Rustic Wilderness Distress Paint. Working quickly, and just allowing the paint to become slightly tacky, I took a semi damp baby wipe and used this to remove some of the paint from the surface. Don't oversaturate the tag, you only need to remove some of that colour.
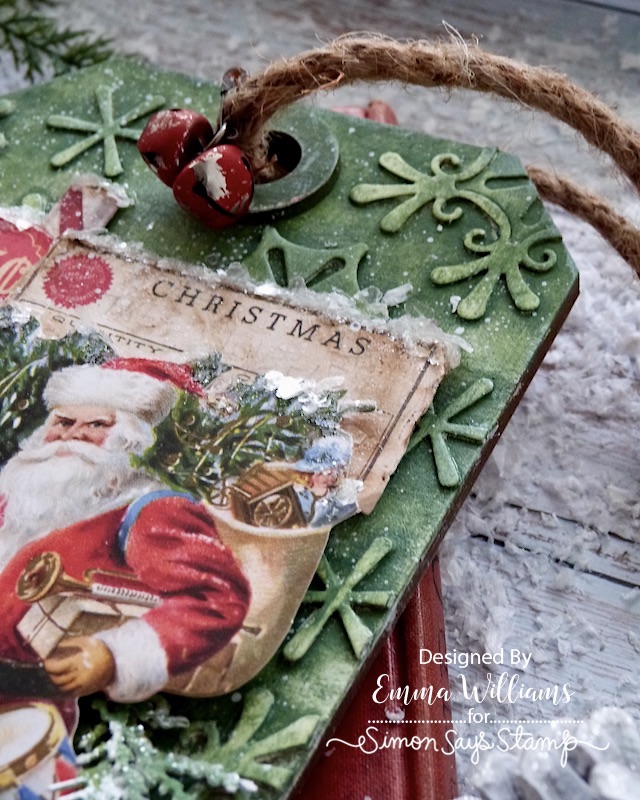
You will see how this technique creates the pockets of light and dark areas around the snowflakes on the background of the tag.

Heat dry the paint and then taking a paint brush dipped in gesso, remove some of the paint from the bristles and dry brush over the top of the raised areas, leaving just a kiss of paint on the background. If you feel any areas need more of the Rustic Wilderness paint, just go back in and repeat the process until you're happy, or you can use the Rustic Wilderness Distress Crayon if you prefer.

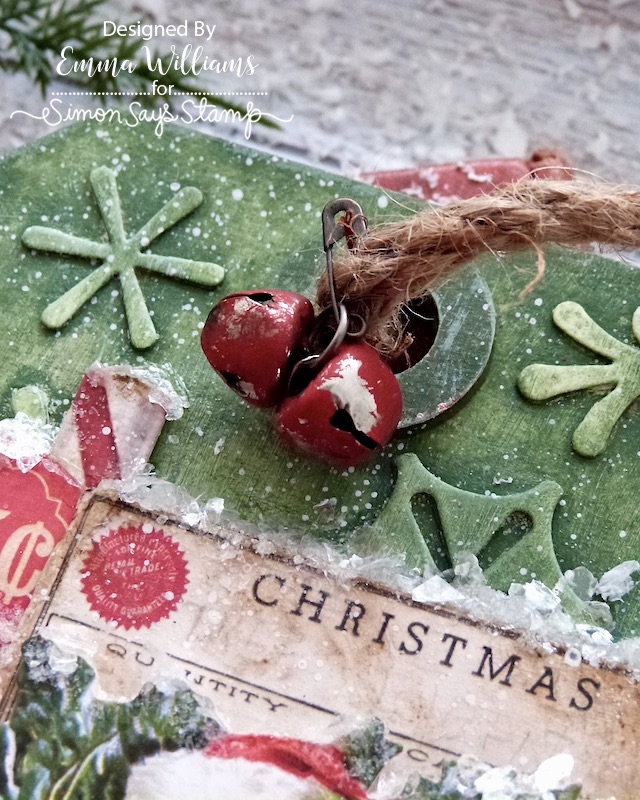
Once the background was dry, I added the hole reinforcer piece, which I painted with the Rustic Wilderness and dry brushed with gesso before attaching it to the tag using Matte Collage Medium.
The tag is now ready for the embellishments....
SEASONS GREETINGS
Along the bottom of my tag, I used one of my all time favourite Tim Holtz idea-ology pieces ~ FESTIVE MARQUEE! This is such a gorgeous piece and I've already made sure I have a stash of these, even if I never use them and just stroke them for the years to come, I needed them!
I wanted to alter the colour of the metal and chose to paint it with Candied Apple Distress Paint. I did this in quite rough way, not covering every piece of the metal, leaving some areas of the original colour showing through. I then left this to dry before applying a small amount of Sterling Foundry Wax. I just applied this to areas of the metal piece, you don't want a complete coverage, you need that red to be the dominant colour. After heat setting the wax, I then drizzled Mushroom Alcohol Ink over the top.

Attach the festive marquee piece across the bottom of the tag using Matte Collage Medium.
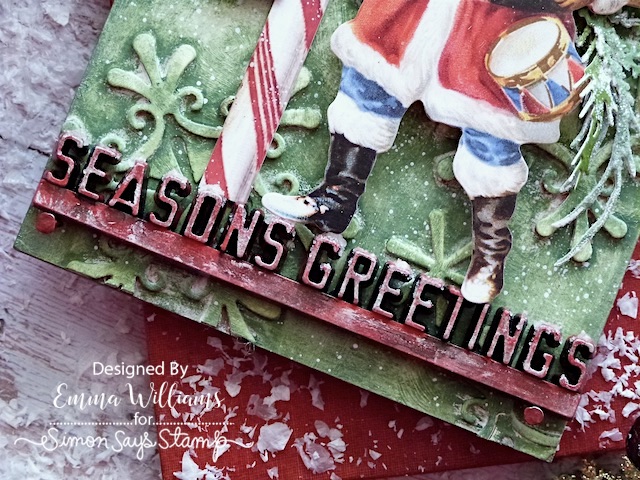
Finally, I hammered two Nail Tacks into either side of the tag, placing them just underneath the Festive Marquee metal piece, and then painted them red to match.

LAYERS
Now for the layers and I started by collating all the pieces that I wanted to use from Tim Holtz's Ephemera Pack and Layers and Paper Dolls Pack. The labels and stamp come from the ephemera pack, the candy cane, Santa and poinsettia are all from the layers pack.

I then arranged all the pieces behind Santa onto my tag, using various depths of foam pads to create the dimension and placing any of the more flimsy paper pieces from the ephemera pack onto mountboard to make them more substantial when attaching them. I inked the edges with Gathered Twigs Distress Ink and also dipped the pieces into some inky droplets of the same colour to create a more vintage feel.

Once all my layers were fixed into position, I used the splatter brush to splatter gesso across the surface of the tag and blasted them with the heat gun to dry it thoroughly.

To add the frosty snowy feel to this piece, I applied some Snowfall Grit Paste along the top edges of the layered ephemera and then drizzled Glossy accents over the paste, before sprinkling Mica Flakes on top. Tag away the excess flakes and leave to dry.

At this stage, I also added some of the paste along the Festive Marquee piece.
Now it's time to place Santa in the foreground and once again, I used foam pads to add the dimension, placing his feet on the top edge of the metal sentiment.

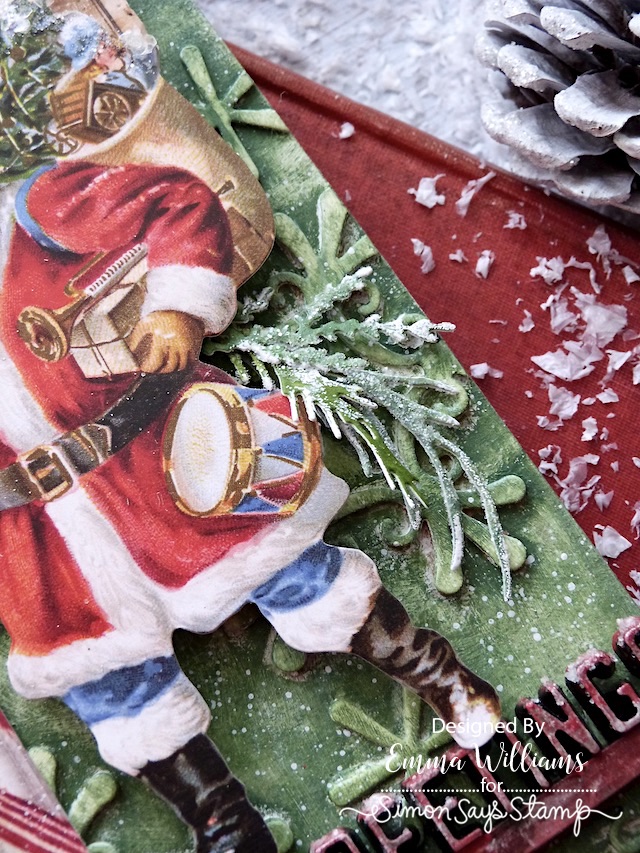
GREENERY
To add more texture to this piece, I used some Sizzix die cut greenery which I placed on the left and right hand sides of the arrangement.
I inked some Heavystock card with the following Distress Stains:
RUSTIC WILDERNESS, BUNDLED SAGE, ICED SPRUCE
...and once the card was coloured, I cut all my foliage using the Tim Holtz Holiday Brushstrokes 3 die set by Sizzix.
Once I had my selection of greenery, I started to add the snowy effect to each piece.

This is achieved by lightly dabbing the edges of the die cuts with the Embossing Dabber and then sprinkling white embossing powder over the wet ink. Tap away the excess, and heat emboss. Once the powder is cool, rub Matte Collage Medium over the pieces, and sprinkle with Rock Candy Distress Glitter. Repeat with all the other pieces and then set them to one side to dry.
Once these pieces were ready, I added them to my tag, arranging them on either side of Santa.


FINISHING DETAILS
For the final details, I threaded some rope through the hole at the top and then attached two of the Holiday Bells which I painted red using the same technique as I used on the Festive Marquee piece.

Clip these onto the rope using a Mini Pin.
So that's my make complete and I hope you love how I created the background and enjoyed seeing how I made this piece. Santa is now ready to walk down Candy Cane Lane bringing joy to everyone....

As always, if you make anything, or if you've been inspired by anything that you've seen here on my blog ~ then please, let me know by tagging me on social media or leaving a comment here and I will be right over to take a look!
Don't forget that every week, one lucky random participant has the chance to win a $25 gift voucher from Simon Says Stamp and you can join in up to 5 times, which means you could have 5 chances to win. You have until next Monday at 8am Ohio time. 1pm UK time, 2 pm CET to join in and good luck....


Recipe for project:


I just love all the little details of this tag. I order the snowflake die as it really adds a wonderful touch to the background. You are so creative. I love all the tedious details. And the Marquees are my favorite this year of all the ideaology! Great job on your tag!!
ReplyDeleteI absolutely love this!! Everything about it is just perfect. Thank you for sharing!!
ReplyDeleteWhere is the Santa from
ReplyDelete