Happy Monday everyone....
Hope you've all had a good weekend and as always, a new week brings a brand new Simon Says Stamp Monday Challenge and this week our theme is all about the most wonderful time of the year...CHRISTMAS!
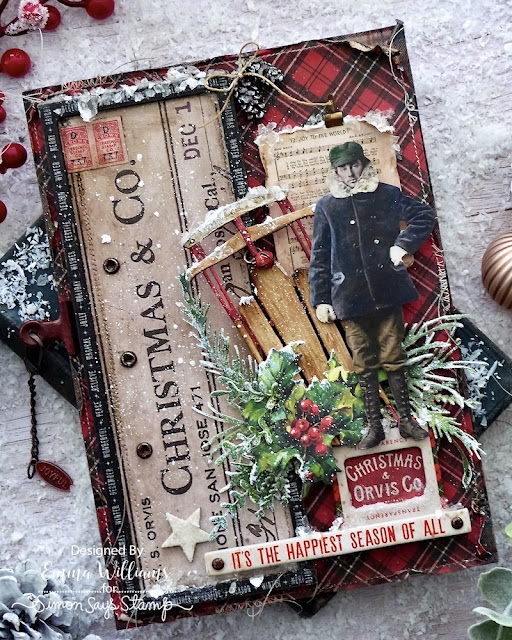
I'm sure that it hasn't escaped anyone's notice that the festive season is on it's way and I'm sure it will be here before you know it ~ where has 2023 gone?!? In fact where have the last three years gone? But as we fast approach making for the holidays, I decided that I would create a panel using some of Tim's new idea-ology products and combining them with some Sizzix dies, and this is the result ~ they go together perfectly and that vintage sled with a paper doll is just a match made in heaven!
COVERING THE PANEL
To begin with I took the larger sized Rectangle Etcetera Panel from Stampers Anonymous and I covered the edges with last year's Christmas Design Tape. This tape hasn't comeback this year but is still available to buy from Simon.
I then used one of the new papers from the Christmas Backdrops set, the tartan/plaid design and once I'd cut this to size, I added some rips and tears around the edge, machine stitched a border and then adhered it onto my panel, curling back the corners to show the tape underneath. I also added a Nail Tack in the top right hand corner, bending the nail back on itself, after I hammered it into the board.
BUILDING THE LAYERS
Now we begin building the layers and I began on the left hand side. This frame is actually made from two of the waste pieces from the Collage Tiles ~ I throw nothing away, keeping all these little bits for those "ooo, this might be come in handy for a project moment", and now is the time to use it!
I layered and stuck the two waste frames together to form the frame and painted them with Black Soot distress Paint. Once dry, I added some more of last year's design tape around the frame.
I then cut a panel of one of my favourite papers from the Christmas Backdrops set, the Christmas & Co paper, concentrating on the logo area only and after machine stitching a border around the edge, I placed the panel behind my black frame, attaching it with Matte Collage Medium, which I also applied over the front of the frame to seal it. In the top left hand corner of the frame, I added some stamps from the Christmas Ephemera Pack.
I then ran the Walnut Stain Distress Crayon around the edge, blending out any harsh lines of colour with my fingertip before I attached the completed piece on the left hand side of my covered Etcetera Panel.
To add some Christmassy feels to the piece, I applied some Grit Paste through the Speckled Layering Stencil, and then splattered some Picket Fence Distress Paint over the panel.
Once this was dry, I added Mica Flakes along the top of the frame, attaching them with a drizzle of Glossy Accents, and also added some along the bottom edge of the frame.
On the outside top right corner of the frame, I attached two of the beautiful Pine Cones that were part of the Christmas idea-ology range and to add the snow effect, I rubbed a small amount of gesso over the cones, just catching the raised areas and then smeared a small amount of Snowflake Paste over the top. I attached each cone with hot glue and then the final touch of a small twine bow.
Finally, I attached three Large Fasteners down the side. I cut the legs off the back of each fastener and stuck them to my panel using Matte Collage Medium.
We're now ready to build the scene on the right hand side....
VINTAGE SLED
We'll begin with making the sled, that I positioned behind the paper doll.
This is one of Tim's new Christmas dies from Sizzix, and is so easy to put together. I cut the base layer from red cardstock, and then cut the remaining layers from Mixed Media Heavystock card, inking these pieces with Walnut Stain and Gathered Twigs Distress Inks to create the Woodgrain effect and adding some darker brown shading around the edges. I then assembled my sled, adding the final die cut section along the top of the sled, which I cut from silver metallic kraft card, and sanded to knock back the shiny, shiny metal look and create more of a vintage feel.
To add the touches of snow to the sled, I used a combination of Snowfall Paste and Grit Paste, applied with my fingertip to create a realistic look of snow, before adding a sprinkling of Mica Flakes.
To complete the sled, I hung a Holiday bell from the centre, which I painted with Candied Apple Distress Paint.
GREENERY
The greenery is all die cut from inked cardstock. I used a combination of Bundled Sage and Rustic Wilderness Distress Spray Stains to add the colour to my card, and then once the card was dry, I cut the pieces using the foliage dies from the Vintage Sled die set, combined with dies from last year's Holiday Brushstrokes. Once I had my selection of greenery, I started to add the snowy effect to each piece.
This is achieved by lightly dabbing the edges of the die cuts with the Embossing Dabber and then sprinkling white embossing powder over the wet ink. Tap away the excess, and heat emboss. Once the powder is cool, rub Matte Collage Medium over the pieces, and sprinkle with Rock Candy Distress Glitter. Repeat with all the other pieces and then set them to one side to dry.
PAPER DOLL
We now have the sled, the foliage and just need the doll and something for him to stand on...
The paper doll is from the Christmas Layers and Paper Doll pack and I just love this guy, he is so cool. I colour tinted the image with Distress Crayons and a waterbrush.
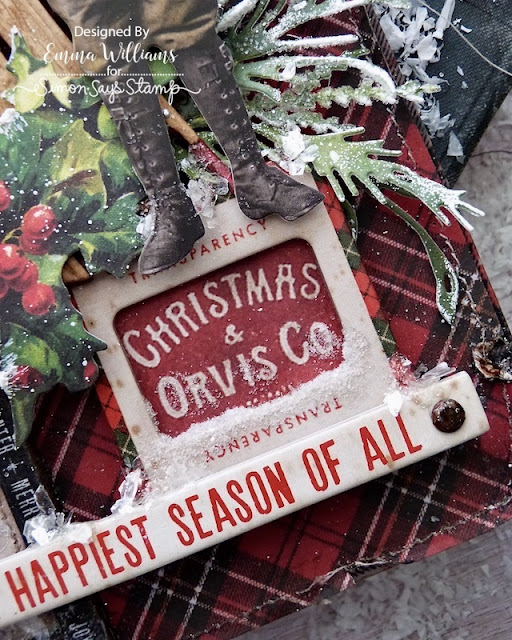
The pieces that he is standing on, is a Transparency Slide from the Baseboards and Transparencies pack. I cut another section of the paper that I used in the frame on the left, but this time is showed "Christmas & Orvis Co", which fit perfectly inside the frame.
I then attached the frame to a collage tile, but you can also use foam pads, before I attached this to my panel.
CREATING THE SCENE
All the pieces are ready and it's time to create the scene.
I placed the sled at an angle, using foam pads to add height and dimension. Before I attached the paper doll, I placed the Joy To The World music sheet, which is taken from the Christmas ephemera pack, behind him, adding some rips and tears around the edge, and attaching it with foam pads. I also clipped a tiny clip to the top of the sheet.
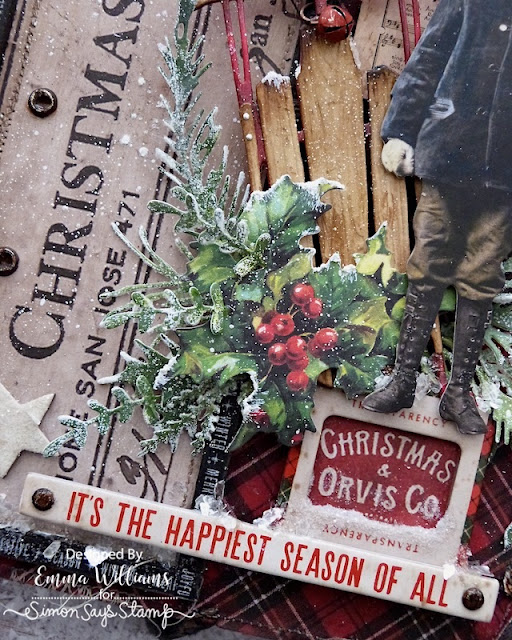
I then attached the paper doll over the top, placing him next to the sled and standing on the transparency slide. I arranged the foliage around the base of his feet, and then finished with a holly piece, again taken from the Christmas Ephemera pack.
The quote chip, 'It's The Happiest Season of All" is from the same pack as the transparency slide and I attached this across the bottom section of my panel, adding hardware heads to either side of the quote chip.
The final piece was the star which sits on the left of the quote and is again from the Christmas Baseboards pack. To add a touch of sparkle to the star itself, I applied a smear of Glossy accents over the surface and sprinkled with Rock Candy Dry Glitter.
Finally, I added Mica Flakes to the panel, once again attaching them with a drizzle of Glossy Accents.
To complete the piece, I painted a hinge clip with Candied Apple Distress Paint, clipped it to the left hand side of the panel and added a Christmas Tiny Tag.
So, that's my project finished for this week and I hope you've loved what I made and enjoyed the techniques I've used to create a sparkly winter's scene.
Don't forget that every week, one lucky random participant has the chance to win a $25 gift voucher from Simon Says Stamp and you can join in up to 5 times, which means you could have 5 chances to win. You have until next Monday at 8am Ohio time. 1pm UK time, 2 pm CET to join in and good luck....
Recipe for project:


Thank you for sharing how you made this gorgeous piece 💜
ReplyDeleteThank you Emma for sharing! It is gorgeous! Please forgive me if you mentioned it and I missed it, did you use an embossing folder on the sled to get a wood grain or just ink?
ReplyDeleteThank you so much for your kind words and for your blog visit, I do appreciate it. ❤️ As for the wood grain effect on the sled, the die has two separate layers, the base and then the upper wood effect layer which actually embosses the wood grain texture when you cut the card but then I enhanced it by using ink. If you go to the tutorial above and to the section where I put the sled together, I've mentioned which colours I've used, and hope that helps but if you have any other questions, don't hesitate to ask... 🙂
DeleteWell, you’ve challenged me once again Emma! I learn so much from your excellent tutorials, you challenge me to excellence lol. I just completed this make , love the rustic look, am a country gal. I had enquired about the little music ephemera piece and then realized when rereading your tutorial you did tell us where to find it, missed that, but Thankyou for answering me on IG.
ReplyDeleteI did just post mine version in Instagram , tagged you. Heather, New Brunswick, Canada
ReplyDeleteSo amazing .I just Dove your art. Thanks for sharing
ReplyDeleteAdore. Lol
ReplyDeleteSomehow I missed this. This is one of my favorite makes. Love the rustic Christmas/Winter that if represents. Great tutorial...LOVE.
ReplyDelete