
Hey everyone...
Hope you all had a great weekend and you're now ready for the week ahead and as always on a Monday, there is a brand new Simon Says Stamp Monday Challenge. This week our theme is called Whatever The Weather, which at the moment seems so appropriate, because what is happening to our weather?! Here in the UK, there is no sign of spring and we've just experienced some more snow, it's still bitterly cold and winter is still hanging on in there!! It's crazy....
But when it's cold outside, it gives us all a good excuse to spend some time creating and we hope you'll join us and play along with our challenge theme!
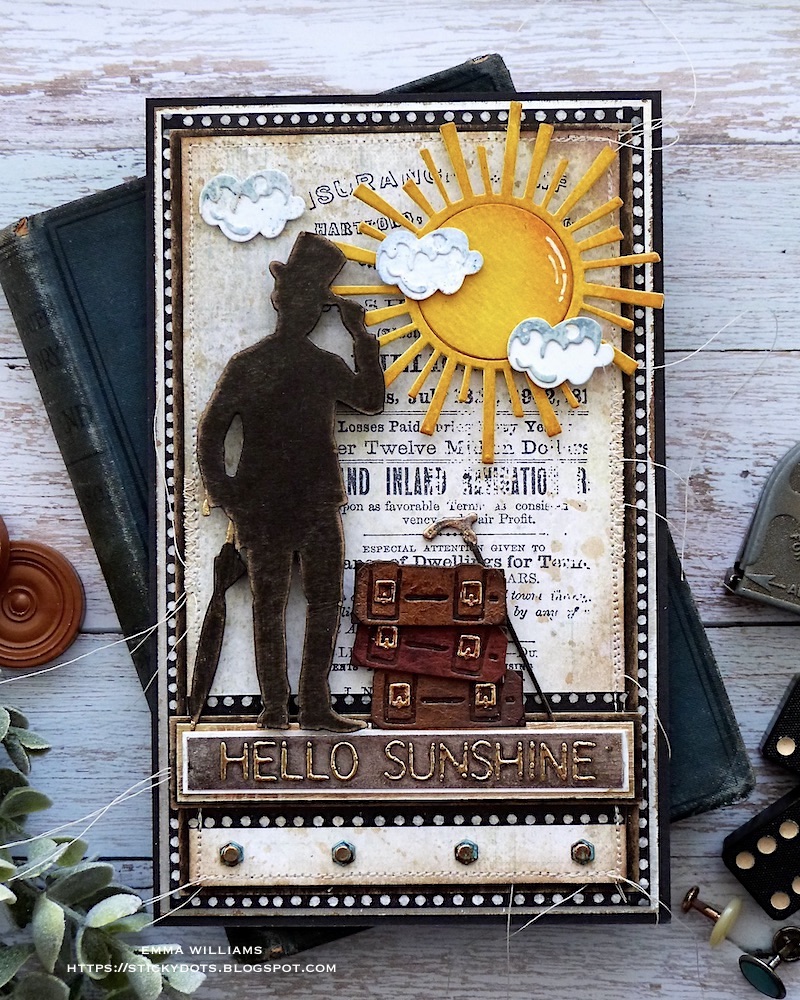
For my make, I chose to make a card all about those warmer days that I hope are just around the corner, and I used a combination of old and new dies from the 2023 Sizzix Everyday collection by Tim Holtz to create my scene that is packed full of sunshine...
So, here we go...it's time for some die cutting fun!

BACKGROUND
I cut a panel of watercolour card, 10.5 x 18cm and spritzed the surface with a light misting of water before spritzing the card with a combination of Lost Shadow, Old Paper and Pumice Stone Distress Spray Stains, together with Lost Shadow Oxide Spray.
After allowing the colours to blend, I heat dried the card panel. I then dipped the card into some inky pools of Frayed Burlap Oxide Ink, heat dried the panel and then inked the edges with Walnut Stain Distress Ink.

Using Black Soot Archival Ink, I inked up the text stamp from The Professor 2 stamp set, and stamped on the right hand side of the panel.

To add more layers, I used the graph lines stamp from Glitch 1 and stamped this using Speckled Egg Oxide Ink. It's a very faint layer, that you can hardly see on the camera, but it is there and just adds to the background.
I machine stitched a border around the outside of the panel before matting it onto black kraft card, sanded with the sanding disks.

These disks are a game changer, if you haven't tried them yet then you MUST. You just attach them to your blending tool and they are good to go and really do the job.
I cut a piece of white card slightly larger than the background panel and applied the dotted Design Tape Trim around the edge to form a border before I layered the background panel onto this piece of card, followed by a final layer of silver metallic, again sanded back with the sanding disks.
Mount the layers onto the card blank.

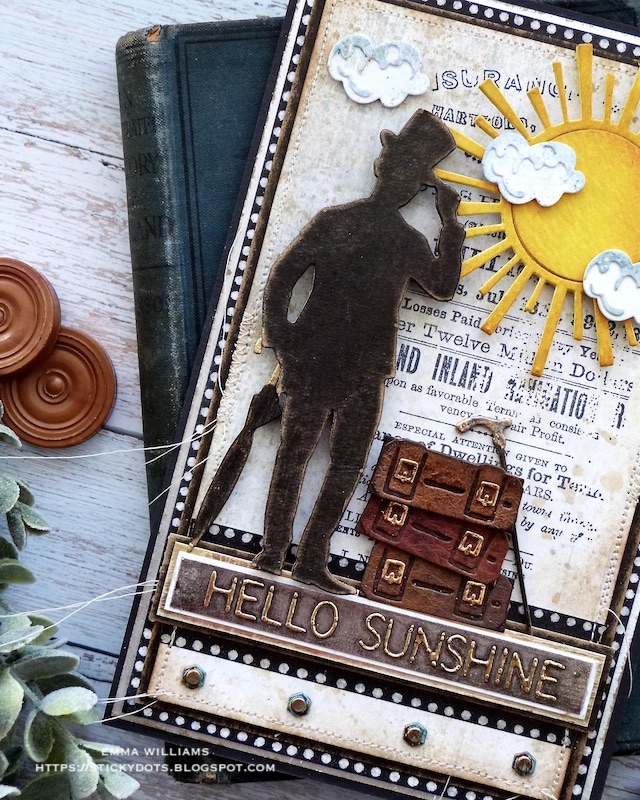
QUOTE PLAQUE
Along the bottom section of my card, I added a quote plaque ~ "Hello Sunshine".

To make this I cut a strip of silver metallic kraft card, and sanded it lightly. I then die cut my sentiment from gold metallic kraft card, using the Label Alphanumeric die set.
Adhere the letters to the silver strip and then apply a light coverage of black soot Distress Paint over the top. Wipe away the paint from the gold lettering and allow it to dry on the silver.
Matt the sentiment strip onto a piece of cream card, followed by black kraft card before attaching across the bottom section using foam pads.
I then applied some more of the dotted design tape trim, above and below the plaque.
We're now ready to create the scene and we'll start by creating some sunshine...
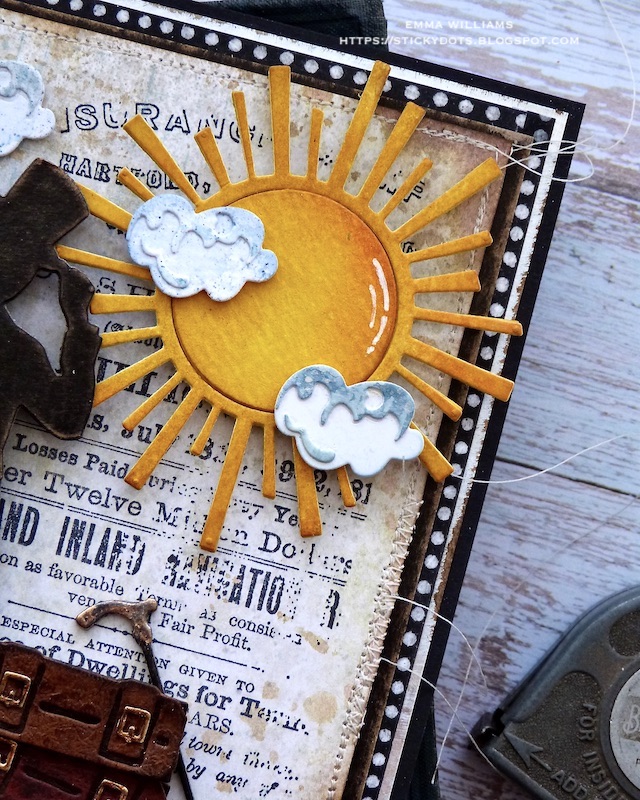
SUN

I coloured some watercolour card using Mustard Seed and Fossilized Amber Distress Spray Stains and once dry, I used the sun from the Circle Play die set and cut the image. After adding some shading with Wild Honey Distress Ink, I inked the edges with Walnut Stain Distress Ink.

This particular die, cuts two sections, the rays and an inner circle and because I wanted to attach the sun to my background using foam pads, I cut and attached a second, slightly larger circle than the die cut circle to the back of the sun before adhering the completed die cut to my background, placing it in the top right hand corner.
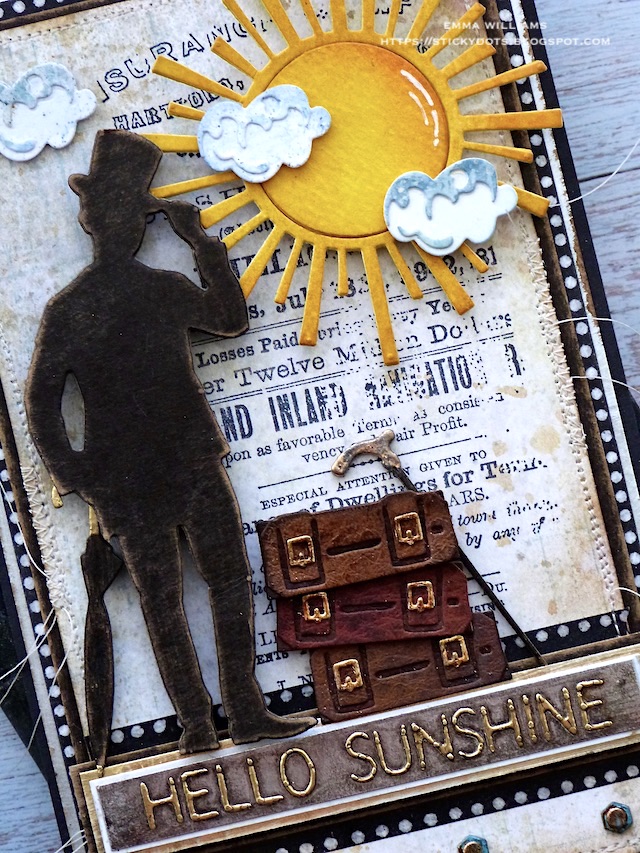
GENTLEMAN SILHOUETTE

Die cut three layers of black kraft card using one of the three silhouette images from the Gentleman Thinlits Die Set and layer each die cut piece over the top of one another to make a one thick, substantial piece. Repeat this to make the umbrella and walking stick.
Taking the umbrella and the walking stick, I wanted to add a gold handle to each and created this effect by pressing just the handle section into the pad of clear embossing ink and then sprinkling gold embossing powder over the top. Heat emboss to create the gold handle.

Sand the edges of the die cuts with the sanding disk, and then taking the gentleman and his umbrella, attach to the card front using foam pads, adhering him to the left of the sun and standing on the sentiment plaque.

You can see how much dimension the foam pads create on this make in the photos below.


SUITCASES
Now for the suitcases, and for these I used the die from the Road Trip Colorize set.
I cut my suitcase pieces from Distress Cracked Leather Cardstock that I had coloured with a combination of Aged Mahogany and Black Soot Distress Spray Stains.
I layered each of the die cut pieces to create the suitcases, adding the gold buckle trims cut from metallic kraft stock card.

Attach the suitcases to the right of the gentleman using foam pads, and lean the walking stick against the pile of cases.

DETAILS
We're nearly there and all that's left is to add the finishing touches, starting with the clouds...
Once again I used the Road Trip colorize die to make my clouds, cutting the sections from inky blue cardstock that I had in my 'leftover' box.
I layered each section to create the three clouds that I attached at the top of my card.

Finally, I attached four Hardware Heads beneath the sentiment plaque using Matte Collage Medium to secure them in place. These are altered with Salvaged Patina, Antiqued Bronze and Black Soot Distress Paint to create the patina effect to the metal.

So, that's my card finished and this week's project complete. I hope you love the card I've made and the ideas I've shared ~ it was a fun piece to make and now all we can hope for is we see a little of that sunshine very soon.

As always, if you make anything, or if you've been inspired by anything that you've seen here on my blog ~ then please, let me know by tagging me on social media or leaving a comment here and I will be right over to take a look!
Don't forget that every week, one lucky random participant has the chance to win a $25 gift voucher from Simon Says Stamp and you can join in up to 5 times, which means you could have 5 chances to win. You have until next Monday at 8am Ohio time. 1pm UK time, 2 pm CET to join in and good luck....


Recipe for project:


Stunning card Emma - I love the variety of techniques and inks you have used with your fabulous dies to achieve this effect - particularly the word plaque. Totally awesome. i do agree that the weather in the UK is sooo unpredictable right now - snow, sun and rain all in the one day! Hope spring is soon around the corner!
ReplyDeletePauline xx