Happy Monday friends...
As the Christmas countdown begins, it's time for a brand new Simon Says Stamp Monday Challenge and this week, our theme is all about Holiday Cheer and we would love for you to join us and play along. The DT are showcasing the amazing products from the equally amazing Tim Holtz but this isn't something you have to do, but of course if you'd like to ~ then that would be fantastic!
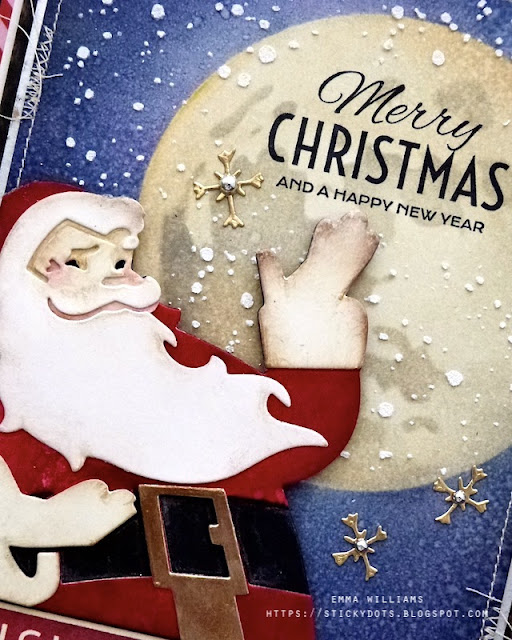
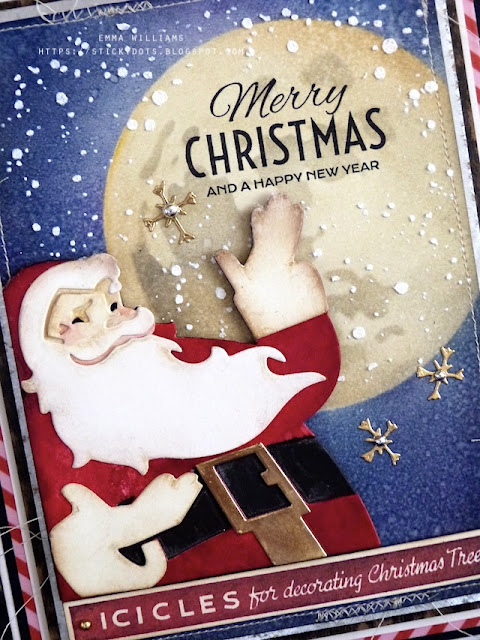
For my project I created a Christmas card full of the holiday spirit and used one of Tim's brand new Christmas dies from Sizzix ~ the beautiful, stylised Retro Santa and hope you'll love how I made my project combining this image with Stampers Anonymous stamps and that gorgeous Moon Mask, which really is the gift that keeps giving ~ other than inks and tools, I honestly think this is the one thing in my stash that I use the most.
To begin with I made a white card blank to measure 14.5 x 19cm and started by adding the first of my base layers.
I cut a panel of white card, and applied the Candy Stripe Christmas Design Tape around the edge of the card stock to create a patterned border. I then matted the panel on to a piece of navy blue cardstock, slightly smaller in size than the card blank and mounted these layers onto my card blank.
MOONLIT BACKGROUND
Now for the background and how I created that big moon behind him. I cut a panel of Mixed Media Heavystock card and 11.5 x 16cm and I placed the solid Moon Mask onto the right hand side of the panel, slightly off the edge.
I then used a blending tool to ink around the mask using Stormy Sky and Chipped Sapphire Distress Inks. starting with the lighter colour and then working my way inwards from the edge using the darker colour, adding less ink as I get towards the edge of the Moon Mask. To complete the background, I blended Villainous Potion Distress Ink around the edges.
Flick water across the surface to add tiny speckles and heat dry thoroughly.
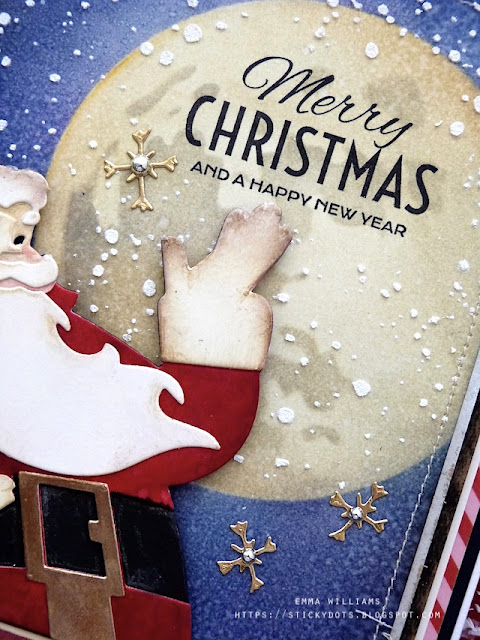
After removing the mask, I inked the inside of the moon with Antique Linen Distress Ink before placing the detail mask over the top and inking through it with Hickory Smoke Distress Ink.
To complete the moon, I added some darker shading around the edge and then stamped the sentiment in black Soot Archival Ink, using a stamp from the Festive Overlap set.
Machine stitch a border around the outside of the panel.
Now for the snow and I to create this, I applied Opaque Grit Paste through the Speckles Layering Stencil and then allowed for it to dry.
Matt the background onto a panel of silver metallic cardstock, followed by a layer of black kraft cardstock and a layer of white card. I then mounted the panels onto the front of my card blank, using foam pads.
ICICLES FOR DECORATING BORDER STRIP
Using the "Icicles for decorating Christmas Trees' stamp from the Vintage Holidays stamp set, I placed the stamp into my stamp platform, inked with Barn Door Distress Ink and stamped the border. Without removing the stamp from the platform, I inked it once more with a light touch of Black Soot Archival Ink and then stamped again.
Cut the border strip down to size and then after inking the edges, I attached this along the bottom edge of my card. Add a gold metallic droplet to each side of the strip.
RETRO SANTA
Now for my star, that gorgeous Santa. I just love this die, it really does epitomise Christmas and his face is just one of the best Santa's I've seen. The die itself is so simple to put together and I went for traditional colours, but you can choose anything you want.
To begin with I inked my layers and used the following colours:
Santa's Suit: White Heavystock Card inked with LumberJack Plaid and Candied Apple Distress Spray Stains
Beard and cuffed gloves: White Heavystock Card
Base layer: Black Heavystock Card
Belt Buckle: Gold Metallic Kraft Stock
Once I'd die cut all my layers, I inked the edges of each piece with Frayed Burlap Distress Ink, before I started to build Santa. On the original die, Santa's face shows the red layer but I wanted to create a proper face, so after cutting the red layer, I then cut a second layer from white heavystock card, trimming the die to have just the piece that will become his face. I then adhered this over the top of the red layer before adding the final die cut layer, which will form the complete face and his beard. I used Distress Watercolour Pencils to add any details to the face.
With Santa complete, I attached him to my card using foam pads and placing him above the border strip.
FINAL DETAILS
We're nearly there and all that's left for me to do is add those gold snowflakes, complete with the Metallic Droplets centres.
I used the snowflake die from the Cozy Winter set to die cut gold metallic kraft card and attached three snowflakes onto the background. To complete the snowflakes, I added gold droplets in the centres of each
So that's my card finished and I hope you love what I've made and the ideas I've used to create this piece.
As always, if you make anything, or if you've been inspired by anything that you've seen here on my blog ~ then please, let me know by tagging me on social media or leaving a comment here and I will be right over to take a look and if sometimes I miss it ~ just keep nudging me!
Don't forget that every week, one lucky random participant has the chance to win a $25 gift voucher from Simon Says Stamp and you can join in up to 5 times, which means you could have 5 chances to win. You have until next Monday at 8am Ohio time. 1pm UK time, 2 pm CET to join in and good luck....
Recipe for project:


Gorgeous!!! LOVE IT!! :-)
ReplyDeleteHope you have a great week
Luv
Lols x x x
Wonderful card!
ReplyDeleteI just found you! Do you have an email list I can sign up for? Love your projects 🥰
ReplyDelete