
"Love is a flower you've got to let grow' ~ John Lennon
Hello friends...
Hope you all had a wonderful weekend and keeping safe and well! So another week has flown by and it's time for a brand new challenge on the Simon Says Stamp Monday Challenge Blog and this week, our theme is called BEAUTIFUL BOTANICALS, so whatever botanicals you choose to work with ~ I think this is a challenge that we'll all enjoy and the DT can't wait to see what you'll be creating.
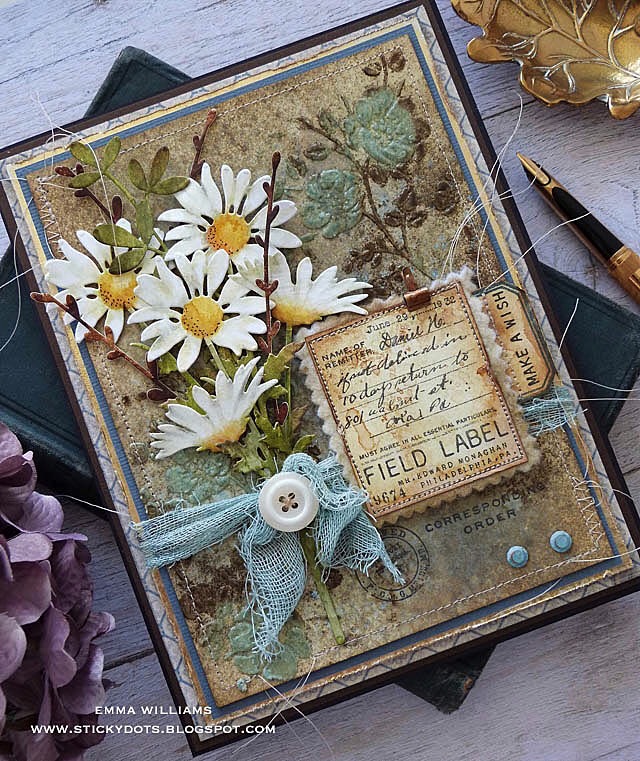
For my project, I chose to make a card which I will be sending to someone special who actually loves flowers but can't have them in the house and what better way to tell them I'm thinking of them than with this bunch of beautiful Tim Holtz die cuts and Stampers Anonymous stamps.

So let's get started and here's how I created this piece....

After die cutting the closed and open daisies, a piece of foliage and some of the twigs, I coloured them using a combination of Distress Marker Pens and Polychromos Pencils.

MARKER PEN COLOURS: Fossilized Amber, Wild Honey and Scattered Straw for the daisy heads with a touch of Pumice Stone on the petals; Peeled Paint and Forest Moss on the stems and the foliage stem and Ground Espresso, Vintage Photo and Gathered Twigs on the twiggy die cuts.
Once I had all my pieces watercolored and shaded with the pencils, I then arranged them into a bouquet, attaching them at the back of each piece with either matte collage medium or foam pads, the latter will add some height and dimension to the finished bouquet and then set this to one side whilst I worked on the background layers.


For the background layers, I began by cutting a panel of Mixed Media heavystock card, 12.5 x 17cm and after misting it lightly with water, I used a base of Old Paper, Speckled Egg and Antique Linen Distress Spray Stains. I then heat dried the card, before spritzing another layer of ink, this time Frayed Burlap Oxide Ink and after another misting of water, I heat dried this layer. I then flicked some Speckled Egg Oxide Spray across the surface before spritzing with Frayed Burlap Spray Stain and a final blast with the heat gun to complete the first layer of the background.
To add the texture, I used a palette knife to apply Translucent Grit Paste through the Floral Layering Stencil that is in the Mini Stencil Set number 25. I arranged the design to be in the top right hand corner, and bottom left hand corner. After carefully removing the stencil, I then sprinkled Speckled Egg onto the flowers and Walnut Stain Embossing Glaze over the leaves. Set this to one side to dry and then once it is, heat emboss the glaze until it becomes molten and dissolves.

I inked around the edges of the panel with Gathered Twigs Distress Ink and then used my sewing machine to create a stitched border.
To complete the background, I stamped a postmark and some imagery taken from the Field Notes Stamp Set and just placed these in the bottom right hand corner, underneath where the Field Label will sit. In the photo below, you can see where I added the stamping.

After matting and layering my panel onto blue card, followed by a layer of gold metallic kraft stash, I attached by bouquet to the panel, placing it on the left hand side and using foam pads and collage medium to attach it.

I then wrapped a piece of Mummy Cloth, dyed with Speckled Egg Distress Spray Stain around the panels, tying it where the two ends come together over the stems of the flowers.


We're nearly there...
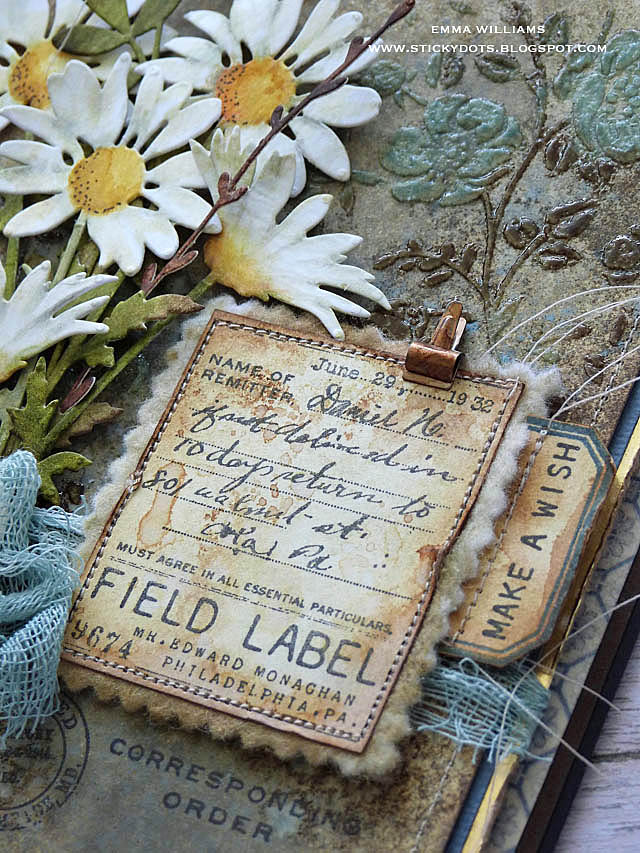
...and the next step is to create the field label which is a stamp in the Field Notes stamp set, stamped with Black Soot Archival Ink onto a piece of mixed media heavystock card, coloured with Antique Linen, Old Paper and Gathered Twigs Distress Inks. After trimming it down to size, I then aged the ephemera piece around the edges and stitched it onto a piece of felt, that I cut using my Grandma's precious hand-me-down...her pinking shears!

I attached the label to the right of the flower bouquet and added a stamped vial label, again stamped using the Field Notes stamp set but with the addition of a message, 'Make A Wish' taken from the Tiny Text Stamp Set.
For finishing details, I added a vintage button and two hardware heads, coloured with Speckled Egg Distress Paints.

I also added a Tiny Clip, altered with a little Rust Alcohol Ink which I then placed onto the top of the field label piece.

Using foam pads on the back, I then mounted my artwork panel onto the black card blank which I covered with a piece of chocolate brown card and a layer of card, covered with one of the tapes from the Butterfly Design Tape set.

So, I hope you've enjoyed this tutorial and how I created my bouquet of flowers card which is now going to be given to the recipient and hopefully, all her wishes will come true!


Tim Holtz/Sizzix: Wildflower Stems 1 and 2
Distress Marker Set
Alcohol Ink: Rust
Distress Spray Stain: Old Paper, Frayed Burlap, Speckled Egg


The daisies look so beautiful nestled on that gorgeous textural background and I love how the mummy cloth looks. This card is a gift in itself Emma, so beautiful. Hugs, Anne xxx
ReplyDeleteEmma, you are awesome and everything yo make is spectacular!!!!
ReplyDeleteAbsolutely love it!!!
ReplyDeletebeautiful card Emma. I love the addition of Make A Wish to the small tag!
ReplyDeleteAbsolutley gorgeous. The daisies look so reall and lifelike. I am sure the recipient will love this card! TFS
ReplyDeleteFabulous make, love the daisies as well...love how you colored them too!
ReplyDeleteYour friend will love this. Every glorious detail. Super gorgeous.
ReplyDeleteGorgeous creation!!!
ReplyDeleteWhat a terrifically elegant, beautiful and thoroughly inspiring design. It sings with the gentle, timeless soul of late summer into early fall.
ReplyDeleteAutumn Zenith 🎃 Witchcrafted Life
Absolutely gorgeous!!!!!!!!!!
ReplyDeleteVery helpful post! Digital Marketing is the game-changer for local visibility. Thanks for sharing these insights!
ReplyDeleteRead More - search google ad in hyderabad