Showing posts with label bird crazy. Show all posts

Thursday, 5 May 2016

Take A Chance...

Hello friends...

Hope you're all having a wonderful week and here in London, we've finally got some warm weather!! After a very long winter, it's so lovely to finally see the sun shine and see the blossom appear on the trees...it's the little things that make me so happy!

And to celebrate the fact that spring has finally arrived, I thought it would be fun to create a project using some of my favourite Tim Holtz products to create a piece that would contain all the colours of the season and of course, a crazy cat and his feathered friend!

This was such a fun piece to create and I just love the expressions on each of their faces...they can't help but make you smile!
The background for this card is created using canvas paper. I applied a wash of Picket Fence Distress Paint over the top of the paper, which I find helps blend those Distress Crayons so much easier! I then took a selection of the crayons and just scribbled them onto the dried paint surface, blending with a baby wipe and my finger to create this splash of colour.
To create a little more interest to the background, I also added some Ranger Texture Paste through the Chevron Layering Stencil and through the Splatters Layering Stencil and some torn tissue wrap which I just applied using Collage Medium, blending a little more crayon over the surface of both.

After a few flicks of Distress Paints ~ Black Soot, Picked Raspberry and Picket Fence I then added some doodles around the edge to create a border and some gold foiling.
Of course, the little birdie and cat don't need any introduction as they are from Tim Holtz's wonderful Crazy Cats and Mini Bird Crazy Stamp sets. I coloured both of these using Distress Markers before die cutting them with the corresponding die set and attaching them to my background, together with cheesecloth, floristry fibres and twine.
To complete the canvas, I added one of the Crazy Talk stamps, which just works so well and also added a Small Talk Sticker.
As a finishing touch, I used a button and sequins from the fabulous 28 Lilac Lane Minty Fresh Button Embellishment set! The colour of these embellishments are just perfect and they match Tim Holtz's Distress products so well ~ you must check out the whole range as they are a must have to any crafter's stash!
...and here is the finished project, matted and layered on coloured card!
Thanks for stopping by today and hope you've loved this little piece of spring!
See you all soon ~ love Emma xx

Monday, 21 March 2016

The Sweet Life...

Hello everyone and welcome to the brand new Simon Says Stamp Monday Challenge where this week our theme is ~ Food & Drink! Whether you celebrate your love for food and drink or whether you choose to make something for Easter, whatever you decide, we can't wait to see what you create and hope you'll play along with our challenge!

For my project, I wanted to create some fun little Easter gifts ~ mini mason jars, filled with chocolate Easter eggs and decorated with the help of some of my crazy feathered friends, dressed as Easter Bunnies!
 I also made a matching Easter card, that can be given alongside the gift!


As my starting point I used some of Tim Holtz's Mini Mason jars, together with a larger jar. These tiny jars are perfect for gifts but because I was adding food products to the jars, I decided to keep them as they were and not use paints or inks. But of course, they did need decorating and I chose to create small tags in fresh spring colours and include the stars of the show...the dressed up crazy birds!
I began by cutting two small tag shapes from kraft card, each one approx 8 x 5cm. I then inked up the Dots stamp with clear embossing powder and stamped directly onto the tag. Sprinkle the ink with white embossing powder and heat emboss. At this stage, I also cut a panel of kraft card and using the Dot Stamp, I stamped and white embossed the card, which I will use later for my card and for my tag messages.

I inked around the edge of the tag with Walnut Stain Distress Ink and then added a bow, made from crinkle ribbon dyed with Tumbled Glass for the first tag and Shaded Lilac for the second tag. Attach the bow using a second piece of ribbon attached around the rim of the lid.
For the little birdies on the tags, I used the Mini Bird Crazy set, which is the perfect size for these and stamped them onto watercolour card before watercoloring each bird with Distress Marker Pens and then die cutting with the corresponding dies. Of course, if you don't have the die, these are quite easy to cut out but using the die just makes things that little bit quicker! Layer all your bird pieces up and then using the bunny ears from the Crazy Things stamp set...stamp, colour and die cut before adding to each of the birds!

When creating the gorgeous little flowers, I used pinks, lilacs, blues and yellows from the Core'Dinations Paper Pad and die cut each of my flowers using the Tiny Tattered Florals die. I then assembled all 17 of my flowers and once the flowers are all made, I then laid them out on a craft sheet and spritzed them with various colours of Distress Stain ~ I used Picked Raspberry, Mustard Seed and Spiced Marmalade. Carefully heat dry the flowers and once thoroughly dry, dip a paint brush into gesso and gently dab the tips of each flower. Heat dry once more and if you need more gesso, just add some more, gently building up the colour!
I stamped the "Happy Easter" message in Jet Black Archival Ink onto some more of the white embossed dot kraft card, cut the card into little banner shapes and attached these to my tags, together with a bird and a couple of the tiny florals. 
On the purple bow, I also added a small flower to the centre of the bow.
To complete the jars, I added a circle of paper from the Wallflower paper Stash, a wooden Kaisercraft embellishment which I altered with a co-ordinating colour of Distress Paints and a touch of Treasure Gold Gilding Wax and as a finishing touch, attached a Curio Knob.
Once I started these little gifts, there was no stopping me and I went on to create a larger jar, which features one of the bigger, regular crazy birds. I attached the die cut bird to the top of the lid, together with a crinkle ribbon dyed bow, floristry fibres, a flower and an enamelled tag with the words, "Sweet Life"...taken from the Words Remnant Rubs set.

...and what could be nicer than using one of the larger Bird Crazy stamps to create a matching card! For this, I used my favourite bird and added him onto the dotted background and some corrugated card matts. I attached more of the tiny tattered florals for a wonderful touch of Spring and added an Easter message and some twine to complete it!
I love the fact that Tim has created the smaller birds to be used on tags, etc and that they will compliment the larger birds which can be used on cards...it just creates such a wonderful set and gift, which I hope you love, as much as I loved creating it!
 
As always, if you need any further inspiration for this challenge, then you need look no further than our blog to see all the wonderful creations from all the very talented Design Team members and every week, one lucky random participant has the chance to win a $50 gift voucher from Simon Says StampYou have until Monday 8am Ohio time. 1pm UK time, 2 pm CET to join in and good luck....


Instagram
Thank you so much for all your visits today and hope you all have a great week ahead
See you again soon...love Emma xx


Products used:

Distress Ink: Walnut Stain
Distress Paint: Picket Fence
Larger mason jar, burlap flower and floristry fibres all from my own stash

Monday, 18 January 2016

Best Friends...

Hey everyone and welcome to a brand new Simon Says Stamp Monday Challenge! Can you believe that we're nearly three weeks into January? Where do these days go? At this rate, it will soon be Christmas again!!!

But back to the challenge and this week's theme is all about BEST FRIENDS! Whether you celebrate your friendship with a card or a scrapbook layout, maybe a journal page showing your appreciation or maybe your best friend is your partner and you want to make them a Valentine's Day card ~ whatever you choose, we can't wait to see what you create and hope you'll play along with us...

For my project, I decided to have some fun and when it comes to fun, there's nothing better than those crazy birds by Tim Holtz! I created a large tag shaped card with a vaudeville theme, using a couple of "Tweethearts" who I've fondly named, Rosie and Harry!


To begin with, I cut a panel of kraft card, 14 x 20cm and created a tag shaped card. I inked around the edge of the tag and then lightly dabbed some Picket Fence Distress Paint onto it. Next, I cut a panel of manila cardstock, large enough for my background and for my message and used Tim's wrinkle free distress technique using Antique Linen, Antiqued Bronze, Brushed Corduroy and Picket Fence Distress Stains to create my neutral, vintage background! I then cut down the inked card to create a background panel and a piece that I could stamp the Wonderful Life quote onto.

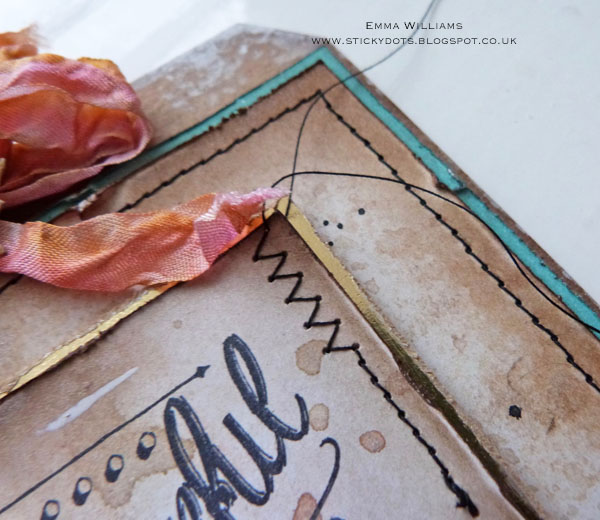
I took the larger inked panel and machine stitched around the outside with black cotton before  distressing the edges and matting it onto a piece of white card that I edged using Evergreen Bough Distress Paint to give me the perfect co-ordinating piece of coloured card stock.

I mounted the matted layers onto the kraft tag, using foam pads for dimension and slightly curled the corner for more of a vintage shabby feel.
Ink up the Wonderful Life quote with Jet Black Archival Ink and stamp onto the smaller panel of inked card.
Add some random stitches around the edge and use a credit card to make paint scratches.
I matted the quote onto a piece of gold metallic kraft core card and then attached it to the front of my tag with more foam pads.

Now for Rosie and Harry ~ I stamped the characters and the accessories onto watercolour card, coloured them all with Distress Marker Pens and then die cut using the co-ordinating die sets. Once I'd layered all the pieces together, I attached them onto a base of inked cheesecloth and some twine that I'd previously wrapped around the backing card.

I then added a adornment arrow and mini sprocket gear altered with Treasure Gold Gilding Wax.
Finally, I dyed some crinkle ribbon with Picked Raspberry and Spiced Marmalade Distress Stain and tied the ribbon into a scruffy bow, which I threaded through a hole I made in the top of my tag and as the finishing touch, I added two Tiny Tattered Florals, cut from Core'Dinations card stock...
...which completes my fun tag, perfect for that special person in your life!
As always, if you need any further inspiration for this challenge, then you need look no further than our blog to see all the wonderful creations from all the very talented Design Team members and every week, one lucky random participant has the chance to win a $50 gift voucher from Simon Says StampYou have until Monday 8am Ohio time. 1pm UK time, 2 pm CET to join in and good luck....


Just click on the link below to go shopping:


Don't forget we still have our Design Team call taking place and for more information about this, then just click HERE!


Thank you so much for all your visits today and hope you all have a great week ahead
See you again soon...love Emma xx


Products used:

Tim Holtz/Sizzix Dies and Punches: Tiny Tattered Florals, Bird Crazy, Crazy Things
Tim Holtz Stamps: Bird Crazy, Crazy Things, Wonderful Life
Distress Ink: Walnut Stain
Distress Paint: Picket Fence, Evergreen Bough
Cheesecloth from my own stash

Monday, 23 November 2015

Santa's Little Helpers...

Hi everyone...

This week, due to it being Thanksgiving over in the USA, there is no challenge over on the Simon Says Stamp Monday Challenge Blog but there is still time to enter our GIVE THANKS challenge that will run until next Monday, 30th November! So you still have plenty of time to show us your wonderful creations and play along with us!

But in the meantime, it may be a week off at SSS but how could I possibly leave you without a blog post?!? So, I thought I would drop by and share a couple of cards that I recently made and had featured in the Christmas issue of Making Cards Magazine using those wonderful Crazy Birds by Tim Holtz!

I've taken plenty of photos for you to see all the details and hope you love these two cards and enjoy meeting Santa's Little Helpers...Sparkle, Twinkle and Jingle!

So, first off we get to meet Jingle, complete with his bright red breast, his candy cane and presents. He even has matching candy cane ribbon
The background is created using Distress Inks and the wrinkle free distress technique! To complete the scene, I stamped snowflakes in Tumbled Glass Distress Ink and added cheesecloth as snow. All the birds and presents are coloured with Distress Marker Pens.


And for my second card, meet Sparkle and Twinkle! These two cuties stand on a bed of cheesecloth, underneath a bough of die cut Holiday Greens, lightly frosted with snow. The background is created in the same way as in the first card.


Hope these cards inspire you with your Christmas crafting and as always, I love seeing what you create and would love you to share!

See you soon and have a great week!
Emma xx

Saturday, 31 October 2015

Happy Halloween...

Hey everyone!

Count Batty and I are just popping by to wish you a very HAPPY HALLOWEEN and hope that you have a safe and spooktacular time!
I actually created this little tag from all the halloween leftovers that were on my desk and not going to be used and this fine gentleman is a distant relation of Zoe Hillman's fabulous Count Peckula and has come all the way from Transylvania for his special night of tricks and treats!
See you soon...love Emma xx
Powered By Blogger

Total Pageviews