Hello everyone...
Hope you all had a wonderful weekend and now ready for the start of the brand new week and a new Simon Says Stamp Monday Challenge! This week, our theme is called SPOOKY and we are celebrating one of my favourite times of the year ~ Halloween and all things that go bump in the night!
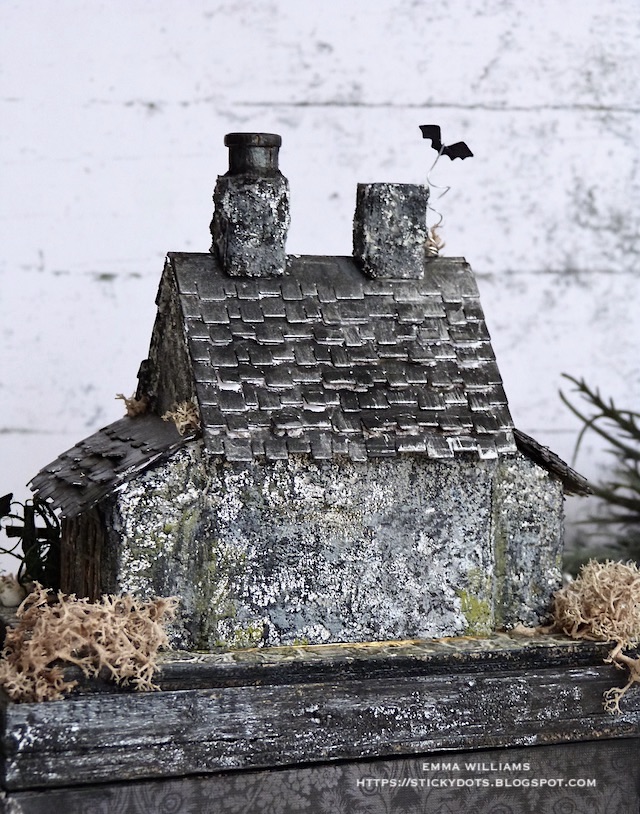
For my make, I couldn't resist using the brand new Village Thinlits die set to make a run down cottage, deep in the depths of the forest that was once the home to Oswald T Hall, a chemist and optician, and has many dark and foreboding tales to tell.
I absolutely love these dies, even when Tim first released the original dies, I've always become lost in my own little world creating villages ~ mainly because I love constructing and building things which is definitely in my genes, as my Grandfather was a master builder and architect by trade, he even built his own house just after the second world war, where my Mum and her family lived for many happy years and where I spent many happy days in the school holidays, visiting my grandparents and spending time with them.
So let's get started and here's how I created this piece...

To begin with I made my spooky little cottage...
For this house, I used the following dies in this set:
House 1
Entry way and roof top
Addition and roof top
Doorway
Chimney
Door and Door Frame
House 1 Roof Top
Tiles
I cut all my pieces from White Heavystock card and assembled them to form the structure of the house with the doorway and window frames cut into the front, complete with 2 x additions, with windows cut into each section attached to the sides. The roof top to the house, the roof tops to the additions, the entry way and 2 x chimneys.
I used red liner tape to attach all my pieces, but you can also use Matte Collage Medium, which works equally as well.
With my pieces in front of me, it's time to start bringing them to life and starting with house base, I attached the additions to either side of the main house...

...and the Entry Way onto the front of the house. Once stuck, I applied a good coat of Opaque Grit Paste over all the walls of the house.

I then left the house to one side to dry completely. If you notice that it's bending, don't panic, I've been there and once it's completely dry, it will straighten out again.
With the house dry, I then painted it to create the stucco look and texture and for this I used a base coat of Pumice Stone Distress Paint, then allowed this to dry before stippling Black Soot Distress Paint over the top. I don't want a block, dark coverage of black paint, just a subtle hint with pumice stone showing through. Set this to one side to dry.
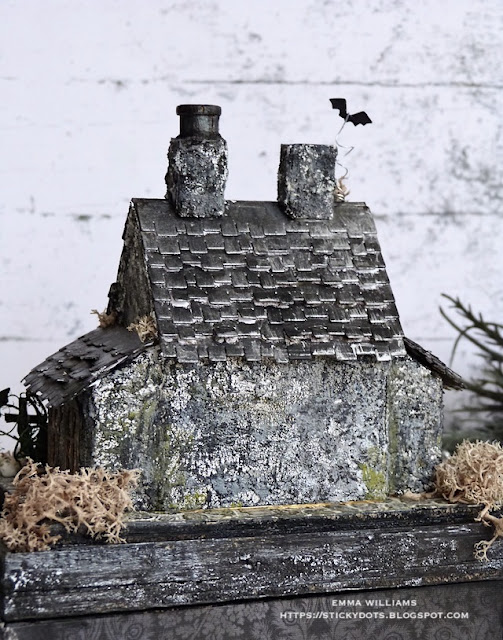
Moving onto the rooftops, I used the tile die set to cut all my pieces to attach to the main house roof and the addition roof tops, which I stuck in place, layering the die cut pieces, one over the other to form the tiled rooftops. I then painted the roofs with Black Soot Distress Paint, allowed this to dry before dry brushing them with Pumice Stone Distress Paint. Again, let the paint dry before lightly spritzing the roofs with Crooked Broomsticks Mica Spray.

When the roofs were completely dry, I then took the house rooftop and just tore away the side to make a hole. I then cut small offcuts of woodgrain card and inked these with Walnut Stain Spray Stain before attaching them to the underside of the roof to form beams.

I then attached all my rooftops onto the house which also includes the Entry Way rooftop which I left untiled but painted in the same colours as the other rooftops.
I assembled the chimney die cuts and once again covered the surface with Opaque Grit Paste and when dry, I painted them with the same paints as I used on the house. I then attached the two chimney pots to the roof. In the one pot, I had some tiny cotton spools and I wanted to create a circular pot inside the square pot, and it fit perfectly. So after painting the spool, I attached it inside the square chimney.
Die cut all the window frames and the door frames from some more of the woodgrain card, again inked and coloured with Walnut Stain Distress Spray Stain. I then attached these with Matte collage Medium.

Finally, to create the shattered windows, I attached Mica Sheets behind each window, adhering them on the inside of the house.

So that's the house ready...
Now for the box and the lid for my house to sit on, and for this I used:
Large vignette box
Large and second largest Vignette Panel
Large Vignette Frame
I attached the vignette frame to the panel using matte collage medium, allowed for this to dry and become secure before applying Translucent Grit Paste around the edges to create texture. Once dry, I painted the frame and panel with a coat of Black Soot Distress Paint. Set aside to dry whilst working on the smaller panel.
I painted the edges of the smaller panel with black soot and then covered it with two embossed panels of card. I used Mixed Media Heavystock and embossed it using the Mini Cobblestones 3D Texture Fade. To add colour to the embossing, I used a combination of the same paints I used on the house but this time, I used a very light coverage of Black Soot, just so it kissed the raised embossed areas to accentuate them.

Attach the smaller sized panel so that it sits over the top of the larger framed panel. NOTE: The panel doesn't fit flush inside the frame, it sits over the top and rests on top of the frame ~ there is a slight gap on either side which you can fill in if you choose but you don't even see this and I like it the way it is.
To attach this, I used a hot glue gun, applying the glue where the panel touches the frame, but you can also use Glossy Accents or Matte Collage Medium.

To complete the framed lid, I added Hardware Heads on either side of the wooden frame.
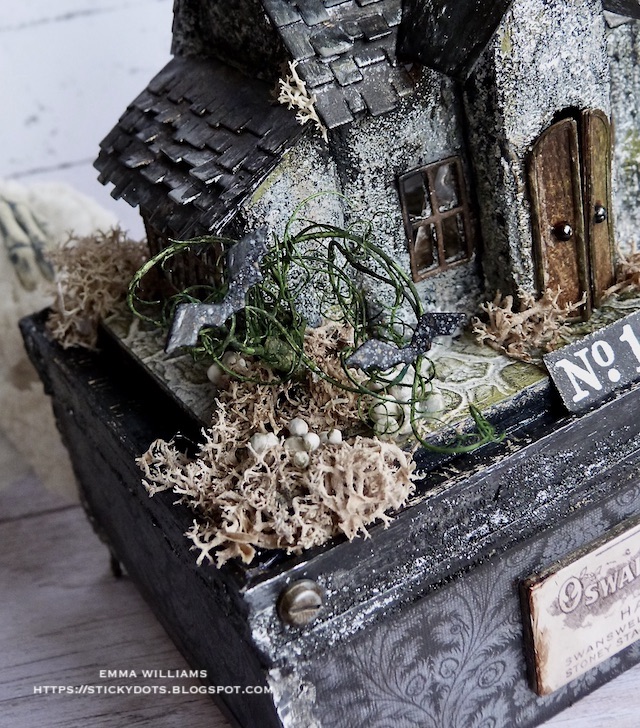
Taking the box, I covered the outside with Halloween Worn Wallpapers. I attached the papers to each side, with Matte Collage Medium and also applied a coat over the top to seal them. You will find that the papers aren't quite long enough to cover the longer sides but I just pieced them together and you can't really see the join once you've applied Black Soot Crayon over the top, which I did.
Around the edges of the box, I applied Crackle Paste and once the paste was dry and had done it's thing, I ran Hickory Smoke Distress Crayon over the surface, and used a waterbrush to blend the colour into the crackles and accentuate them.
I also covered the inside of the box, but you don't have to do this, you could just paint it, seal it with collage medium or leave it natural ~ YOU DO YOU!

I also added Mini Foundations to the bottom of the large Vignette Box and painted these with a little Black Soot paint.

We're ready to put this together...
Taking the panels, I drilled a hole through all of the layered panels and then fed my tiny lights through the hole. I then attached the wires of the lights to the base with hot glue and placing the house over the top, I secured and fixed my house to the base.

The battery box is attached to the underside of the lid.

Once everything is set into place, I adhered clumps of moss around the base of the house, and also on the roof of the house.
I also added some tiny pebbles stones and some moss that I have in my stash and bought from a local florists.
For the finishing touches...
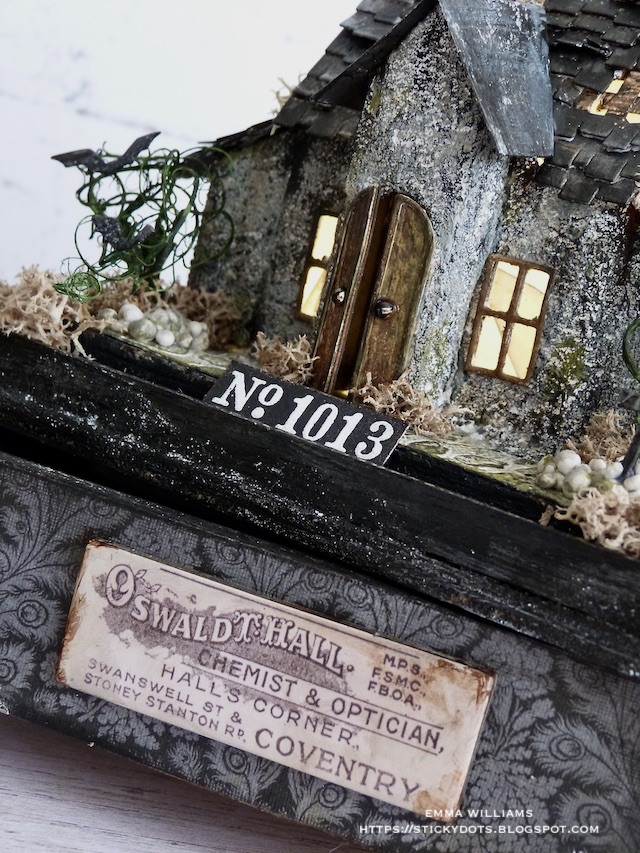
...I added my door knobs to the front doors ~ these are Metallic Droplets and I painted them with Black Soot Distress Paint before attaching them to the doors.
I then added a small cross which I just made from strips of black card and placed this in the pebbles on the right hand side.
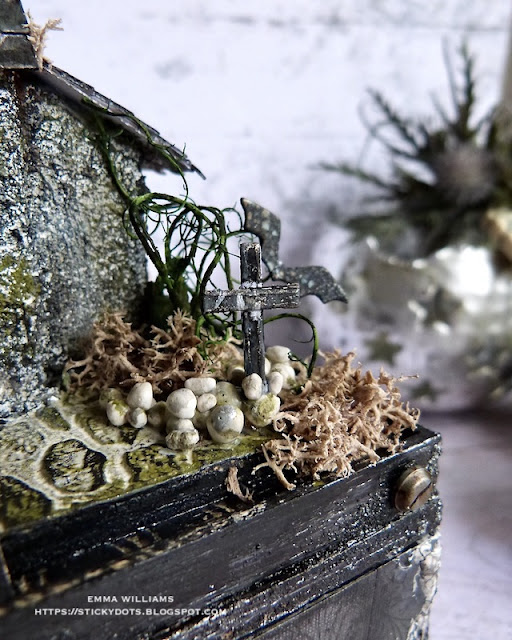
For the bats, I cut these using the Ghost Town 2 dies and attached three of them to the mossy clumps on either side of the house.
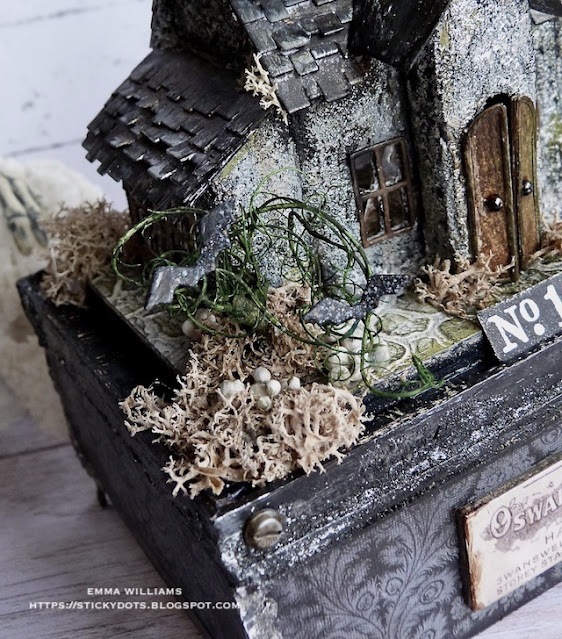
For the fourth and final bat, I attached it to thin wire and then placed this to come out of the roof.

Finally, I added the house number which I stamped and embossed with white powder using the No. 1013 from the Rest In Peace Stampers Anonymous stamp set by Tim Holtz. After cutting it down to size, I attached it to the front of my house.

Finally, I placed a Halloween Baseboard piece onto the front of the box, distressed with a little Distress Paint to make it look slightly more worn and old worldy!

So, that's it for me for today and I hope you've loved this piece as much as I loved creating and building it! I also wanted to say, that I have had lots of messages about my Winter Village that Tim showed during the YouTube Live and I will be posting this very soon...it's on it's way so watch this space!

As always, if you make anything, or been inspired by anything that you've seen here on my blog ~ then please, let me know by tagging me on social media or leaving a comment here and I will be right over to take a look!
Don't forget that every week, one lucky random participant has the chance to win a $25 gift voucher from Simon Says Stamp and you can join in up to 5 times, which means you could have 5 chances to win. You have until Monday 8am Ohio time. 1pm UK time, 2 pm CET to join in and good luck....
Thank you so much for taking the time to stop by today ~ stay safe and keep well.
Love Emma xxx
RECIPE FOR PROJECT
Sizzix/Tim Holtz: Village Collection Chapter 4 Thinlits Dies and Mini Cobblestone 3D Texture Fade, Ghost Town 2
Stampers Anonymous/ Tim Holtz: Rest In Peace
Distress Crayons: Hickory Smoke, Black Soot
Distress Spray Stain: Walnut Stain
Mica Spray
Distress Paint: Black Soot, Pumice Stone, Peeled Paint
Idea-ology: Halloween Worn Wallpaper, Vignette Box, Vignette Panels, Halloween Baseboards, Tiny Lights, Halloween Ephemera Pack, Halloween Snippets, Curiosities Sticker Book, Metallic Droplets, Hardware Heads, vignette Frames, Mini Foundations
Surfaces: White Heavystock Card, Woodgrain Card
Mediums: Crackle Paste, Matte Collage Medium, Translucent Grit Paste, Opaque Grit Paste, SSS White Embossing Powder
Tools: Heat Gun, Glass Mat, Waterbrush, Collage Brush, Glue Gun
Moss, mica sheets, wire, pebbles and floristry fibres from my own stash