Showing posts with label Christmas 2017. Show all posts

Monday, 18 December 2017

Party In Style...

Hello friends and welcome to the final Simon Says Stamp Monday Challenge of 2017 because the team are having a little break over the next two weeks but hasn't this year flown by? I can't quite believe it's only a week to go until Christmas Day...

But if you do have some creative time, then why not play along with us for this week's challenge...it's called PARTY and is running for 2 WHOLE WEEKS, ending on the 1st January, so you have plenty of time to join in!

For my project, I created a gift box and gift tag using some gorgeous Tim Holtz products and dies that I cut with something everyone needs, the Sidekick! I thought these would be idea to place on my Christmas table, using the tag as a name place setting and filling the box full of treats.
So, let's get started and here's how I created this week's project...

To begin with I made a box from Little Sizzles Mat Board. This is a really substantial surface and perfect for stamping and adding paint to. If you don't have a box or haven't got time, then you can use any box of your choice, whether it's patterned or plain, it will work and you can use the same techniques to decorate.

Once my box was cut and whilst it's still flat and not made up, I painted it with black gesso. Heat dry the gesso thoroughly before moving onto the stamping.

For this I used the Mini Swirly Snowflakes stamp set and stamped the image randomly over the painted surface using Versamark Ink. I then sprinkled the wet ink with gold embossing powder and heat embossed my snowflakes.

I then made up my flat packed box and added some Alchemy Wax to the edges to give a more vintage feel.
To decorate the top of the box, I used the Holiday and Festive dies from Tim Holtz to die cut gold metallic kraft card and green kraft card using the Sidekick. I then frosted the ends of all the foliage by brushing Collage Medium over the tips and dipping into Rock Candy Glitter.

Tie some of the metallic trimmings gold ribbon around the box and arrange the foliage around the bow. To complete the box, I added some Bauble Findings.
Now to move onto the tag...
Once again I used my Sidekick and the tag die that is provided in the starter kit, to cut a tag from Heavyweight Mixed Media card. I inked the tag with Antique Linen and Walnut Stain Distress Inks.

I then cut some more foliage using the Festive and Holiday dies and also cut a poinsettia pieces from red kraft card. I layered the two sections of my poinsettia die cut, slightly offsetting each of them and frosted the edges of the flower with Rock Candy Glitter.
To create the centre of the flower, I used the Spiky flower punch to punch gold metallic kraft card and again layered two sections over the top of one another before attaching them to the middle of the red flower. To complete the flower I added a Bauble Finding.
Finally, I added a Christmas Clipping Sticker and some metallic ribbon through the hole of the tag.
So, that completes my final project of 2017 and I hope you love what I've created.
As always, if you do need any further inspiration, then look no further than our blog to see all the wonderful creations from all the very talented Design Team members and every week, one lucky random participant has the chance to win a $50 gift voucher from Simon Says StampYou have until Monday 8am Ohio time. 1pm UK time, 2 pm CET to join in and good luck....


Thank you so much for stopping by today and I want to take this opportunity to wish all my friends and followers a wonderful Christmas and a very happy and healthy 2018!

Love Emma xxx


Monday, 11 December 2017

The First Snow Had Fallen...

Hello friends and welcome to this week's brand new Simon Says Stamp Monday Challenge...

Our theme for this challenge is called ~ Christmas/Winter Holidays and as the big day approaches, we can't wait to see what you will be inspired to create!

For my project this week, I decided to make a very special Christmas card that I will be giving to my parents. It's full of Christmas cheer and uses another of my favourite ever dies from Tim Holtz ~ the Ice Skates.
So, let's begin and this is how I created this card...


To begin with I cut a panel of watercolour card. I then applied Broken China, Antique Linen and Cracked Pistachio Oxide Inks to my craft sheet, spritzed the inks with water and swooshed my card through to pick up all the gorgeous colour before heat drying the card thoroughly.

To create more depth to the background, I applied some torn tissue tape to the central area of the inked card. I then used an old credit card to scrape some gesso over the surface before adding some more colour using Pumice Stone and Chipped Sapphire Distress Crayons, blending out the colour with my fingertip, to create a soft diffused look.

Ink around the edges of card before adding a machine stitched border in ivory coloured thread.

To add some texture, I applied Grit Paste through my favourite Layering Stencil of the seasonal release, Starry! I then sprinkled Rock Candy Glitter over the top of the wet paste and allowed it to dry.

Once the paste is dry, I matted the background onto silver metallic kraft card, followed by a layer of kraft card, distressed around the edge with some gesso. Wrap some twine around the bottom section of the card, securing the ends at the back.

I then prepped my card blank, which is 20 x 18cm by adding a layer of paper from the Christmas Paper stash, matted onto some more kraft card. Mount the inked background onto the front of the covered card blank.

For the ice skates, I cut these from chipboard and then primed them with gesso before adding some colour to the heels and blades using Black Soot and Brushed Pewter Distress Paints.
To give them a more worn, vintage feel, I ran the Black Soot Distress Crayon around the edges, blending the colour out to add just a subtle hint.

Lace up the boots using twine, tying the ends into a bow at the top.
Arrange them onto the front of your card blank.
For the foliage, I cut a selection from the green classic kraft card and silver metallic kraft card using the Holiday and Festive Greens dies. I then added a touch of Picket Fence to the tips of the foliage. Once the paint was dry, I brushed a small amount of Collage Medium over the top of the foliage and dusted each piece with Rock Candy Glitter.

I then arranged my greenery around the tops of the boots.
To complete this section, I added some berries to some of the foliage, using Autumn Red Nuvo Drops and finished this arrangement with some baubles that I frosted in the same way as I frosted the greenery. I also added a Mirrored Star which you can see just popping out from behind the frosted baubles.
I love creating dimension to my work and in the photo below, you can see the depth that this card has.
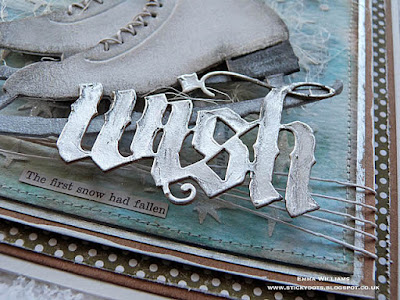
Finally, I added my wording and used the Vintage Tidings Die to die cut the word, 'Wish' from silver metallic kraft card. I used the Sanding Tool to lightly sand the surface and then ran the Black Soot Distress Crayon around the outside of the lettering.

I then attached my word to the bottom section of the boot to create the look of it being suspended.
For the finishing touch, I added a Christmas Clippings sticker beneath the boots.
I hope you've enjoyed the creative process behind this card and that you've loved the techniques I've used to build up the texture, the layers and the dimension.
As always, if you do need any further inspiration, then look no further than our blog to see all the wonderful creations from all the very talented Design Team members and every week, one lucky random participant has the chance to win a $50 gift voucher from Simon Says StampYou have until Monday 8am Ohio time. 1pm UK time, 2 pm CET to join in and good luck....


Thank you so much for stopping by today and see you again very soon!
Love Emma xxx


Tuesday, 5 December 2017

Joy To The World...

Hi everyone and welcome to my blog and today's post!

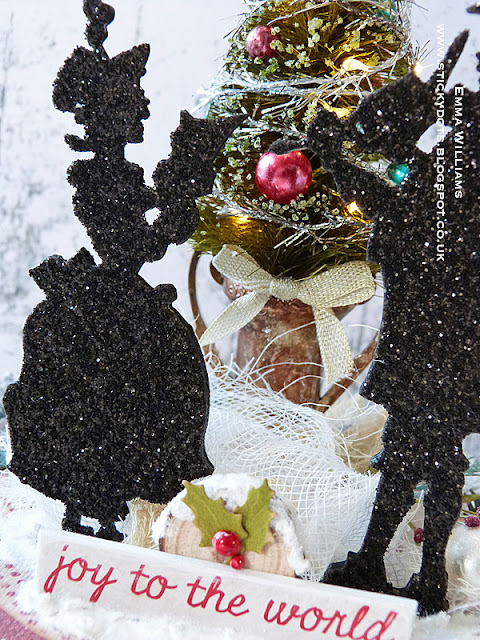
Today, I'm delighted to be sharing a sneaky peek of a Christmas home decor project that I've created over on the Simon Says Stamp Store Blog, using dies and products by Tim Holtz. I hope you'll have time to pop over to check it out in it's entirety and I would love to hear what you think of this piece...
Thanks so much for stopping by today and see you again soon...love Emma x

Monday, 4 December 2017

Dreaming Of A White Christmas...

Hello friends and welcome to this week's Simon Says Stamp Monday Challenge! Our theme is called Icy Inspiration and the DT are showcasing PaperArtsy products within their projects.

For my piece, I used PaperArtsy's Fresco Finish Paints and Infusions to create a background on this icy blue panel, which I've packed full of layers and dimension all created using Tim Holtz products.
So let's get started and here's how I made this project...

 
To begin with, I cut a piece of canvas paper (but you could also use Mixed Media Heavyweight card) to measure 17 x 15cm. I then mixed some of the Mermaid Fresco Finish Paint with the Snowflake paint so that it would give me this beautiful shade of blue that I then painted over the card to create my background. I then added torn strips of tissue tape to my background, dry brushed some gesso over the top and then added some depth of colour using Pumice Stone and Chipped Sapphire Distress Crayons. Once I was happy with the layers of colour, I used an old credit card to scrape gesso over the surface which created the icy white patches. I then machine stitched around the outside to create a border.

To add some texture to the piece, I then laid down the Starry Layering stencil and applied Grit Paste through the stencil. Whilst the paste is still wet, I sprinkled Rock Candy Distress Glitter over the top and tapped away the excess. Let the paste dry.

The background is now complete and ready for some layers...
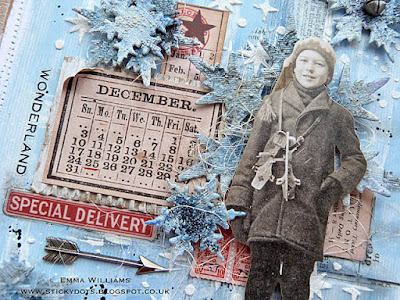
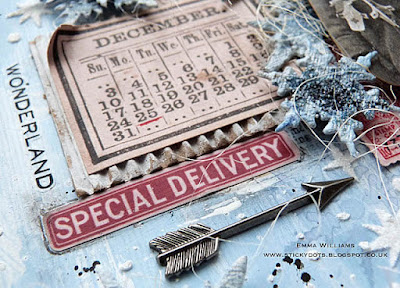
...and for this, I used some Tim Holtz Christmas Ephemera pieces that I collaged onto the background, attaching some directly onto the surface and layering other pieces onto pieces of corrugated card, painted with the Snowflake Fresco Paint.
For the snowflakes, I used the Stacked Snowflakes die. I used the die to die cut seven flakes from chipboard and applied a layer of gesso over each of the flakes to prime them.

Once the gesso is dry, I painted them with the same colours as I used on the background, dried the surface and then added a layer of Rock Candy Distress Crackle Paint over the top. At this stage, I also added a small amount of Art Stones, by sprinkling them over the medium. Set this aside for the gorgeous crackles to appear and once the medium has done it's job, then apply a very small amount (less is more) of the A Bit Jaded Infusions. Spritz the colour crystals with water and allow it to sink into the crackles.

Gently heat dry the snowflakes, dabbing away any excess moisture.
Place three, various sized snowflakes over the top of the ephemera pieces, stacking some of them and leaving the others singular and using foam pads to attach them. Once the flakes are in place, I attached my Christmas Paper Doll. I decided to keep this image black and white, as I didn't want to introduce to much colour to the piece, just keep it icy blue with a pop of red.
With the remaining two snowflakes, I added Jingle Brads to the centres and then attached these to my project.
To complete the project, I added the Dreaming Of A White Christmas Quote Chip and placed this over a small amount of cheesecloth and attaching it so that the paper doll is standing on the wording.
I then added an adornment arrow and a Christmas Remnant Rub to the arrangement in the centre.
Finally to complete the panel, I added some crystal gems to each corner and matted the artwork onto layers of kraft card, silver metallic card and a final layer of pewter coloured card.
I hope you've enjoyed the creative process behind this project and loved the techniques I've used to create texture, sparkle and dimension.

As always, if you do need any further inspiration, then look no further than our blog to see all the wonderful creations from all the very talented Design Team members and every week, one lucky random participant has the chance to win a $50 gift voucher from Simon Says StampYou have until Monday 8am Ohio time. 1pm UK time, 2 pm CET to join in and good luck....


Thank you so much for stopping by today and see you again very soon!
Love Emma xxx


Heat Gun
Cheesecloth, crystal gems, sisal fibres and canvas paper from my own stash

Wednesday, 29 November 2017

The Season Of Goodwill...

Hello everyone!

Hope you've all had a good start to your week and can you believe how quickly November has disappeared...it's gone so fast!! Today, I'm sharing another project that I created for the Tim Holtz Holiday Inspiration Series and if you want to see all the inspiration Tim has been sharing over the last few weeks, then you can pop over to his Facebook, Instagram or blog to see everyone's wonderful projects.

For this project, I created a vignette box but instead of using it as a shadowbox, I turned it around, added two panels and made a decorated trinket box, complete with decoration full of the Christmas spirit.
So, let's get started and here's how this project came to life...

To begin,  I used the second smallest sized vignette box and covered the sides of the box, with the black and white plaid paper from the Christmas Paper Stash and adhered them with Collage Medium.

Moving onto the panels, I took the next size of panel which is slightly larger than the box and will use this for my base. I cut a panel of paper from the stash, inked the edges and then attached this to the panel again using Collage Medium and leaving a border around the outside.

I then attached my covered vignette box onto the covered panel and added some of the feet to the base. Using the Christmas Typography letters, I painted each letter with Barn Door Distress Paint before ageing them with Black Soot Distress Crayon. Finally I added a small amount of Gold Mixative Alcohol Ink, to accentuate the edges. Attach the letters to the front of the box and add two star adornments to either side of the lettering.
To complete the bottom section, I added two ring fasteners to the left and right hand sides of the box.
Moving onto the top section, I took the panel that fits the top of the box and again covered it with papers from the Christmas Paper Stash. I then added some design tape to cover the raw edge of the box and create a nice finish.
You're now ready to start building the scene and making the elements, starting with the lamp post...

For this, I used the Lamp post die and cut four pieces of chipboard. I then layered three pieces of the chipboard together but before adding the final piece, cut a small section of acetate. Ink the acetate with Red Pepper and Sunshine Yellow Alcohol ink and then attach this small piece to the lamp post, trimming away any pieces overhanging. Attach the final die cut layer to create one solid die cut. Paint the lamp post with Black Soot Distress Paint.

Once dry, dab the surface with Versamark Embossing Ink and then sprinkle black embossing powder over the top. Tap away the excess and heat emboss. To create the beautiful enamelled finish, repeat this process three more times, adding a touch of gold embossing powder into the final layer.

Add some Grit Paste around the die cut piece to emulate snow and sprinkle Rock Candy Glitter over the top. Set aside to dry.
Using the Holiday Greens die set, die cut plenty of foliage from classic kraft stash to use on the base. Add some frosting to the tips by lightly applying collage medium to the pieces and dusting with Rock Candy glitter.
For the trees, I used three woodland trees of two sizes. I applied a small amount of gesso to the tips of the trees, dried the medium and then rolled the trees in Glossy Accents. I then sprinkled Vintage Platinum Glitter Dust over the top. Paint the trunks of the trees with Walnut Stain Distress Paint and add a fluted star on the top of one tree.
Colour your Christmas Paper Dolls using Distress Marker Pens and then arrange all these pieces onto the top of your box, placing them over the top of a bed of Grit Paste, applied directly onto the covered vignette panel lid and layered with some draped cheesecloth.

To complete the scene, I added some Baubles which I coloured with Turquoise and Cranberry Alcohol Ink and added these to the arrangement.
Tim will be doing a recap of all the projects featured this week over on his blog, on Saturday, so make sure you pop by! Thanks so much for stopping by today and see you soon...love Emma x


Cheesecloth and acetate from my own stash

Powered By Blogger

Total Pageviews