Hello everyone...
Hope you've all had a wonderful weekend and you're now ready for the week ahead! As always, a brand new week, means a brand new Monday Challenge and we are challenging you to create a project using our theme ~ FOOD AND DRINK, and with so many wonderful products available at Simon Says Stamp, I'm sure you'll be spoilt for choice and we can't wait to see what you create.
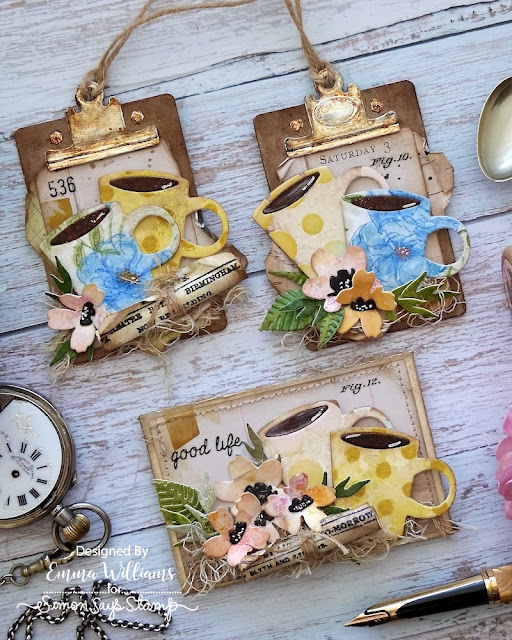
For my make, I chose to create a trio of gift tags and a tiny gift card holder, which is perfect for gifting to someone who loves their coffee, and food!
I used a combination of Tim Holtz dies to make these projects and also offcuts from my scraps box that are perfect for these smaller die cuts, such as the flowers and coffee cups!
So, it's time to get started and show you how I created these pieces.
CREATING THE CUPS
Each cup, and I made 6 cups for these trio of projects are die cut using the mug die from the Sizzix Vault Fresh Brewed die set by Tim. I cut my pieces from leftover scraps that I had in my scrap box from previous projects. Each of these scrap pieces were either stamped or inked using stencils and I'm sure I'm not the only one who has these scraps, and this is the perfect project to use up all those tiny offcuts.
Once I'd cut all my pieces, I layered them together to form the six patterned cups.
FLORALS
The flowers and greenery were also die cut from inked card scraps that I had in my box and once again, were perfect for this make and after cutting each piece, I layered and shaped the florals to create my selection ready to use. To complete the flowers, I added white pen work to the centres.
NEWSPAPERS
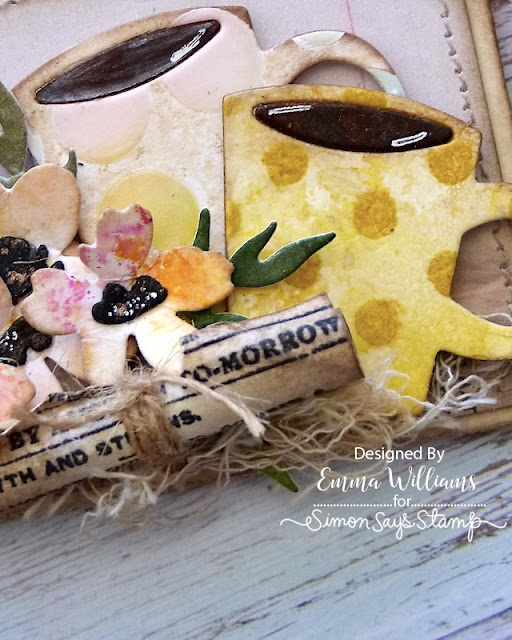
Now in the morning, no cup of coffee is complete without reading the morning news, I know you can do this online ~ but I still like the actual newspaper and with that in mind, I made some newspaper rolls.
For these, I used Tim's Newsprint stamp, which I stamped in Black Soot Archival Ink directly onto some vintage notepaper that I have in my stash.
I cut the stamped paper into small pieces which I then rolled, securing the ends with red line tape. I then tied a piece of twine around the centre, and made tiny rips and tears into the paper before inking the edges with Frayed Burlap Distress Ink.
We now have all the element to decorate, so it's time to make this trio come to life....
ENVELOPE
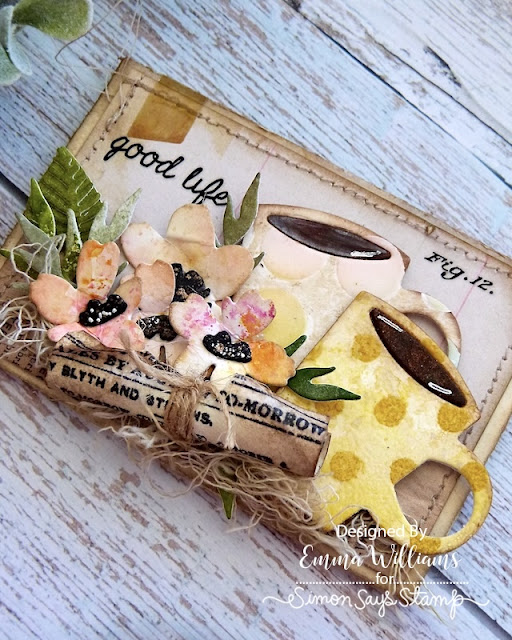
I cut the envelope using the main die in the Postale die set from Mixed Media Heavystock card. To knock back the 'clean' look of the card stock, I inked it with Old Paper Distress Ink, spritzed with a light mist of water, and then heat dried the card. I then folded the die cut along each scoreline before inking the edges with Frayed Burlap Distress Ink.
With my envelope ready, I needed to decorate the front.
For this I cut a panel of paper from the Memoranda Paper Stash but if you don't have this stash, any background paper of your choice, will work.
I machine stitched a border around the outside and then inked the edges before mounting it onto the front of my envelope.
In the top left hand corner, I added a cello sticker and then arranged my die cuts, placing the mugs on the right hand side...
...and then the flowers and greenery to the left.
I placed the newspaper roll across the base of the arrangement, before adding some torn Mummy Cloth fibres that I had dyed with Frayed Burlap Distress Spray Stain.
To complete the envelope, I added some Remnant Rubs from my stash ~ I used the 'good life' Tiny Text Remnant Rubs in the left hand corner, but I'm sad to say, these are now retired.
I also added the "Fig 12" in the top right hand corner.
Finally, I added a seal to the back of the envelope ~ once again, this was actually die cut using a die from the Vault Rosettes Die Set by Tim, and is the seal for the centre of the rosette.
TAGS
The tags are cut from Mixed Media Kraft heavy stock card and silver metallic Kraft stash, using the clipboard die in the Noteworthy set. I have a tutorial HERE, which shows how I made these tags, and these were created using exactly the same technique.
The only difference with these tags, is instead of using the Screwheads either side of the clips at the top, I chose to die cut these tiny screws from silver metallic Kraft stash card using the dies in the Vault Industrial die set. I then altered them using the same technique as I used to alter the clips using Distress Paints;
Crackling Campfire, Black Soot, Antique Bronze and a touch of Ground Espresso
I apply each paint individually and allow them to dry before layering. I then just build up the colours to create a rusty effect and finish to the metallic card stock.
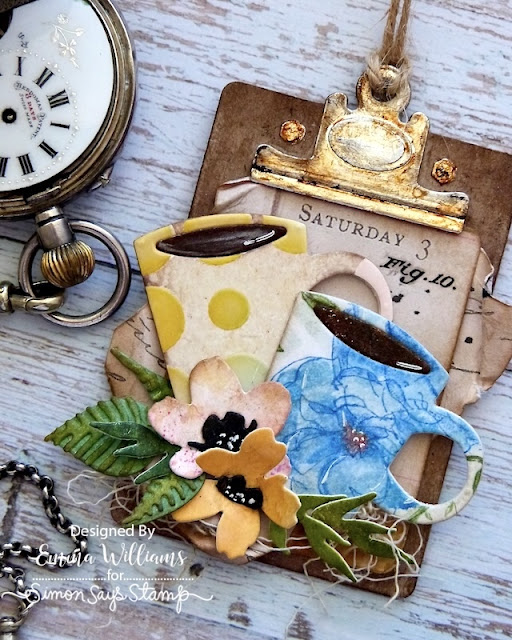
Once each of my tags were ready to decorate, I cut two panels of paper from the Memoranda paper stash, and after adding rips and tears around the edges and inking them with Frayed Burlap Distress Ink, I attached these papers to the tiny clipboards. You can see from the photos below how I arranged the papers to the board ~ I love how the one paper shows the day and date!
I then took my mugs, and attached two to each of the clipboards using foam pads to added dimension.
I added some florals and Mummy Cloth Fibres to each tag for texture...
...and then on the one tag, I attached one of the newspaper rolls.
To complete each tag, I threaded some twine through the clips and then added tiny remnant rubs ~ the number 536 on one....
...and the Fig 10 one the second tag.
Don't forget that every week, one lucky random participant has the chance to win a $25 gift voucher from Simon Says Stamp and you can join in up to 5 times, which means you could have 5 chances to win. You have until next Monday at 8am Ohio time. 1pm UK time, 2 pm CET to join in and good luck....
Recipe for project:


These are amazing! How you achieved the rusty effect on the clipboards is astonishing. I do love my morning coffee and these tags are pure delight!
ReplyDeleteI know I already commented on these in your socials, but there's something lovely about leaving a blog comment too. These are so gorgeous Emma. Love the way you tarnished the clips. Such cool creations! xoxo
ReplyDelete