
Hope you are all having a wonderful week!
Today I'm so happy to sharing the first of my Creativation 2020 makes for Tim Holtz. It's been a busy few weeks of making, but I've had so much fun and over the coming weeks, I'll have plenty of inspiration to share with you all, including projects for Stampers Anonymous, Ranger Ink, idea-ology and of course, Sizzix which includes, this particular project made using dies from the Chapter 1 release, available and shipping now. Don’t forget that if you missed Tim’s Facebook Live showing this amazing release and all the fabulous projects, then you can catch up with it here!

What I particularly want to do in this tutorial is concentrate on the techniques that I used to create the typewriter and the Heartbeat, both of which began life as a piece of boring old chipboard.
I started by using the smaller sized Vignette Tray, covering the raw edges of the tray with Humidor Design Tape and then covering the front, back and sides of the tray ~ inside and out with papers from the Dapper Paper Stash.


After die cutting the heart from a square of chipboard that was slightly larger in size than the heart itself, I placed all of the pieces in front of me on my glass mat ~ don't throw anything away as you will be placing the heart section back into the die cut once they are painted. I now want to add the colour, and used Candied Apple Distress Paint to colour the heart pieces. I then dry brushed the surface with Black Soot Distress Paint and set these aside to dry.
For the background the heart, I wanted to create a rusty patina to the surface of the chipboard and painted the chipboard with black gesso. I then started layering my Distress Paints, Evergreen Bough, Ground Espresso, Black Soot, Rusty Hinge and Vintage Photo. I apply each layer of paint individually, using the dry brushing technique to add colour. Just dip your paint brush into the paint, wipe away the excess on a towel and then just gently allow the brush to paint the colour across the surface of black gessoed chipboard. Remember to dry the paint layers between each application.

Place the red heart pieces back into the die and attach with adhesive. For the heartbeat, I cut this from gold metallic kraft stash, running the die through my machine again and snipping away the heartbeat from the main part of the die cut.
After aging the metallic kraft stash with a little Mushroom Alcohol Ink, I attached it to my the die cut, placing it directly over the top of the existing heartbeat that is attached to the die.
I mounted the die cut heart into the top section of the tray, using foam pads and then took a Pen Nib, which I aged with the same colours of Distress Paint that I used on the background of the heart and placed this in the centre of the heart. I also used the Tiny Type die to cut the number 14 from gold metallic kraft stash and attached this.

After painting all the chipboard pieces with gesso to prime them, I started adding colour. To begin with I took the larger die cut piece and the second smaller die cut piece, that will sit over the top the layered section and using a very fine detail paint brush, I handpainted the main key section of the typewriter with 2 coats of Candied Apple Distress Paint. Once the paint is thoroughly dry, I dry brushed the surface with Black Soot Distress Paint, which knocks back the brightness of the red and creates more of a vintage feel. For the paper roller section at the top of the die cut, I used Black Soot and Brushed Pewter Distress Paint. Set this to one side.
Taking the layered solid key section die cut, I painted this with Black Soot Distress Paint and once again, once the paint was dry, I used Brushed Pewter Distress Paint, which I dry brushed over the top. I then cut a small piece of silver metallic paper stash, and placed this over the keys on the bottom section of the layered painted die cut. Take the remaining pieces of die cuts and attach these over the top of the layered die cut. Ink around the edges of the die with Black Soot Distress Crayon, blending out the colour with a damp fingertip and if you need to tidy up any of the paintwork, or fill in spots that might have been missed, this is the time to do it! You can see how I layered the pieces in the photo below and also see the metallic elements that sit behind the keys and the top section of the typewriter.


Using plain copy paper, I typed out the quote on my computer and cut the paper to size so that it would fit into the typewriter. I inked the paper with a little Old Paper Distress Ink and then placed it into the typewriter, securing it at the back of the die cut.

Using a layer of foam pads, I attached the typewriter into the tray, placing it onto the shelf and slightly overlapping the heartbeat die cut that is above it. To complete the typewriter I attached a small star adornment.

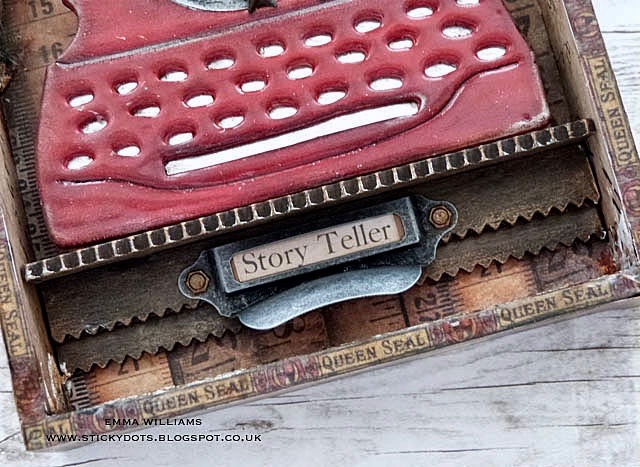
We're nearly there and all that was left for me to do was add the Mini Hardware Pull, complete with Clippings Sticker to tell the story of the Story Teller...
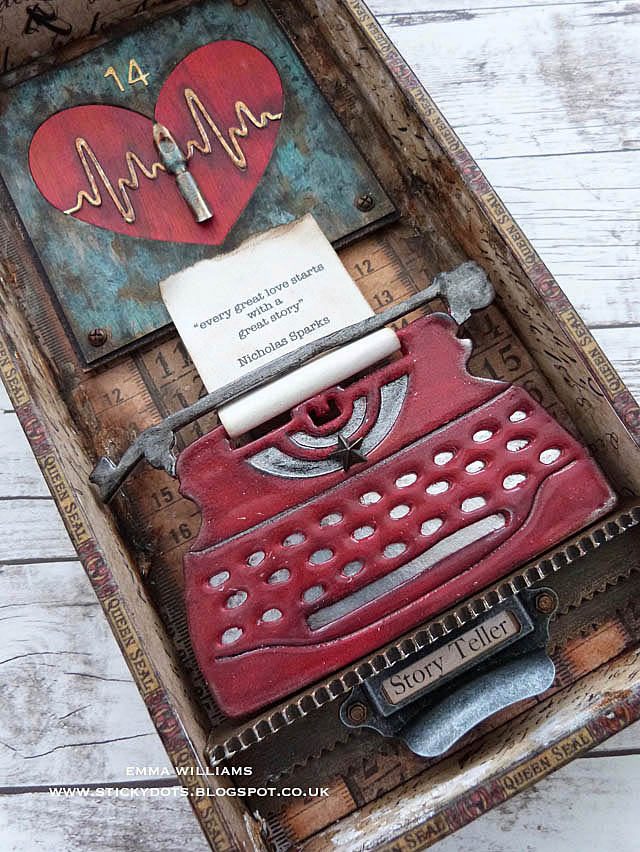
...and then add a handle at the top. I used a Faucet Knob that I aged to create a rusty patina effect using the same paints as I used on the background of Heartbeat Die.

I hope you've loved how I created this Vignette Tray and enjoyed the process of how the piece came together using Distress Paints to create the colour to the die cut elements and add some vintage flair to the project.
Thank you so much for taking the time to stop by today and I just wanted to say a huge thank you to Tim, Paula and Mario for their continued support and for asking me to be a part of Creativation 2020 and join them on their amazing creative adventure!
Hope to see you again soon, love Emma xxx
Recipe for project:
Tim Holtz/Sizzix: Retro Type, Heartbeat, Alphanumeric Tiny Type Upper
Tim Holtz/Stampers Anonymous: Pinked Etcetera Trims
Distress Paint: Ground Espresso, Black Soot, Evergreen Bough, Antiqued Bronze, Candied Apple, Brushed Pewter, Vintage Photo
Distress Crayons: Walnut Stain
Tim Holtz/Stampers Anonymous: Pinked Etcetera Trims
Distress Paint: Ground Espresso, Black Soot, Evergreen Bough, Antiqued Bronze, Candied Apple, Brushed Pewter, Vintage Photo
Distress Crayons: Walnut Stain
Tim Holtz Idea-ology: Hardware Heads, Mini Hardware Pulls, Clippings Stickers, Pen Nibs, Faucet Knob, Humidor Design Tape, Vignette Tray, Star Adornments
Alcohol Inks: Mushroom
Alcohol Inks: Mushroom


I LOVE this! Thank you for the thorough explanation of the process.
ReplyDeleteI always love your work.
ReplyDeleteLOVE it
ReplyDeleteI am always happy when you are picked to make for Tim's releases...great project and fabulous tutorial....
ReplyDeleteLOVE LOVE LOVE! My favourite make using Tim's lovely typewriter die so far! Absolutely stunning!
ReplyDeleteClaudia x
I love this Typewriter Die and I love, love, LOVE what you did with it..!!
ReplyDelete