
Hello friends and welcome to Day 1 of the Simon Says Stamp Holiday Sparkle Blog Hop.
I'm so excited to be joining so many of my talented friends and designers on this hop and if you've arrived here from, Barbara Tarayao's blog ~ then hello, but if not, and you want to catch up with everyone who is participating in this hop, then don't worry because you can head back to the beginning by clicking ---> HERE.
There are so many gorgeous new products in this release and I can guarantee you’ll be spoilt for choice because every single one of them will have you heading to your craft room to create some festive Holiday magic and sparkle. You can see all the products in this amazing release, HERE!
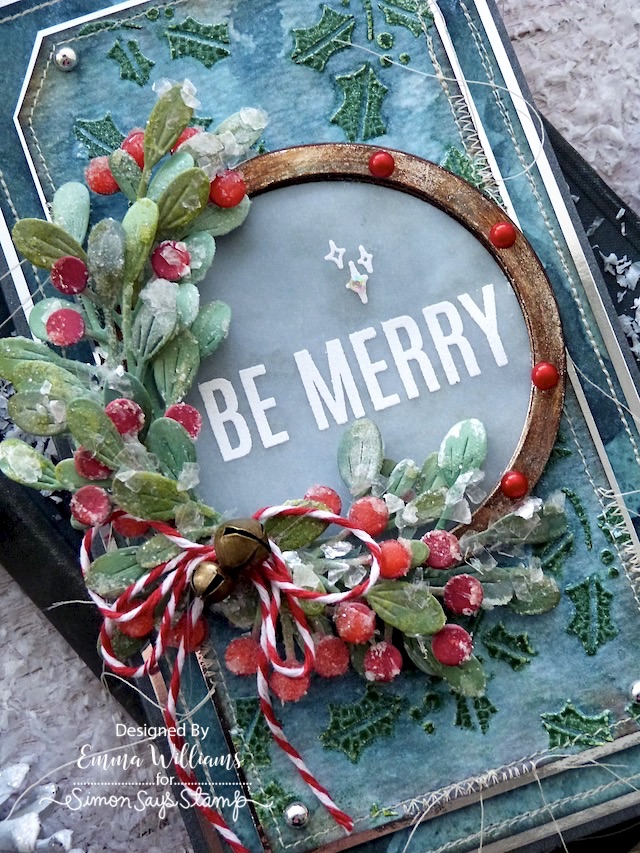
Now, back to my make and I created a vintage style card using the gorgeous Fruitful Berries Die Set, and combined it with a stamp from the XL Christmas Greetings set from this time last year.

So let's get started and here's how I created my card...
To begin with I cut a card blank to measure 18.5 x 10.5cm, using charcoal coloured card from the Sizzix Charcoal Surfacez Opulent Cardstock pack.
I then started to create the backgrounds for my card...

BACKGROUNDS
This card has two backgrounds, the base layer and the tag. I began by cutting the base layer of Distress Watercolour Card, 17.5 x 9.5cm and also a tag shape from the same card. I spritzed both card layers with a light misting of water before sprinting Tim Holtz's Winter Frost Mica Stain and Tumbled Glass Spray Stain. I allowed for the inks to blend and then heat dried both pieces of card.
After inking the edges with Walnut Stain Distress Ink, and machine stitching a border around the outside, I matted the larger base layer onto silver metallic kraft card. I then mounted the layers onto my card blank.
Moving onto the tag, I wanted to create more texture on this layer, so I applied Tim Holtz Distress Crackle Paste through the Hollyberry Layering Stencil from Stampers Anonymous. Remove the stencil and immediately sprinkle with Rustic Wilderness Distress Glaze, tapping away the excess. Set the tag to one side to dry.
As soon as the crackles appear, then carefully heat emboss the powder and paste, being careful not to overheat or cause bubbling.

Ink around the edges of the tag, and once again add machine stitching to create a border before matting the tag onto a layer of silver metallic kraft card.

Mount the tag onto the covered card base with foam pads.
Now to create the wreath that sits in the centre...
WREATH
Taking the Fruitful Berries die, I cut a selection of foliage and inked each piece with the following inks:
Foliage: ASPEN, SAGE, PINE
Berries: LumberJack Plaid
I assembled the die cuts to make up each piece of the foliage, adding glossy accents to the berries to make them dimensional. Once the glossy accents was dry, I then added some festive sparkle to them by smearing a small amount of Collage Medium over the surface and sprinkling with a dusting of Rock Candy Glitter and Mica Flakes.

Whilst waiting for the foliage to dry, I began making the hoop that the foliage will be attached to.
HOOP

I cut four separate layers of cardstock and one layer of silver cardstock using the SSS Nested Layers Die Set. To do this I used two of the nesting dies, the largest die measures approx 3" and the next die down in size and placed the dies, one inside the other, onto my card to die cut the hoop. I then layered and adhered each of the die cuts over the top of one another to form the hoop, attaching the metallic layer on the top.
I wanted a rusty look to the hoop and for this I used a combination of Distress Paints; Crackling Campfire, Ground Espresso, Black Soot...layering the paints one by one to create the rusty finish to the metal.

Behind the hoop I added a sentiment and to create this, I cut a circle of vellum using the largest of the circle dies. I wanted to use vellum for this as I love how the opacity creates a softer feel to the centre of the hoop than if you used solid cardstock. In the centre of the circle of vellum I stamped the "BE MERRY" sentiment using an older SSS stamp set, XL Greetings and stamped this with clear embossing ink before sprinkling white embossing powder over the wet ink, tapping away the excess and heat embossing the powder until molten. I also stamped a tiny sparkle motif, just above the sentiment ~ this is from the SSS Magical Christmas stamp set, and then to complete the stamping, I placed a tiny gem in the centre.

Attach the vellum circle behind the hoop and mount onto the centre of tag using foam pads.
ASSEMBLING THE WREATH
Taking all those gorgeous Fruitful Berries die cuts, arrange them to cascade around the left hand side of the hoop. Don't be afraid to cut into the die cuts to create smaller pieces that can be added to 'fluff out' the wreath.


We're nearly there and all that's left is to add the embellishments....
EMBELLISHMENTS
I added some red Tim Holtz Christmas Droplets to the right hand side of the hoop...

...and then, I placed a silver metallic droplet in each corner of the tag.

...and then the final detail is the bow. I used candy cane red and white twine, tied it into a double bow and then attached it to my wreath, together with two tiny bells.
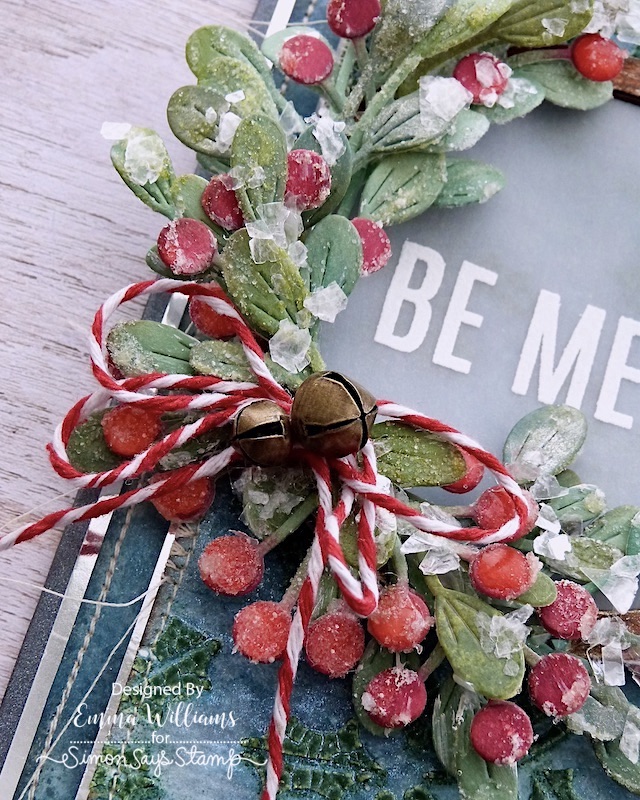
So that's my card complete and I hope you've enjoyed the process of how I created this.

Simon Says Stamp is giving away a $25 coupon to every stop on the blog hop! This means you can leave a comment here and on every stop along the way to increase your chances. Winners will be posted on the Simon Says Stamp blog on Wednesday, 16th November and all winners will need to contact/email Simon Says Stamp to claim their prize.

BLOG HOP ORDER
Emma Williams <—- YOU ARE HERE


