Hello friends and Happy Monday...
Hope you all had a wonderful weekend and you're now refreshed and ready for the week ahead and a brand new Simon Says Stamp Monday Challenge! This week our theme is all about SWEET TREATS and with Easter only a week away, this challenge couldn't have come at a better time! So with this theme in mind, we'd love for you to come and join us and play along!
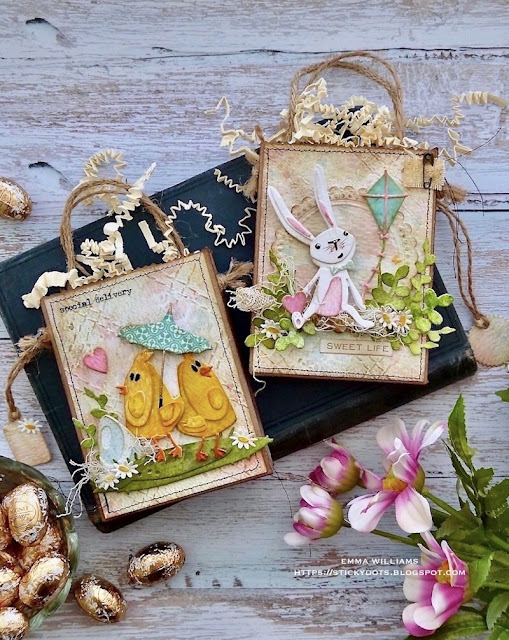
For my make, I created some 'sweet' little Easter treat bags and used dies some of the new Chapter 1 dies from Tim Holtz and Sizzix and combined these with older dies that you might have in your stash already.
So let's get started and here's how I created these little bags ready for Easter....


TREAT BAGS
To make the bags themselves, I used the Sizzix Treat Bag die from Tim to cut a panel of Kraft cardstock. Once cut, I assembled the bags and adhered the join using red line adhesive tape.
After inking the edges of each bag with Walnut Stain Distress Ink, I moved onto the panels that I attached the front and back.
For these I used Distress Watercolor Card and inked the sheet with a combination of Old Paper, Saltwater Taffy, Speckled Egg and Frayed Burlap Distress Inks, and Antique Linen Oxide Inks. I applied the inks individually to my media mat and then spritzed each of them with water until it beaded. I then dipped my cardstock into the inks, drying each layer before adding the next.

Once I was happy, I then cut panels of the inked card that would fit inside the Quilted 3D Texture Fade and embossed each individual piece in my Big Shot Foldaway. At this stage, I also used the inked card to cut a Switchlits Seal Dies and Embossing Folder and I will be using this on the bunny bag.

After cutting the panels to fit the fronts and backs of each of my bags, I then machine stitched a border around the edges before inking the paper edge with Walnut Stain Distress Ink. I also lightly went over the top of the raised embossed areas, so it would highlight the stitching.

I fixed each panel to the treat bags, using Matte Collage Medium.
On each bag, I added some rope as a handle and after punching a small hole in each side, I threaded the rope through and secured it with a knot.


BUNNY GAMES BAG

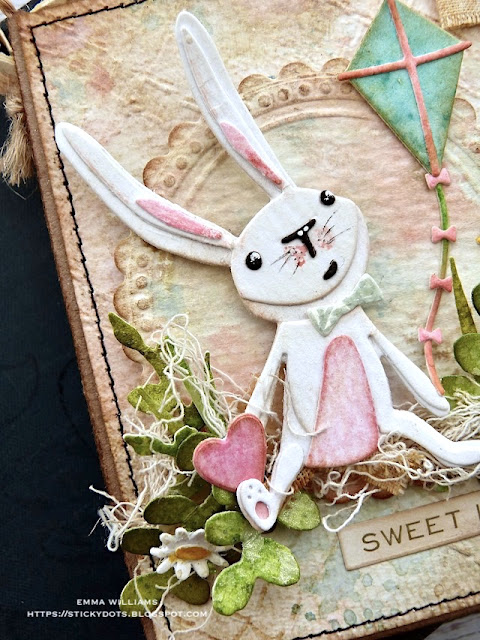
I cut the sitting bunny using the Bunny Games die from watercolour card and then inked the various pieces using Antique Linen and Pumice Stone Distress Inks for the body and the pink areas are inked with Spun Sugar and Picked Raspberry. The facial details are cut from Black Kraftstock.
To bring bunny to life, I drew whiskers on his little face, and added tiny white pen details.
I also added a tiny bow tie to my bunny, and this is cut using the
Sizzix Hip Haunts Thinlits Die Set. It's the one that is used on the cat but if you don't have this set, then you can cut a bow tie shape from a piece of card or you could use ribbon or twine and tie it into a small bow.
In this scene the bunny is holding a kite and this is taken from The Park. I cut my kite piece from card that I have in my stash ~ I never throw any card away as even the smallest of pieces can be used for these tiny dies.
After assembling the kite, I attached this in my bunny's paw and then used foam pads to attach both pieces to the Switchlits Seal that I cut earlier.
I mounted the seal onto the front of the bag using foam pads.
For the foliage around the bunny, I used the Modern Floristry die set but you can use any foliage dies you choose. I cut all my foliage from card inked with a combination of Peeled Paint and Bundled Sage Distress Inks and then inked the edges with Forest Moss Distress Ink.
I arranged the foliage around the base of the bunny and seal before I added a little Mummy Cloth that I dyed with Antique Linen and Frayed Burlap Distress Spray Stains.
I cut a few daisies, which are from the Bunny Games die set and attached them before I then die cut a small pink heart using the Stacked Hearts Thinlits Die Set and more of my inked cardstock in my 'save for later stash' and placed the heart in the bunny's paw.
To complete this bag, I added a Metallic Sticker ~ Sweet Life and attached this underneath the bunny and finally a piece of linen, that I attached to the top right hand corner of the bag using a Mini Pin.
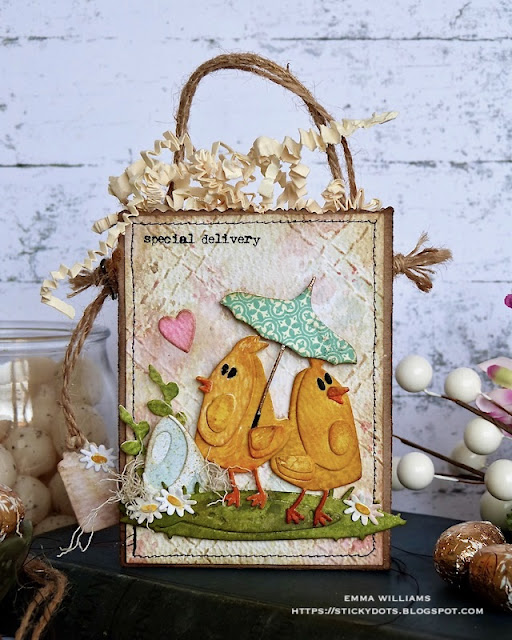
PAPERCUT CHICKS BAG
Using the Papercut Chicks Thinlits Die Set, I cut my chicks from card that I coloured with Mustard Seed, Fossilised Amber and Wild Honey Distress Inks and then assembled the layers to form the two little chicks. Once again, I added a little accessory to this bag, the umbrella. This is once again from The Park die set and after cutting the umbrella from more leftovers in my card stash, I attached it to one of the chicks, tucking it underneath the wing so it appears that the chick is holding it.
Next to the chicks, I added a little egg ~ this is cut from a further piece of cardstock inked with Speckled Egg Distress Ink and the layers are then assembled.
Attach the chicks to the green base, which again is from the Papercut Chicks Die set and cut from the same green card that I inked for the foliage on the previous bag.
Using foam pads, I attached my chicks to stand on the green base, and then attached the egg next to them, together with a couple of sprigs of foliage and some Mummy Cloth.
I completed the scene with some more of those little daisies.
I added a Special Delivery Remnant Rub, 'special delivery' to the top left hand corner and also cut another of those little pink hearts using the Stacked Hearts die set and placed this to the left of the chicks.
On the back of this bag, I added another heart and the "Love You" Metallic Sticker.
Finally, I cut a tag complete with a daisy and attached this to the rope handle before filling the bags with some chocolate/candy ~ there might also be a few leftovers for the maker as a treat!
So, that completes this week's make for the challenge and I hope you've loved what I've created and been inspired to make some of your own.
As always, if you make anything, or if you've been inspired by anything that you've seen here on my blog ~ then please, let me know by tagging me on social media or leaving a comment here and I will be right over to take a look!
Don't forget that every week, one lucky random participant has the chance to win a $25 gift voucher from Simon Says Stamp and you can join in up to 5 times, which means you could have 5 chances to win. You have until next Monday at 8am Ohio time. 1pm UK time, 2 pm CET to join in and good luck....
Thank you so much for taking the time to stop by today ~ stay safe and keep well.
Love Emma xxx
Recipe for project:
Distress Ink: Antique Linen, Frayed Burlap, Ground Espresso, Walnut Stain, Antique Linen, Spun Sugar, Speckled Egg, Peeled Paint, Bundled Sage, Forest Moss, Saltwater Taffy,


These are absolutely adorable! I would so love to make this in a card version but I would need to buy a lot of supplies…
ReplyDeleteThese bags are just absolutely beautiful! I love all the pale colors and texture...and that embossing folder is a "gotta have"
ReplyDelete