Hey everyone and welcome to this week's brand new challenge over on the Simon Says Stamp Monday Challenge Blog. Our theme is SHOW US YOUR METAL and whatever you choose to use, we hope you'll join us and play along!
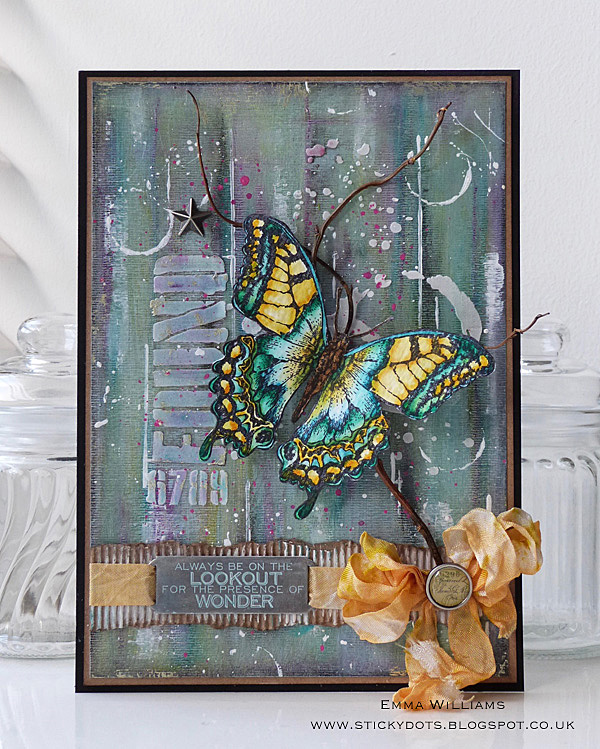
For my project, I created a card using plenty of metal elements, including a rusty metal background which started life as silver metal tape foil...


and hope you enjoy the creative process behind this project!
To begin with, I cut a piece of metal foil tape approx 22 x 14cm and attached the foil to a piece of card. I then ran the adhered foil through a die cutting machine using the Rivet Texture Fade to create that gorgeous embossed background. At this point, you might be thinking that the embossing folder is slightly smaller than the card but if you emboss the top section first, then move the folder down to the lower section, it matches up perfectly to give a continuous pattern with no joins!
Once the card was embossed, I then wanted to create this rusty look and for this, I began by using Black Soot Distress Paint which I applied to the foil, before taking a kitchen towel to gently wipe away the excess of the paint. By doing this, the paint will seep and settle into all those embossed areas.

Once dry, I then used Evergreen Bough and Vintage Photo Distress Crayons and applied these to the foil, blending them with my fingers to add that final touch of 'rust'.

For the next stage, I took a piece of adhesive canvas and using the Imaginary Stamp from Tim Holtz, I stamped the image with Jet Black Archival Ink directly onto the canvas, adding highlights of colour with Distress Marker Pens.


As always, if you need any further inspiration for this challenge, then you need look no further than our blog to see all the wonderful creations from all the very talented Design Team members and every week, one lucky random participant has the chance to win a $50 gift voucher from Simon Says Stamp. You have until Monday 8am Ohio time. 1pm UK time, 2 pm CET to join in and good luck....


Thank you so much for all your visits today and hope you all have a great week ahead
See you again soon...love Emma xx
Products used:
Tim Holtz Stamps: Imaginary
Tim Holtz Sizzix Dies/Texture Fades: Gearhead Thinlits Die, Diamond Plate and Riveted Metal
Distress Paint: Black Soot, Tarnished Brass, Pumice Stone, Old Paper
Idea-ology: Adornment Arrows, Small Talk Stickers, Dapper Design Tape
Screw Head brads, clock parts and Idea-Ology Word Sticks (Muse) from my own stash