Showing posts with label idea-ology 2022. Show all posts

Monday, 25 July 2022

School Days....

Hello everyone and welcome to a brand new Simon Says Stamp Monday Challenge!

This week our theme is BACK TO SCHOOL and we'd love for you to join us and play along and create a project inspired by anything that is school related.

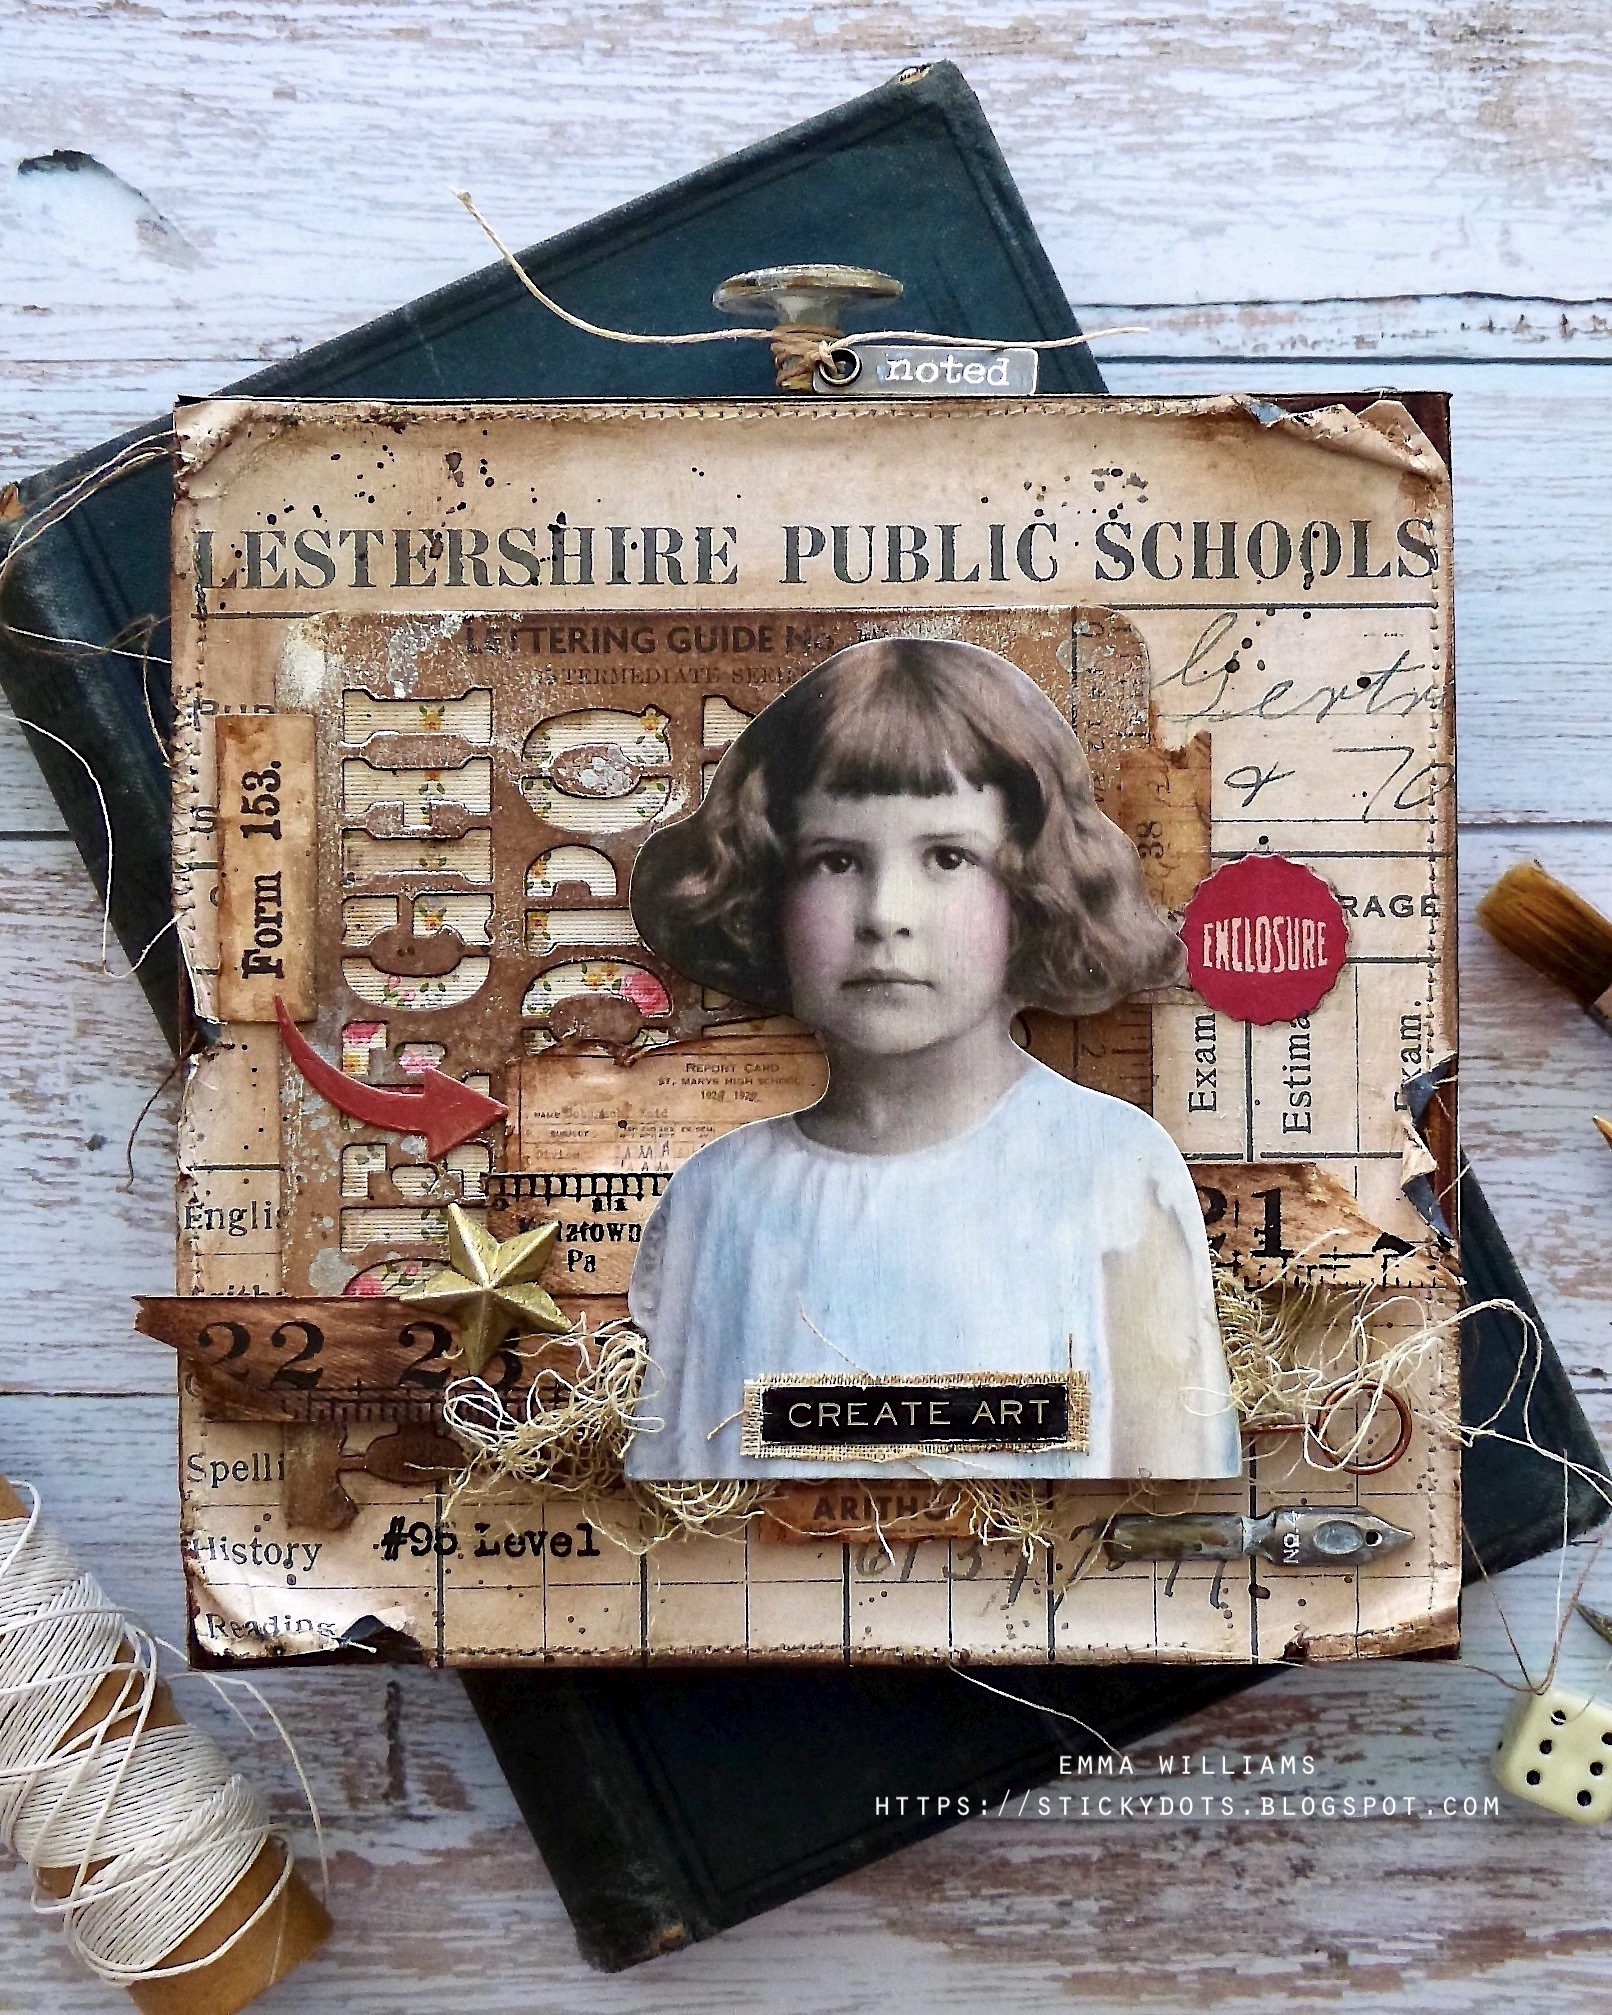
For my make, I used an idea-ology square vignette box to create my project and packed it full of everything I could find that had anything to do with this theme, from backdrop papers and rulers, to ephemera to paper dolls ~ it all came together perfectly to tell the story of one little girl who's favourite lesson was art...so, ring the bell, because it's time for class and here's how I made my vignette box...


VIGNETTE BOX

To begin with I covered the square vignette box, and this is the largest sized box of the set of 3. I cut a panel of backdrop paper, from Vol. 1 and cut the top section showing the Lestershire Public Schools heading.
I ripped and tore the edges of the paper, before machine stitching a border and adhering the panel onto the box which I flipped over to show the flat side uppermost. 

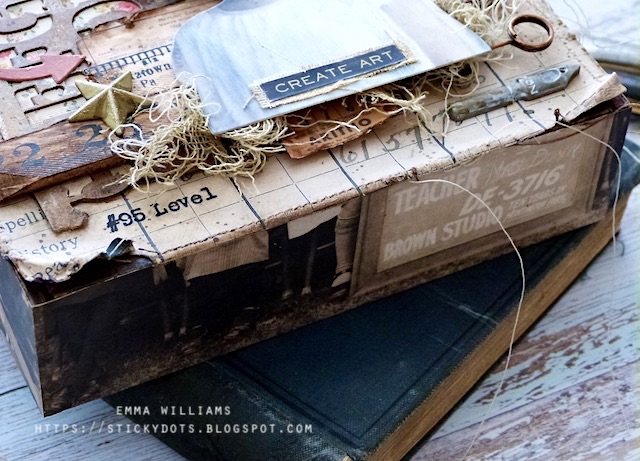
On the sides of the box, I chose another piece of paper, this time from Backdrops Vol. 3 and this showed a classroom of kids and their teacher. I'd used the reverse side on a previous project, so only had a portion of this paper left but it fit the sides and bottom edge of my box perfectly.

I adhered each of the panels into place, across the bottom...
This is the right hand side of the box....

...and this is the left.

On the top of the box, I used another strip of the Lestershire Public School paper. After applying a coat of Matte Collage Medium over the top of all the papers to seal them, I ran the Gathered Twigs Distress Crayon around the edges, and blended out any harsh lines before I splattered a little Black Soot Distress Paint over the top and front, and set it to one side to allow it to dry thoroughly.
With my box covered, I moved onto the next stage...the collage section on the front.

COLLAGE

As I mentioned, I sorted out all my school related idea-ology pieces and then just played with them to create the focal point.

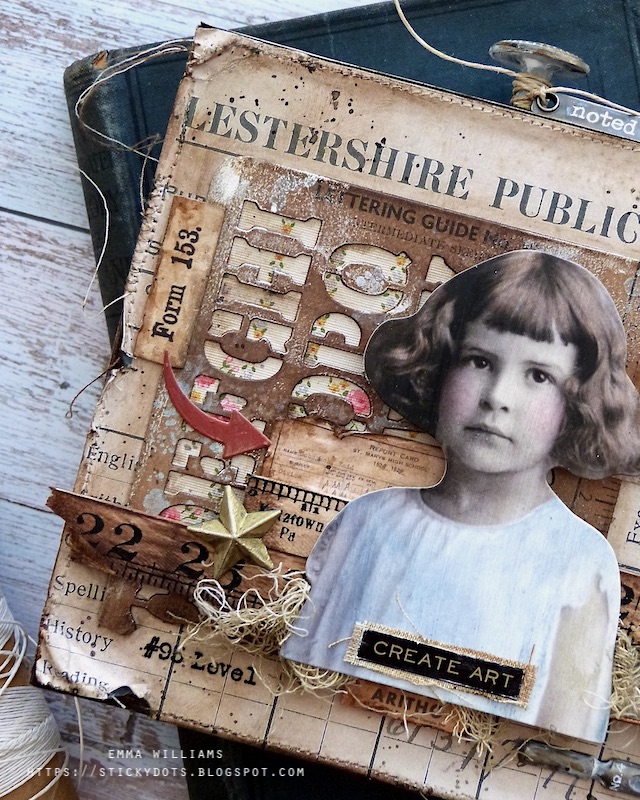
I started with the stencil card that sits behind my image, and for this I used a stencil card. I roughly tore the bottom section of the card, to reveal a raggedy edge and then I applied a little bit of Sterling Foundry Wax over the surface, concentrating on the edges. After heat setting the wax, I flicked some Speckled Egg Oxide Spray across the surface, heat dried the droplets before using a blending tool to apply Walnut Stain Distress Ink. I then misted the card with water, dabbing away the excess.

I matted my stencil card over the top of some Worn Wallpaper and then mounted this onto the front of my box, placing it on the left hand side.
Next comes the rulers and the ephemera pieces...

I broke two rulers into pieces, and coloured them by swiping a Walnut stain Distress Ink pad across the surface. I then blended the ink with a baby wipe before I arranged them across the box, together with some Snippets Ephemera pieces that I placed at the top and bottom of the arrangement. All the ephemera is inked with Walnut Stain Distress Ink to add more of a vintage feel to the paper.

Now for the star of the school and I used my favourite Portrait Paper doll ~ I just think she is adorable and I've been waiting for the right project to use this one.
I applied colour to the paper doll by first adding a layer of clear gesso over the surface and then once dry, I watercolored the image with Distress Crayons and a water brush.
I then mounted the paper doll over the top of the rulers using foam pads to add a little more dimension to the piece and placed some threads of Mummy Cloth around the base of the image.

You can see the dimension in the photo below.

Together with a piece of torn design tape, I added a final ephemera piece to the background ~ placing the enclosure sticker just behind her head.

On the opposite side, I adhered a Numbers Strip, Form 153. Once again I inked these with Walnut Stain Distress Ink and then smeared a little Prima Burnt Sienna Liquid Acrylic Paint over the top. To complete this section, I added the "red swoosh" which is a die cut from the Postale Thinlits Die Set. I already had this cut and it was on my desk, and it was the perfect finishing touch to the collage.
To the left of the portrait, I added a gold star. I altered the largest sized Star Adornment with Gilded Foundry Wax and once I'd heat set the wax, I attached it to my ruler and then just beneath the ruler, I applied a Labeled remnant rub, #95 Level.

To complete the collage, I added a Metallic Sticker Quote "Create Art" and placed this on a piece of linen, before attaching it across the bottom of my portrait.
We're nearly there and all that's left is the finishing touches...

DETAILS

I placed a pen nib in the bottom right hand corner of the box, which I altered with white gesso and a little Mushroom alcohol ink and adhered with matte collage medium. I placed a memo pin above, sticking it into one of the foam pads to secure it into place.
Finally, I added the Mini Hardware knob on the top of my box. Again this is altered with gesso and Mushroom Alcohol Ink and attached to my box, together with Hardware Heads either side.

I completed the box by wrapping some twine around the neck of the knob and hanging a story stick.
So that's my project finished for this week and I hope you've loved what I've made and been inspired by the ideas.

As always, if you make anything, or if you've been inspired by anything that you've seen here on my blog ~ then please, let me know by tagging me on social media or leaving a comment here and I will be right over to take a look and if sometimes I miss it ~ just keep nudging me!

Don't forget that every week, one lucky random participant has the chance to win a $25 gift voucher from Simon Says Stamp and you can join in up to 5 times, which means you could have 5 chances to winYou have until next Monday at 8am Ohio time. 1pm UK time, 2 pm CET to join in and good luck....


Thank you so much for taking the time to stop by today ~ stay safe and keep well.
Love Emma xxx

Monday, 4 July 2022

Blaze of Glory....

Hello everyone and Happy 4th July to all my friends in the USA!

So here we are in a new month ~ I can't quite believe that we're over halfway through the year, where has 2022 gone?!?!? But as always, as we start a new week, it's also time for a brand new Simon Says Stamp Monday Challenge and this week, the DT are showcasing PAPER ROSE products and combining them with our RED, WHITE &/or BLUE theme and if you'd love to join us and play along, then all you need to do is create something using either all of the colours, or some of the colours!

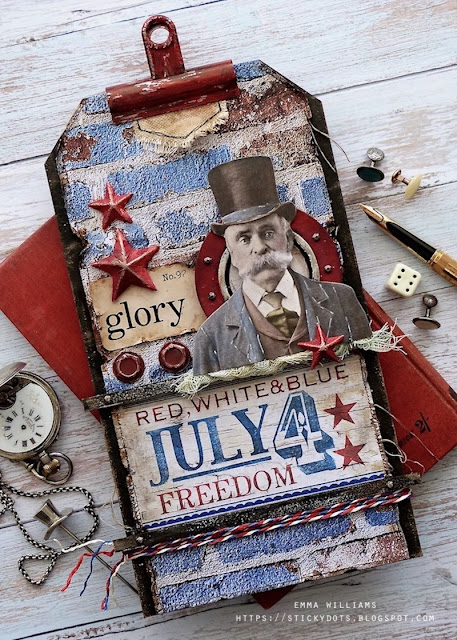
For my make, I wanted to create a piece to celebrate American Independence Day and I chose to use Paper Rose backing papers, combined with Tim Holtz products to make a vintage style tag.

It's time to get creative...


TAG

To begin with I used a Small Stampers Anonymous Etcetera Tag that I painted with Black Soot Distress Paint. Once dry, I sanded back the edges, removing some of the black paint and revealing the core.

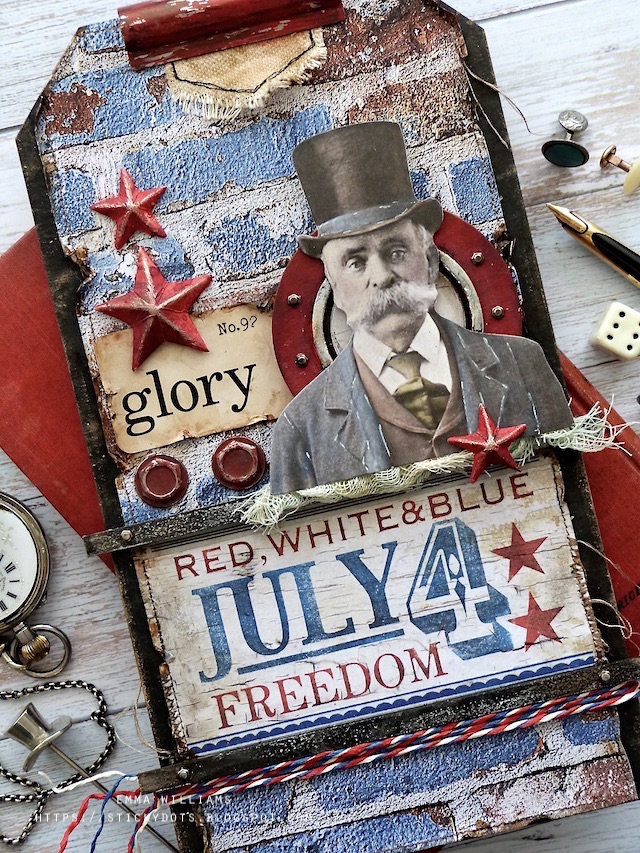
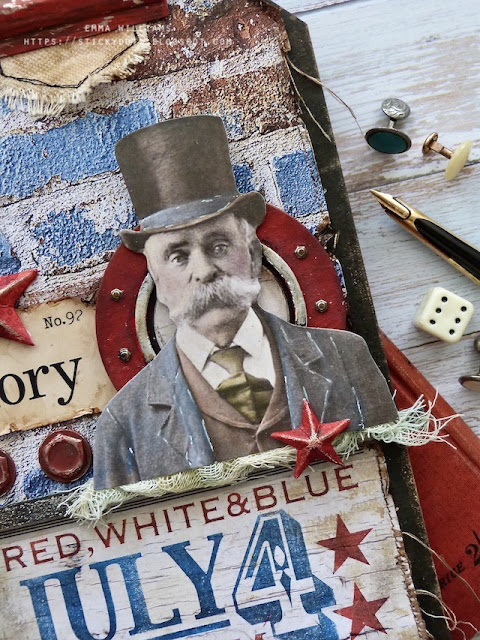
Down the centre of the tag, I adhered a panel of the double sided paper, choosing the brick wall design, from the Paper Rose Textures 1.0 12" x12" paper pack. I cut the paper to size, slightly smaller in width than the tag itself so that it will leave a black border showing either side, ripped and tore around the edges of the panel and then machine stitched a border.
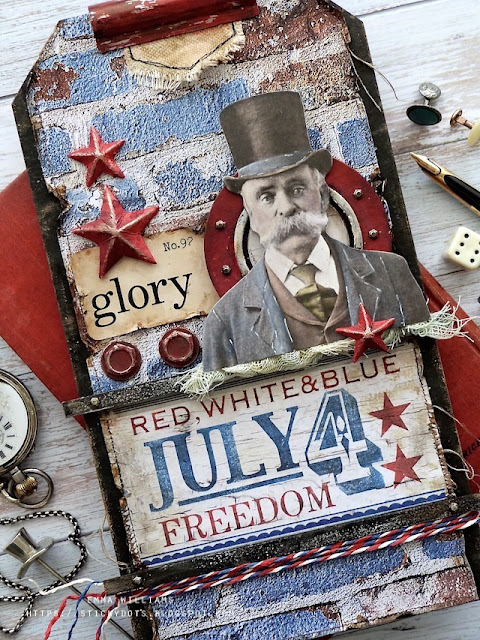
With my tag surface prepped and ready to go, I moved onto the next stage ~ the JULY 4th banner.

STAMPED July 4th BANNER

For this I cut a panel of the same paper, but used the reverse side, which is a white wooden plank design.

I placed the paper into my stamp platform, and then using the background stamp from the Americana Silhouettes Stamp Set by Tim Holtz, I used masking tape to mask off the areas I didn't want to stamp.

I then preceded to ink up the various sections of the stamp using Fired Brick and Prize Ribbon Archival Ink. I will admit that this technique is so much easier to do with the stamp platform but it can be done without but you might need to use ink with a slower drying time.

I machine stitched the banner around the edge and then attached it to my covered tag.
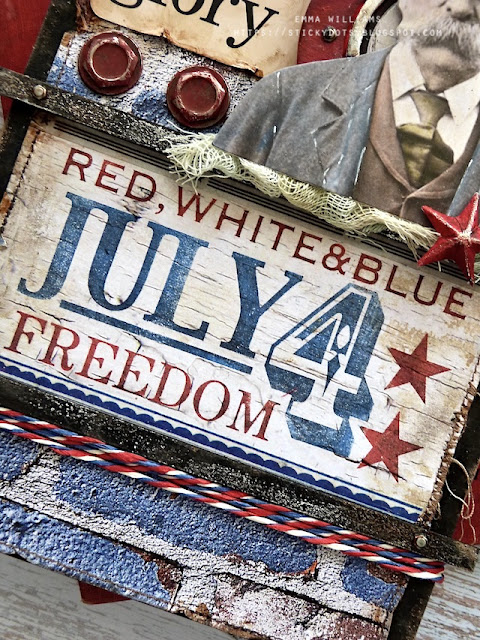
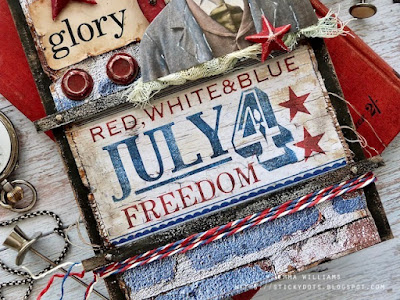
To frame the banner, I attached two of the straight edge trims from the Bat Web Trims pack. I chose them to be slightly longer in length as I liked them hanging over the edge, and after painting them with Black Soot Distress Paint, I placed them above and below the banner before I attached Hardware Heads onto each of the ends of the trims.
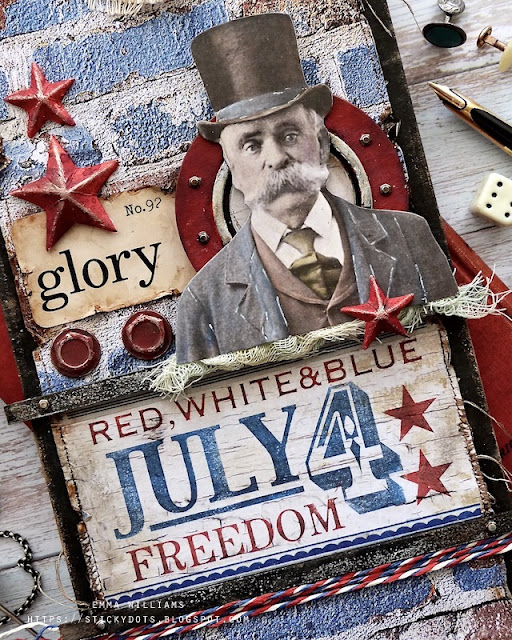
To complete this section, I wrapped some red, white and blue paper string that I had in my stash. This is by Tim Holtz, but is quite old ~ so if you're lucky enough to own it, then now is your chance to use it.
STEAMPUNK PART DIE CUT

We can now move onto all those layers, and let's start with the circle that sits behind the old gentleman.

I used the Steampunk Parts die and using only the circle on this die, I cut multiple layers of card that I built up to create a thick and very substantial die cut. This die cut has two separate pieces, so at this stage, I didn't attach the smaller ring that sits on the top of the circle.

I then painted this with a combination of Candied Apple and Black Soot Distress Paint, applying the red paint first, allowing it to dry and then dry brushing the black paint over the top. In the centre of the steampunk part, I attached a circle of the paper that I used on the banner.

Taking the smaller ring die cut, I applied Sterling Foundry Wax over the surface, heat set the wax and then attached it to my steampunk part.

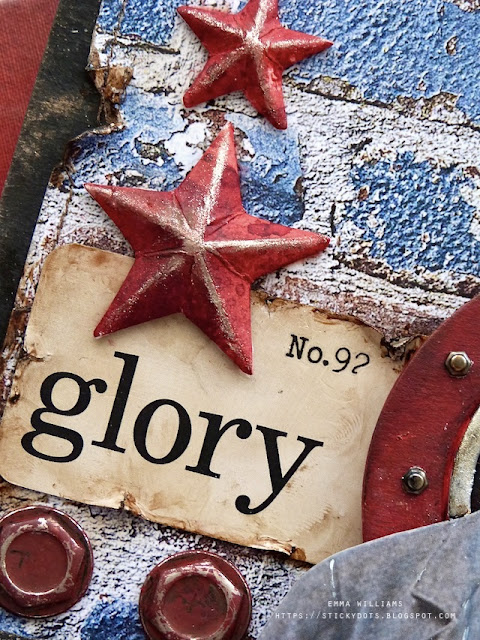
I layered the circle onto my tag, using foam pads and placing it on the right hand side, attaching a Flash Card to the left, ripping and tearing the edges and using Matte Collage Medium to adhere it.

I then ran my Gathered Twigs Crayon over the top and around the torn edges, before adding a Specimen Remnant Rub number, "no. 92" onto the card.
PAPER DOLL PORTRAIT

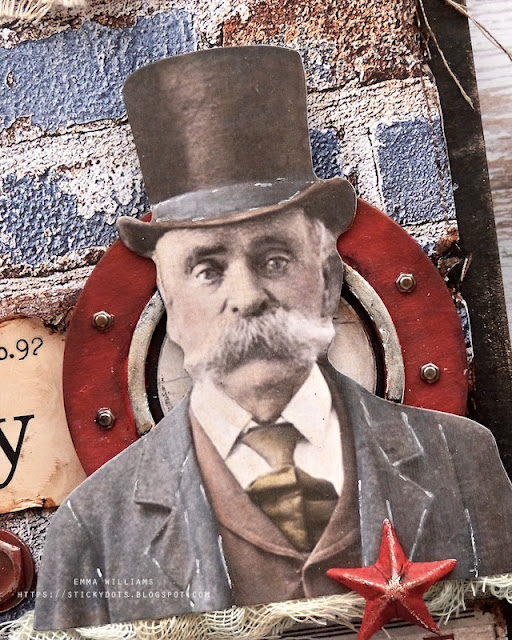
Now for the Paper Doll Portrait, and for this I primed the surface with clear gesso and once it was dry, I added colour using Distress Crayons and a water brush.

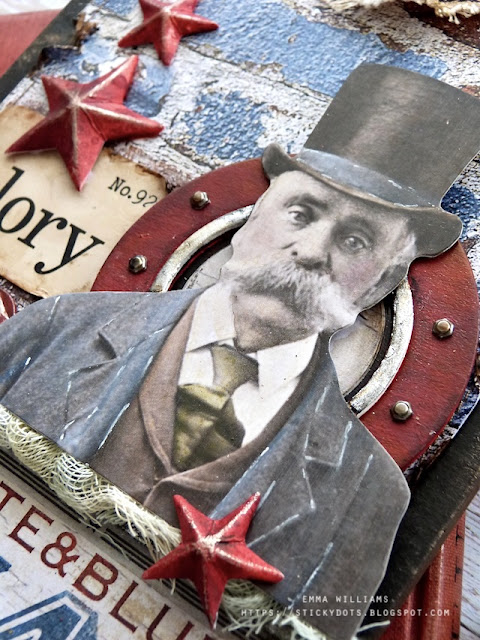
I then used a white gel pen to apply some detail before I attached the portrait over the steampunk part using foam pads.
To the left of the portrait, I attached two Machinery Heads that I painted with Candied Apple Distress Paint. Once the paint was dry, I then scratched the surface to reveal the metal underneath, which creates more of worn effect to the pieces.
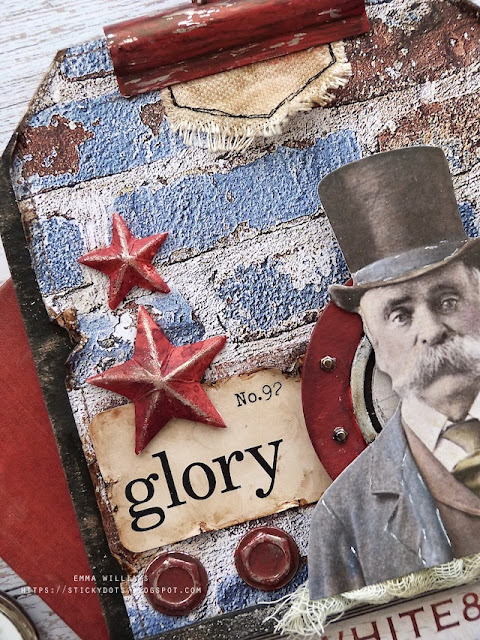
On either side of the portrait, I used Hex Fasteners. These come in two different sizes and I used the small ones and cut the wings off the back before attaching them to my steampunk part.

To finish the bottom line of the portrait, so it appears more grounded and doesn't float, I used some Mummy Cloth that I had on my desk and just tucked this underneath to from the base.
STARS

For the three stars on this project, I used Mixed Media Heavystock card inked with Candied Apple, Aged Mahogany and Barn Door.

I cut the stars, two small and one larger size, using the two dies in the Holiday Vault 2021 die set and folded along the scorelines to create my dimensional stars.
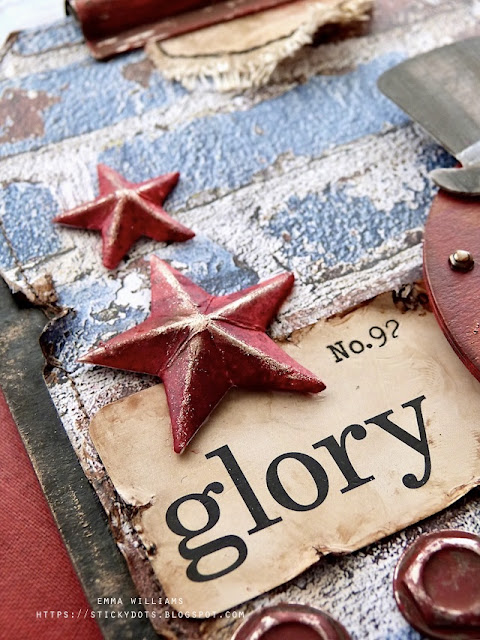
Along each of the folded edges, I applied some Sterling Foundry wax which I then heat set before I attached them to my tag ~ two on the left hand side...

...and a third star on the portrait.
We're almost there...

CLIP

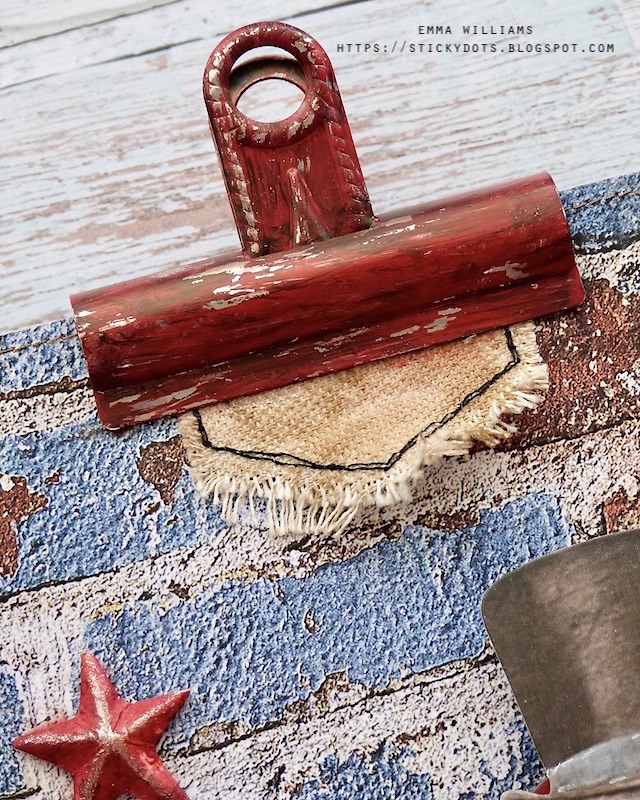
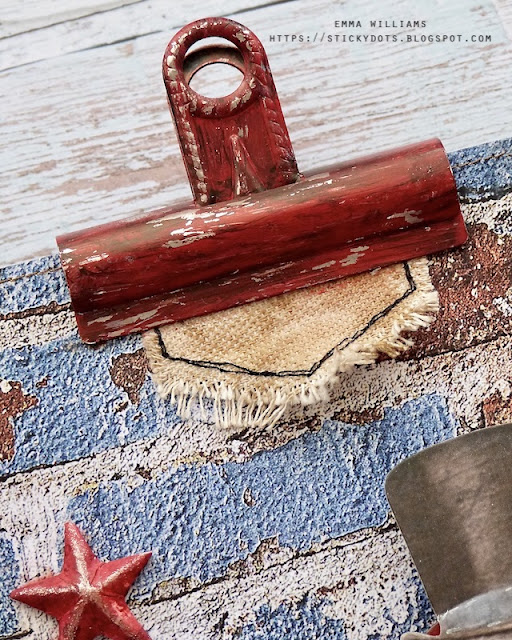
...and all that's left is to paint the Vintage Clip with Candied Apple Distress Paint. Once again, once the paint was dry, I then scratched the surface to reveal the metal and then clipped it to the top of my tag, together with a Stitched Scrap that I dyed using Frayed Burlap Distress Spray Stain.
So that's my project finished for this week and I hope you love this piece...it's definitely been a lot of fun to make.
As always, if you make anything, or if you've been inspired by anything that you've seen here on my blog ~ then please, let me know by tagging me on social media or leaving a comment here and I will be right over to take a look and if sometimes I miss it ~ just keep nudging me!

Don't forget that every week, one lucky random participant has the chance to win a $25 gift voucher from Simon Says Stamp and you can join in up to 5 times, which means you could have 5 chances to winYou have until next Monday at 8am Ohio time. 1pm UK time, 2 pm CET to join in and good luck....


Thank you so much for taking the time to stop by today ~ stay safe and keep well.
Love Emma xxx

Recipe for project:

Distress Spray Stain: Frayed BurlapCandied Apple, Aged Mahogany and Barn Door.
Distress Ink: Walnut Stain
Red, White and Blue Paper String from my own stash

If you’re looking for some more 4th July inspiration then here are a few pieces I’ve made in the past and hope you enjoy revisiting them!

Monday, 20 June 2022

Ordinary World...

Hello friends...

Hope you all had a great weekend and ready for the week ahead. As always on a Monday, and yes time really does seem to by flying ~ it's time for the brand new Simon Says Stamp Monday Challenge and this week our theme is all about SOMETHING BEGINNING WITH 'S'....

So whatever inspires you starting with the letter S ~ then we hope you'll join us and play along with our fun challenge theme!

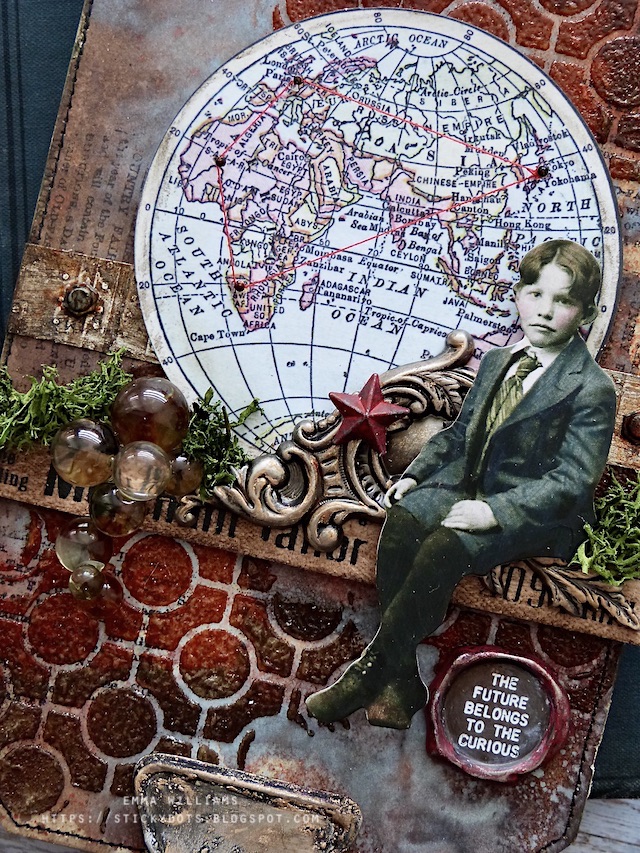
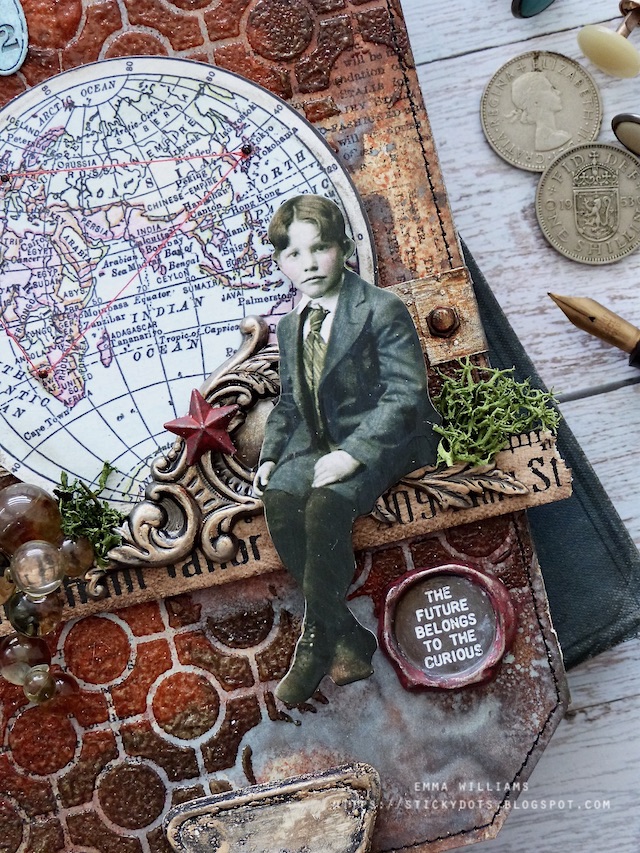
My something beginning with "S" make, is all about SEEING THE WORLD through the eyes of a child, charting his journey on the world map, and finishing with the quote that "The Future Belongs To The Curious. I also used sprays, stencils and stamps ~ all beginning with the letter "S" to make this Etcetera tag project.


So let's get started, it's time to get creative!

BACKGROUND

To begin with I prepped my background and for this I cut a panel of mixed media heavy stock card to measure the same size as the mini etcetera tag. Spritz with a light mist of water and then start to apply the Distress Spray Stains:

Crackling Campfire, Ground Espresso, Speckled Egg, Frayed Burlap, Rusty Hinge and Speckled Egg Oxide Spray

After another light misting of water to blend the sprays, I heat dried the surface and in the photo below, you can see the blend of oxide and inks on that background panel.

To add some interest to the background, I used the butterfly stamp from the Botanic Collage stamp set and inked the newsprint section only with Black Soot Archival Ink, stamping repeatedly over the background which can be seen in the photos below.

Now for the texture and after I applied Translucent Grit Paste through the Linked Circles Layering Stencil, I immediately sprinkled a combination of Crackling Campfire and Walnut Stain Distress Glazes over the top of the wet paste. Set aside for the paste to set ~ this will take approx 30 mins depending on temperatures where you are.

Once the paste is set, very gently heat the glaze until it becomes molten and has a glassy, enamelled effect.

To complete the background, machine stitch around the edge and then mount onto the tag using Matte Collage Medium.

WORLD

Now to build up the layers and I started with the world which is from the Memoirs Ephemera Pack. I applied a coat of Matte Collage Medium over the surface and then mounted it onto a piece of thick card to create more stability once it's attached to the tag.

Across the tag, I added a strip of metallic cardstock which I embossed using the Tim Holtz Foundry 3D folder by Sizzix. I always have these offcuts from previous makes sitting on my desk and find them so useful to create texture and detail on projects ~ many of you have probably seen them on a lot of my previous projects. I adhered the strip onto the background and added a Hardware Head ether side before I attached the globe over the top using foam pads. I then ran the Walnut Stain Distress Crayon around the edge of the world, blended out the harsh lines of colour with my fingertip before I began adding the cotton thread and pins.

For this I used regular haberdashery pins, which I very carefully cut down to size using wire cutters.

I then placed the pins into the map at random places to map the journey before I wrapped cotton thread around the pins.

EMBELLISHMENTS

Underneath the map, I attached a ruler piece, broken on one end and inked with Walnut Stain Distress Ink that I swiped across the wooden surface and blended out with a semi dry baby wipe.

As always, I love dimension on projects and this one is no exception because the next layer is a Adornment Flourish. I altered the metal embellishment with a Statue Foundry Wax which I then heat with my heat gun to set it.

Attach the adornment to the right of the world, placing it so it adheres to the ruler and the world itself.

After I watercolored the paper doll, I sat him on my flourish adornment and placed some moss along the ruler piece.

On the left hand side I added some bubbles to represent the sea on this young man's travels...

These clear bubbles were given a little ageing with the help of some Mushroom Alcohol Ink and then I arranged them to cascade down the tag using Glossy Accents to hold them in place.

Next to my paper doll, I placed a star adornment, which I painted red with Candied Apple Distress Paint and attached with more of the Matte Collage Medium.

I also used the red paint to outline the Quote Seal, which I attached on the right hand side of the tag, placing it beneath the ruler piece. To highlight the wording I used the Picket Fence Distress Crayon, which I ran over the lettering and then wiped away the excess.

We're nearly there and the only thing left is to add that little arrangement in the top right hand corner...

To begin with I stamped the pointy finger from the Eccentric stamp set and coloured it with Polychromos Pencils before fussy cutting around the outline. I adhered it to my tag with the medium, placing it together with an Air Mail label and some Design tape Trim. 

I finished this little grouping with a Factory Tag hanging from the pointy finger. I altered the tag with some Salvaged Patina and Picket Fence Distress Paint, and then used some twine to hang it....

...all that's left for me to do, is add the clip at the bottom. I used a Vintage Clip, altered with a little Black Soot Distress Paint and the Statue Foundry Wax and then I clipped it onto my tag as a finishing touch.

And here is my finished make....

As always, if you make anything, or if you've been inspired by anything that you've seen here on my blog ~ then please, let me know by tagging me on social media or leaving a comment here and I will be right over to take a look and if sometimes I miss it ~ just keep nudging me!

Don't forget that every week, one lucky random participant has the chance to win a $25 gift voucher from Simon Says Stamp and you can join in up to 5 times, which means you could have 5 chances to winYou have until next Monday at 8am Ohio time. 1pm UK time, 2 pm CET to join in and good luck....


Thank you so much for taking the time to stop by today ~ stay safe and keep well.
Love Emma xxx

Recipe for project:

Distress Spray Stains: Ground Espresso, Speckled Egg, Crackling Campfire, Rusty Hinge, Frayed Burlap
Oxide Sprays: Speckled Egg
Distress Glaze: Crackling Campfire, Walnut Stain
Distress Ink: Walnut Stain
Distress Crayon: Picket Fence
Distress Paint: Black Soot, Ground Espresso, Rusty Hinge, Salvaged Patina, Picket Fence, Candied Apple
Moss, red cotton thread, pins from my own stash
Powered By Blogger

Total Pageviews