Showing posts with label vintage. Show all posts

Monday, 1 September 2025

Countdown to Autumn...

Hello everyone and HAPPY STAMPtember...

As we celebrate the start of this exciting month, it's time for a brand new Simon Says Stamp Monday Challenge and this week we are showcasing the wonderful products of our very own Simon Says Stamp brand and the theme is called STAMP IT! So, however you choose to use stamps, we can't wait to see what you create and hope you'll join us and play along!

For my make, I started the countdown for my favourite time of year ~ AUTUMN and I chose to use Tim Holtz's Nature's Wonder stamp set together with the Simon Says Stamp co-ordinating die set. I love that these dies cut the images perfectly and there's no more fussy cutting which is definitely something to celebrate!

So, let's get started because it's time to share how I created my tag...

To begin with I used two Etcetera Tags which I layered ~ the Mini Etcetera Tag and the Size 8 Etcetera Tag.

CREATING THE BACKGROUNDS

I started with the larger tag, and began by applying Design Tape around each of the four edges. I then cut  a piece of decorative paper from the Halloween Backdrops pack and added rips and tears to the edges. I machine stitched a border and then adhered the paper to the tag with Matte Collage Medium, adding more tears and curling the corners to create a gnarly, vintage feel to the piece.

After applying a coat of Collage Medium to the surface of the paper, I then took my Walnut Stain Distress Crayon and used this to add colour to the rips and tears. I also added a small Cello Sticker Tape to the edge on the right hand side of the tag.

Moving on to the smaller, Size 8 tag I created my own background. For this I used a Size 8 Mixed Media Heavystock tag and the Numeric Mini Layering Stencil. I placed the stencil so the numbers would be in the centre of the tag and then applied Translucent Grit Paste through the stencil.

Remove the stencil and whilst the paste is still wet, I sprinkled Pumice Stone Distress Glaze over the top, tapping away the excess and then setting it to one side to dry.

Once the paste is touch dry, (or near enough) I then heat embossed the glaze until molten and created a faux enamel effect. Remember to not settle on one area for too long as you only want to melt the glaze and not create bubbles in the paste.

To add colour to the tag, I used a combination of Distress Spray Stains and Oxide Sprays:

Distress Spray: Black Soot, Frayed Burlap, Speckled Egg, Antique Linen

Oxide Spray: Speckled Egg

After misting the tag with water, I layered the sprays until I was happy and then allowed the tag to dry. The stencilled area will resist the colour, and if there is any residual ink, just wipe it away once the tag is dry.

To complete this, I machine stitched a border and then attached it to my Etcetera Tag with Collage Medium, before mounting this tag onto the centre of the larger tag, again using the medium to adhere it.

I added some flicks of Antique Linen 

LEAVES

Now to create the leaves for this piece and create those beautiful colours of Autumn.

As mentioned, I used Tim's Nature's Wonder stamp set by Stampers Anonymous and the co-ordinating die set by SSS.

I stamped each of my leaves onto watercolour card using Black Soot Archival Ink and then watercolored them with a selection of Distress Watercolour Pencils in Aged Mahogany, Crushed Olive, Peeled Paint, Crackling Campfire, Carved Pumpkin.

Once happy, I then used the co-ordinating dies to die cut each of the stamped leaves and then inked the edges with Walnut Stain Distress Ink. I used a total of 8 leaves for this make and shaped each of themes that this will create dimension on the finished piece.

PHOTO BOOTH IMAGE

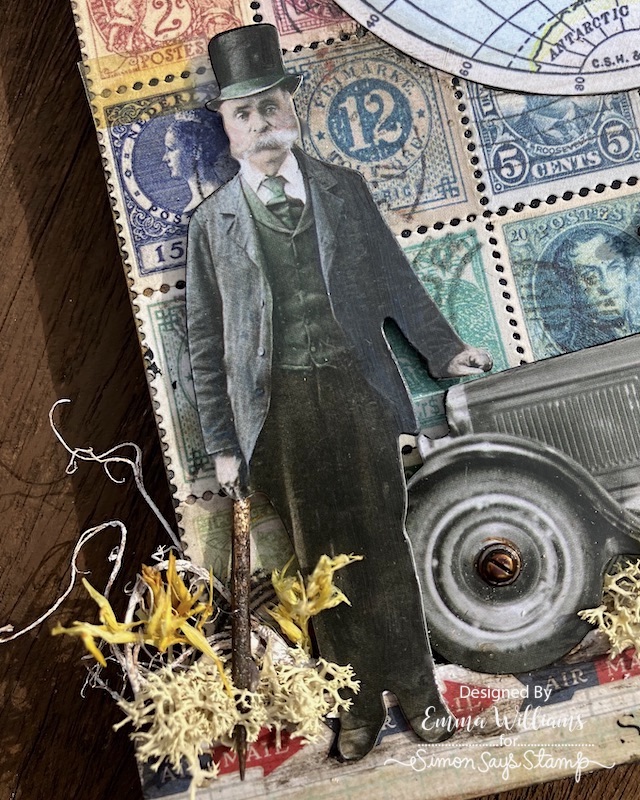
With the leaves ready, I colour tinted the PhotoBooth image using Distress Crayons and a water brush. I chose this particular photo as I wanted someone wearing a coat and smiling ~ someone who looks as if they're embracing the season. I also wanted to keep the colours that I used to colour tint, quite warm, so chose similar colours to the ones I used on the leaves and added a blue background.

I added some rips and tiny tears to the edges of the photo, and then attached a piece of idea-ology Cello Sticker Tape to the left hand side before machine stitching some detail onto the photo.

I attached the photo to a piece of felt that I cut with Pinking Shears from my own stash, and then mounted the felt onto a piece of mountboard. The mount board will create a stable base once the photo is stuck into place.

To complete the photo, I added the Oct 18 remnant rub from the Labeled set.

LAYERING THE LEAVES AND MOUNTING THE PHOTO

It's now time to create the focal point to this piece and I attached the photo into position with foam pads. I then arranged the leaves to cascade across the tag, by placing these on either side of the image. 

I then tucked in some pieces of Spanish Moss, that I have in my stash but can be found in floristry departments. The moss creates more interest and texture to this arrangement which I love.

FINISHING DETAILS

We're nearly there and all that's left is those tiny details that add so much more to a piece than you think.

Firstly, I clipped a Large Hinge Clip to the top. This clip was painted with a combination of the Lumberjack Plaid Distress Paint, Antiqued Bronze and Black Soot for a beautiful vintage finish. 

I added the 'Merchandise" ephemera piece which is taken from the Field Notes Snippets pack and attached this just below the Hinge Clip. I also attached a Machinery Head to cover the hole in the top of the smaller tag. I painted this piece with Lumberjack Plaid Distress paint for a chippy vintage look.

Beneath the photo arrangement, I added a Theories Quote Chip, "Focus On The Good". I sanded the edges of the chip and then inked them with Walnut Stain Distress Ink before attaching it to my tag. On either side of the chip, I placed a Large Fastener. To add the dents and "dings" to the surface of the fastener, I used the Texture Hammer.

So, that's my make finished for this week and I hope you love the story behind this piece and all the tricks and techniques I've used to create the project.

As always, if you make anything, or if you've been inspired by anything that you've seen here on my blog ~ then please, let me know by tagging me on social media or leaving a comment here and I will be right over to take a look!

Don't forget that every week, one lucky random participant has the chance to win a $25 gift voucher from Simon Says Stamp and you can join in up to 5 times, which means you could have 5 chances to winYou have until next Monday at 8am Ohio time. 1pm UK time, 2 pm CET to join in and good luck....


Thank you so much for taking the time to stop by today!
Love Emma xxx

Sunday, 1 June 2025

A Pocketful of Dreams...

Hello friends....

...and Happy Monday! As always, the start of a new week, means a brand new Simon Says Stamp Monday Challenge and this week, our theme is all about those men in our lives and we want you to create something MASCULINE! Whatever you choose to make, we're looking forward to you joining us and playing along.

For my make, I chose to use one of my favourite Tim Holtz brands, idea-ology and I made a vintage style panel, featuring lots of rusty metal and all inspired by dreams and aspirations.

So, let's get started because it's time to share how I created this panel...

For this make, I chose to use the larger Stampers Anonymous Rectangular Etcetera Panel.

PANEL

The first thing that I did on this panel was to apply design tape, I added mine down the edges, and also around the edges of the surface of the panel. I used two different designs that co-ordinated with each other.

Next, I covered the front of the panel, and for this I chose to use a selection of Large Collage Strips. I used the neutral and green tones from the packed cut the pieces down to size so that they fit the panel, applying them horizontal and vertical.

I attached each piece with Matte Collage Medium, and then gave the surface a coat of the medium to seal the papers.

Once this was dry, I the added a Labelled Remnant Rub, "09255' onto one of the photos...

...and on the opposite side, I added another rub, "Original", and then placed a piece of the Cello Sticker Tape over the top.

I ran my Walnut Stain Distress Crayon over the joins of the Collage Strips and then blended the colour with my finger. I then splattered some Black Soot Distress Paint across the surface.

FRAME and CLIP

We're now ready to begin creating the focal point and for this, I began by creating the background piece.

I used two of the pieces from the idea-ology Photo Studio pack, the frame and the Photo Studio ephemera piece. I placed the frame over the top of the solid piece, then I used a sewing machine to add a border around the edge.

I mounted this onto a panel of gold metallic Kraft card, that I sanded to knock back the shine and create more of a vintage feel before I used the Walnut Stain Distress Crayon around the edges, once again blending the colour with my fingertip.

After splattering the surface with Black Soot Distress paint, I added a couple more of those fabulous 'must have' Cello Stickers, and then a tiny pointy finger ephemera piece, which is from the Snippets Ephemera pack.

At the top of the framed panel, I wanted to add a clip and instead of using a metal idea-ology clip, I thought it would be fun to make one using the die from the Sizzix Noteworthy Die Set by Tim Holtz.

Once I'd cut my pieces from silver metallic card, I used Distress Glazes to add colour and make it look rusty. You can see my recent tutorial for how I use Glazes to create this effect by clicking HERE.

For this piece I used the following colours of Glaze: Hickory Smoke, Vintage Photo, Rusty Hinge

I then attached my clip to the top of the frame, and added a small Star Adornment, which I painted with Crackling Campfire, Black Soot, and a touch of Antiqued Bronze Distress paints.

Finally, I clipped a hook to the top which I had in my stash.

CLUSTER OF GEARS

Moving onto the gears and once again, you can see how I created the rusty gears by clicking HERE. For this piece, I chose to use a selection from the following idea-ology packs:

INDUSTRIAL GEARS, SPROCKET GEARS AND GADGET GEARS

With all my gears rusted and ready, I arranged them to cascade across the bottom of the photo studio frame. I added some Screwheads to the centres of each.

In the centre of the arrangement I added a black and white target, taken from the Junk Drawer Baseboards pack and then placed my Paper Doll to sit on top of the target. The paper doll is colour tinted with Distress Crayons.

You can see the dimension of this section in the photo below....

SALVAGED HEART

I used one of the smaller Salvaged Hearts and painted this with a layer of Candied Apple Distress paint, allowed this to dry and then used a paint brush to dry brush Black Soot Distress Paint over the top.

Once dry, I added a Screw Head in the centre, altered with the same colours of paints as I used on the gears.

Finally I added some frayed pieces of Mummy Cloth, dyed with Frayed Burlap Distress Spray Stain and I placed these  around the paper doll, tucking them underneath to look as if he's sitting on them and creating some texture to this piece.

RULER and QUOTE

With the panel nearly complete, I set this to one side to move onto the next stage.

Across the bottom section of my panel, I wanted to add my Quote Chip.

I placed the Quote Chip inside the Label Frame, that I rusted and altered with Distress Paints, using the same colours as I have throughout on all my metal pieces.

I then took a ruler piece, snapped off both ends, (please be careful when doing this) and inked the wooden surface with Walnut Stain Distress Ink.

I added some darker tones to the edges before attaching to my panel with Matte Collage Medium, placing it beneath the focal point, across the lower section of the panel.

Finally, I added two Screw Heads to either side of the ruler, altered with Distress Paint.

...before attaching the framed Quote Chip to the centre of the ruler piece.


As always, if you make anything, or if you've been inspired by anything that you've seen here on my blog ~ then please, let me know by tagging me on social media or leaving a comment here and I will be right over to take a look!

Don't forget that every week, one lucky random participant has the chance to win a $25 gift voucher from Simon Says Stamp and you can join in up to 5 times, which means you could have 5 chances to winYou have until next Monday at 8am Ohio time. 1pm UK time, 2 pm CET to join in and good luck....


Thank you so much for taking the time to stop by today...
Love Emma xxx

Recipe for project:

Tim Holtz/Stampers Anonymous: Etcetera Panel
Distress Paint: Black Soot, Candied Apple, Crackling Campfire, Antique Bronze, Salvaged Patina
Frayed Burlap Distress Spray Stain

Monday, 17 March 2025

Signed, Sealed, Delivered...

Hello everyone...

It's time for the brand new Simon Says Stamp Monday Challenge and this week our theme is called TRANSPORT IT and we hope you'll come and join us and play along.

For my project, I decided to take you on a global journey and used some of my favourite Tim Holtz products. I made a Stampers Anonymous Etcetera Panel and framed it with Etcetera Trims to create something a little different in shape. This make would be perfect for anyone who loves cars, travel or even stamp collection...

So, let's get started because it's time to share how I created this hanging panel...

To begin with I chose to use the smaller size in the Rectangular Etcetera Panels pack and I teamed this with Bracket and Pinked Etcetera Trims.

PANEL

Starting with the panel, I covered the raw edges with Design Tape from my stash and then, primed and painted the surface with Black Gesso.

Once the gesso was dry, I started attaching my stamps from the Postmarked Sticker Book. I started my first line of stamps, approx 0.5" from the top and then using the different colours, I carried on attaching them to the panel in straight lines until I reached the bottom.

With my stickers in place, I applied a coat of Matte Collage Medium over the top and allowed this to dry.

Moving onto the trims, I took a selection from the two packs, all of which are slightly wider than the panel itself. I used three bracket trims, 1 wide and 2 narrower, and one narrow pinked trim for this make.

I applied black gesso to the surface of each trim and then taking the wider bracket trim and the pinked trim, I attached this to the top section of my panel, attaching them so that the straight edges are joined together. Over the top of the trims, I used the "G. Montague & Co" strip from the idea-ology Paper Strips pack. This strip is the perfect length for the trims and once I'd adhered it into position, I applied Matted Collage Medium over the top to seal it and when that had dried thoroughly, I sanded the edges of the trims and then applied Walnut Stain Distress Crayon to give the look of ageing.

With the two remaining trims which I will attach to the bottom of the panel, I left one of the trims black and then die cut a piece of Backdrops paper from my scrap box using the Decorative Trims die ~ sorry, I can't remember which set this paper is from but you can choose a pattern you like, it really doesn't matter. I chose an idea-ology Paper Strips, the 'Airmail" design which I adhered to the covered trim and then after applying a coat of collage medium over the top, and allowing it to dry, I used the Walnut Stain Distress Crayon around the edge and blended it over the surface using my fingertip.

Once the trim is in place, I added a Special Delivery Remnant Rub, which funnily enough is from the "Special Delivery" pack. This pack of rubs are unfortunately discontinued but I have a stock pile of them in my stash.

LAYERS

Now for building up those layers and I began by using the globe from the Memoirs Ephemera Pack and I adhered this directly over the top of the stamps, applying a layer of collage medium over the top to seal it.

On either side of the globe, I added a pointy finger, again attached directly to the surface.

At the top of the globe I added a Numbers Snippet, 1907 Model and on the right hand side, 

...and I placed a label that I cut in half, which once again is from the Memoirs Ephemera Pack.

You'll notice that my pointy fingers are pointing at London and Australia, and to join these two countries, I wrapped some red cotton thread around a tiny brad and then attached the brads onto the panel by piercing a small hole into the board, adding a touch of glue and placing the brad into it.

I used Walnut Stain Crayon around the edges of all my layers, again blending out any harsh lines with my fingertips.

We're nearly done with the background, and all that's left was for me to add the centre to the globe. This piece is from the Gauge Dials pack and I attached it to the centre using foam pads. I then placed a Screw Head in the centre of the hands, adding some rusty goodness with Distress Paints ~ Crackling Campfire, Black Soot and Antiqued Bronze.

PAPER DOLL AND CAR

When it comes to Paper Dolls, there are always going to be favourite characters and for me, this gentlemen is one of mine and I knew that together with a card, I wanted to include him in this make. Both of these pieces are from the Paper Dolls and Poses pack.

I colour tinted each of the pieces with Distress Crayons, that I applied with a waterbrush over the top of clear gesso.

Behind the windows of the car, I added some Mica Sheets, but I didn't cover the entire window, I wanted them to appear to be rolled down.

Then, on the wheels of the car, I added some Screw Heads that I altered with the same Distress Paints as used on the centre of the gauge dial.

I positioned the car on the right hand side of the panel, using foam pads to attach it into place.

I then attached the gentleman into position on the left of the car and you might notice that he has a little walking stick.

This is actually a cocktail stick that I cut in half and then painted with Walnut Stain Distress Paint. Once it was dry, I attached with a dab of collage medium and placed it so that he was holding it in his hand.

To complete the scene and add some texture, I used moss and dried grasses from my own stash.

HANGER

For the hanger, I used Hinge Clips which I clipped to the trim that is fitted across the top of the panel.

Each of the pewter coloured clips were given a patina using Salvaged Patina, Black Soot and Crackling Campfire Distress Paints and once the paints were dry, I used a little gilding wax from my own stash over the top.

With the clips in position, I added some chain from my stash which will now allow for the piece to be hung on a hook..

FINISHING DETAILS

All that's left to do now is add the finishing details of screw heads that I placed on the trims across the top of the panel.

So that's my make for this week complete and I hope you love the piece that I've designed and will be inspired by the tips and techniques in this project.

As always, if you make anything, or if you've been inspired by anything that you've seen here on my blog ~ then please, let me know by tagging me on social media or leaving a comment here and I will be right over to take a look!

Don't forget that every week, one lucky random participant has the chance to win a $25 gift voucher from Simon Says Stamp and you can join in up to 5 times, which means you could have 5 chances to winYou have until next Monday at 8am Ohio time. 1pm UK time, 2 pm CET to join in and good luck....


Thank you so much for taking the time to stop by today...
Love Emma xxx

Recipe for project:

Tim Holtz/Stampers Anonymous: Etcetera Trims Bracket and Pinked, Etcetera Panel
Distress Paint: Black Soot, Antiqued Bronze, Crackling Campfire, Salvaged Patina

Moss and chain from my own stash

Powered By Blogger

Total Pageviews