Hello everyone....
As always, a Monday brings a brand new Simon Says Stamp Monday Challenge and this week, we are asking you to STENCIL IT with our fun challenge theme. With so many stencils available, I'm sure you'll all be spoilt for choice and we can't wait to see how you will interpret our challenge and hope you'll join us and play along.
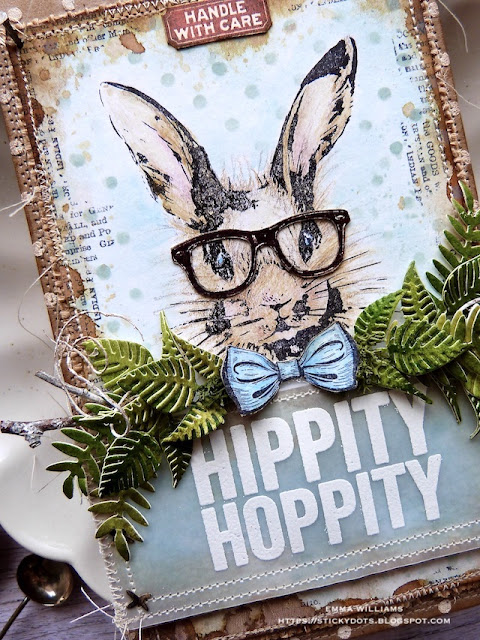
For my project, I wanted to create one last Easter make and with this in mind, there was only one Easter Bunny that would feature on this project and he is the coolest bunny in town ~ say a big hello to Hippity Hippity the Hipster Bunny from Tim Holtz and Stampers Anonymous!
So, lets' start making and here's how I created my Easter Tag...
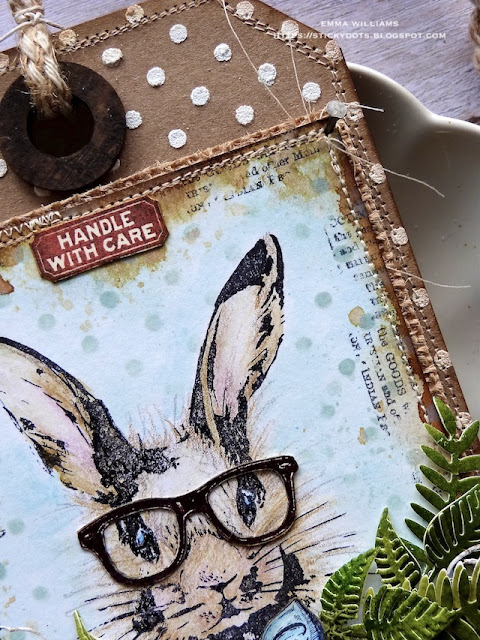
To begin with I created the background for my Mini Sized Etcetera Tag. I cut a panel of Kraft Heavystock Card the same size and shape as the tag and applied Grit Paste through the Polka Dot Layering Stencil. After I'd allowed for the paste to dry I machine stitched a border around the outside and adhered it to my tag using Collage Medium. You can use the Polka Dot Stencil that comes with the stamp set but because I wanted to cover a larger area, I used the larger layering stencil.
I dragged the Frayed Burlap Oxide Ink pad around the edge of the background panel, and smudged the ink with my finger.
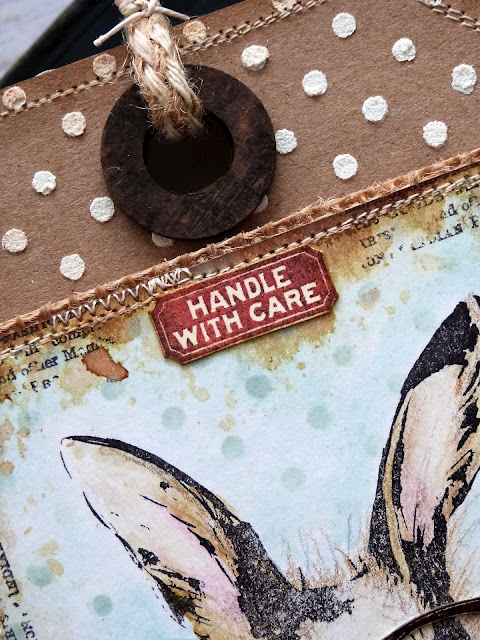
To complete the tag, I painted the hole reinforcer with a combination of Black Soot and Walnut Stain Distress Paint and then attached over the hole.
I then threaded some rope through the hole.
We're now ready to say hello to the Hipster Bunny...
HIPSTER BUNNY
I cut a panel of Watercolour Cardstock to measure 10 x 16cm and stamped the image of the Hipster Bunny onto the card.
I watercolored the image with Distress Watercolour Pencils but then added some 'fur and fluff' detail with Polychromos Pencils.
To add colour around my image, I smooshed some Tumbled Glass Distress Ink onto my glass mat, spritzed with water and then used a paint brush to pick up the colour and added a colour wash across the background.
I then heat dried the ink before dipping the edges into the remaining droplets of ink on my mat, being careful not to get anything on the bunny.
Once the panel was dry, I then added the grungy, vintage edging and for this, I smooshed Frayed Burlap Oxide Ink onto my mat, spritzed with water and then dipped the edges of the card into the ink.
After drying my card, I inked the edges with Walnut Stain Distress Ink and then added some text stamping using the newsprint part of the stamp from the Botanical Collage, just adding tiny snippets around the card edge.
To add some more detail and another layer to my background, I applied Speckled Egg Oxide Ink through the Polka Dot Stencil that comes with the Hipster Bunny.
With my panel ready, I machine stitched the artwork to a piece of burlap and then mounted it onto my tag using foam pads.
At the top of the panel, I added a little "Handle With Care" Label. This is from the Eccentric Stamp set and I stamped it onto heavystock card using Fired Brick Archival Ink and then cut it out before mounting it onto my panel.
HIPPITY HOPPITY
To create the sentiment, I stamped Hippity Hoppity onto a strip of vellum using Versamark Ink and then sprinkled with white embossing powder. Tap away the excess and heat emboss.
I layered the vellum strip over a panel of card that I coloured using Tumbled Glass and Speckled Egg Distress Spray Stains. The edges of the card are inked using Frayed Burlap Oxide Ink, in exactly the same way as the background panel. I secured the vellum at the back of the card panel, machine stitched an edging around the panel and then mounted the sentiment onto my tag, placing it just below the bunny.
To add some detail to the panel, I had some tiny little die cut stitches on my desk that were left over from a previous project, using the Bunny Stitch Die Set and I just stuck these on either side of the sentiment.
After stamping his little bow tie onto a piece of watercolour card, I coloured it with Tumbled Glass Distress Watercolour Pencils and then fussy cut around the edge before attaching it under the bunny's chin.
DIE CUT FOLIAGE
Now this little bunny is hiding behind the foliage, and to create that foliage I used my all-time favourite leaf die from the Funky Florals Die Set. You'll have seen this used on so many occasions since it's release and I love it because of the layers and detail it creates on a project and it's so simple to put together.
I spritzed a piece of Heavystock Card with Rustic Wilderness and Peeled Paint Distress Spray Stains and once dry, I cut all my foliage pieces which I layered.
I then arranged the foliage around the bunny, attaching it to either side. To complete the arrangement, I added twigs, some curly moss and reindeer moss from my stash.
For the finishing touches, I hammered a Tack Nail into either side of the panel....
...and then finally, I added his little glasses.
I used the stamp from the stamp set and stamped them in Black Soot Archival ink onto the cardstock. I then sprinkled Lumberjack Plaid Distress Glaze over the top, heat embossed the glaze before I fussy cut them around the outline, and removing the centres. I then attached them to my bunny, popping them onto his nose with a dab of Collage Medium.
So that is my project finished and ready to be displayed at Easter...
I hope you enjoyed the make and the techniques I used to bring this piece together.
As always, if you make anything, or if you've been inspired by anything that you've seen here on my blog ~ then please, let me know by tagging me on social media or leaving a comment here and I will be right over to take a look!
Don't forget that every week, one lucky random participant has the chance to win a $25 gift voucher from Simon Says Stamp and you can join in up to 5 times, which means you could have 5 chances to win. You have until next Monday at 8am Ohio time. 1pm UK time, 2 pm CET to join in and good luck....
Recipe for project:


This is stunning!!!! So cute!
ReplyDeleteLove. Love, love this! Thank you for the inspiration ❤️
Oh my gosh, this is absolute perfection! I always enjoy your tutorials. Your creations are fantastic! I would buy this in a heartbeat. Well done!
ReplyDeleteI just love your make, this little bunny is just the cutest ever. love, love, love!!!
ReplyDeleteWow. Perfect!
ReplyDelete