
Hello friends! Can you believe another week has flown by and we're already at the end of January?!? But because it's the start of a brand new week, it also means it's the start of a brand new Simon Says Stamp Monday Challenge and this week our theme is called RESIST IT! There are so many techniques that can be used to interpret this challenge, you might use embossing powder, Distress Glaze or maybe gesso and whatever you choose, we can't wait to see what you'll create and hope you'll join us!
For my project, I went with the heat embossed technique to create the background for my scene that I added to a mini clipboard and hope you'll read along to find out all the details of how I created this home decor piece...

So, let's get started ~ it's time for this week's project!


To begin with, I'll start with the background panel and the technique I used to create this layer. I cut a piece of the Mixed Media Heavyweight cardstock and then using the Flourish Background stamp from Tim Holtz, I inked the stamp with Versamark Ink and then, using the Tim Holtz Stamp Platform, I stamped the background directly onto the card. Remove the card from the platform and sprinkle white embossing powder over the top of the ink. Tap away the excess and then heat emboss until molten.

Now for the fun part of inking up that background and watching the embossing resist the colour. I applied Fossilized Amber, Frayed Burlap, Iced Spruce and Vintage Photo inks to my craft sheet, spritzed them with water and then dragged my embossed panel through the inks, picking up the colour. To dry the inks, I just gently wafted my heat gun over the top of the card, ensuring that I didn't overheat the embossed areas. At this stage, if you need more colour, just go back into the inks and keep dipping until your happy with the background.

When I'd throughly dried my panel, I then inked the edges of the card with Walnut Stain Distress Ink and matted it onto some sanded black soot kraft card.
Now to build up the layers and for this, I removed the clip and then covered my clipboard with a piece of decorative paper from the Etcetera paper stash, adhering the paper onto the board with Matte Collage Medium. I then sanded around the edges of the board and lightly inked them to create a more aged, vintage look.
I then mounted my embossed panel onto the board.
For the clip, I wanted a more rusty feel to the metal and for this, I painted it with a coat of Antiqued Bronze Distress Paint, allowed it to dry before using a sponge to dab some Steampunk Copper Alchemy Paint over the top, allowing the paint to pit slightly and create the look of rust. Once the paint was dry, I accentuated the metal with a hint of Aged Brass Alchemy Wax by lightly rubbing it over the top with my fingertip.
I attached the clip back onto the clipboard and then tied some twine around the clip and added a tag complete with remnant rub, die cut from kraft card using the Gift Tags die set.

We can now start building that scene and to begin, I created my base layer and attached some Botanical Layers to my panel and a ruler adornment, that I snapped in half.
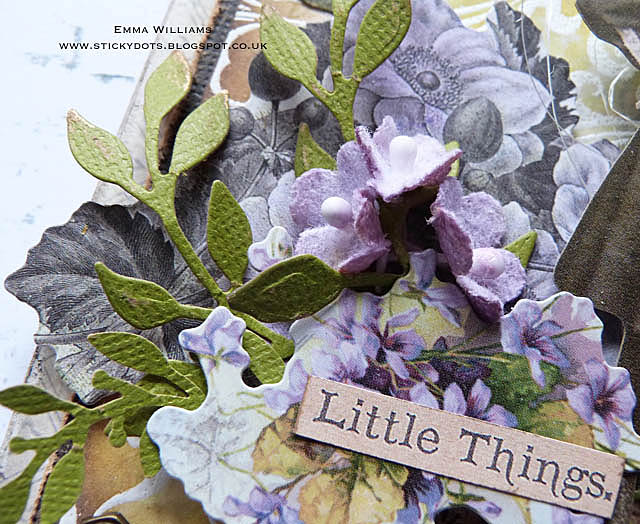
I then added some more botanical layers, some die cut foliage cut from green kraft card using the Garden Greens dies and some flowers snipped from the Bouquet Findings and coloured with Sanded Lilac Distress Spray Stain.
To complete the scene, I attached my Paper Doll with foam pads and placed over the top of some sisal fibres, attached a couple of butterflies from the Botanical Layers pack and added a Clippings Sticker. You can also see from the photo below, just how dimensional this project is

As a finishing touch, I used two Hex Fasteners on the bottom left and right hand corners of the panel.

I hope you've enjoyed how this project was created and love the final piece...it reminds me that spring is just around the corner!

You can find more inspiration from my talented teamies over on the challenge blog and don't forget that every week, one lucky random participant has the chance to win a $50 gift voucher from Simon Says Stamp. You have until Monday 8am Ohio time. 1pm UK time, 2 pm CET to join in and good luck....


Thank you so much for stopping by today and I'll see you very soon!
Love Emma xxx
Recipe for project:
Tim Holtz/Sizzix: Garden Greens, Gift Tags
Tim Holtz Stamps: Flourish and Lattice Stamp Set
Distress Paint: Antiqued Bronze
Distress Spray Stain: Shaded Lilac
Distress Oxide Ink Pads: Vintage Photo, Frayed Burlap, Antique Linen, Fossilized Amber
Mediums: White Embossing Powder, Versamark Ink Pad, Aged Brass Alchemy Wax, Steampunk Copper Alchemy Paint
Surfaces: Classic Kraft Card, Heavystock Card, Etcetera Paper Stash
Hemptique Twine
Ranger Craft Sheet


