Hello friends...
It's time for the final Simon Says Stamp Monday challenge of 2022. This challenge is running for TWO weeks until the 2nd January, so you'll have plenty of time to play along with our fun challenge theme ~ Party Time and we can't wait to see what you create.
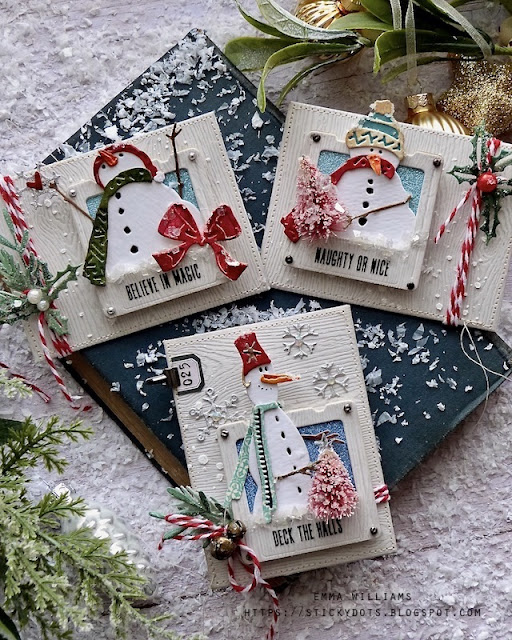
Now for my final make of 2022, and these were inspired by Raymond Briggs’ book, The Snowman and especially the scene at the North Pole when all the snowmen from around the world throw a Christmas party with Santa! So, with this in mind, I wanted to make some place settings that I'll be placing on each dinner plate at my Christmas gathering, and all of them will have a Christmas message inside and as no party is complete without special guests, I decided to use the infamous Twig And Stump from Tim Holtz and Sizzix...I'm still waiting for my Chilly & Freezy die set to arrive, and if it makes it to the UK before the big day, then they will also join in, but for now, I've used just the original die.
ENVELOPES AND SLIDE FOLDERS
To begin with I made my envelopes.
I used the Collector Thinlits Die Set as my base, and cut each envelope from Light Gray Woodgrain Cardstock. I also cut the cards for inside my pockets, using dies from the same die set to cut Christmas Pocket Cards for the backgrounds and then, some more of that gorgeous Light Grey Woodgrain card which I will be stamping on.
I applied Grit Paste through the Speckles Layering Stencil to the front of the envelopes before setting to one side to dry. Once the paste is dry, I machine stitched a border around the outside before assembling the pockets and inking the edges with Pumice Stone DI!
With my pockets ready, I began to cut the slide frames from the same woodgrain cardstock using the die from the Specimen Die Set.
I folded along the scorelines to assemble the die cut and then placed the blue option from the Winter Deco Sheets so that they will show behind the aperture windows.
Don't stick the slides together just yet!!!
TWIG AND STUMP
Moving on, I cut all my layers and pieces to assemble all my different versions of Twig and Stump. I used Distress Watercolour Card for the snowmen because I like the texture it gives the die cuts, and then I coloured Heavystock Mixed Media card with various Distress Inks and sprays for all the remaining pieces that are die cut. I also used some of my previously made backgrounds for their scarves and hats.
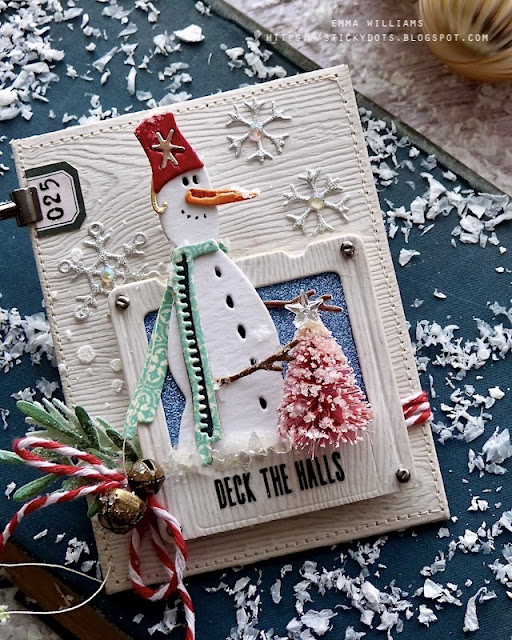
POCKET ENVELOPE 1 ~ DECK THE HALLS
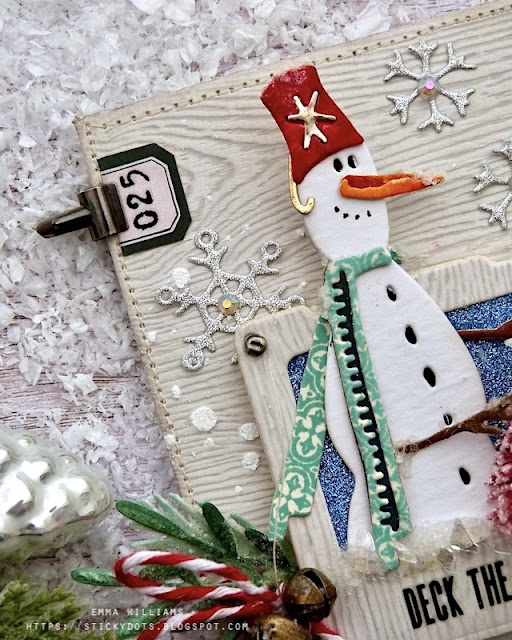
For my first envelope, which is vertical, I began by wrapping some candy cane twine around the envelope and tying it on the left hand side to secure it. I then took one of the specimen slides and my finished Twig and cut a small section away from the bottom of Twig before placing him behind the specimen slide aperture.
I added a mouth using a black pen and placed a small woodland tree beside him, wrapping his twiggy arms around the tree. The Woodland Tree is dyed using Kitsch Flamingo Spray Stain, sprayed directly onto the tree itself before drying the stain. After removing the wooden base from the tree, I rolled each one in Glossy Accents that I applied to my glass matt and sprinkled with Rock Candy Dry Glitter and Mica Flakes for a little sparkle. I then attached the tree to my envelope and added a Mirrored Star on top.
Spilling out from the image is some more frosty sparkle and I drizzled Glossy Accents along the base of Twig and the tree, and then sprinkled Mica Flakes over the top.
After adding Mini Fasteners to each corner, I applied a Remnant Rub along the bottom of the slide frame before attaching it to my envelope, using foam pads.
To add a little greenery, I cut pieces from green inked card, using one of Tim’s older Sizzix die sets, called Festive Greens (662425) but if you don't have this set, you can use any foliage die you have in your stash.
As always, if you make anything, or if you've been inspired by anything that you've seen here on my blog ~ then please, let me know by tagging me on social media or leaving a comment here and I will be right over to take a look!
Don't forget that every week, one lucky random participant has the chance to win a $25 gift voucher from Simon Says Stamp and you can join in up to 5 times, which means you could have 5 chances to win. You have until next Monday at 8am Ohio time. 1pm UK time, 2 pm CET to join in and good luck....
Recipe for project:


Thank you for all the inspiring makes that you gifted to us, throughout the years! These are amazing and such adorable place settings! Merry Christmas and Happy New Year!
ReplyDeleteHello. Beautiful envelopes for a plate. I am sure that the guests will be impressed. I am. Thank you for such detailed instructions. I wish you a merry Christmas and a happy new year. Romana
ReplyDeleteOh my word! These are so wonderful and I adore all the details! Not sure I have time to emulate this year, but definitely going on the list. Thank you for all your fabulous inspiration through the year, and happy holidays to you and yours!
ReplyDeleteThese are fabulous Emma!!!!! Merry Christmas and Thank You for sharing your wonderful designs with us! I know its a lot of work because i used to do it, I got burned out but I really enjoy your work!!!
ReplyDeleteSo magical!
ReplyDeleteI absolutely love your work. Thank you for sharing the recipe! These just bring pure joy.
ReplyDelete