Hello all...
As we head into December, I'm just popping by today to share this fun vignette project that I've made using some more of the wonderful Christmas idea-ology products from Tim Holtz. As regular readers and friends of my blog, you'll already know that I adore Christmas and love creating and displaying home decor pieces around my home and as soon as I saw these adorable little Salvaged Snowmen, I knew that I just had to build a snowman and create a scene for him to call home and hope you'll enjoy how this project came together.
So, grab yourself a hot chocolate and let's get started...
To begin with I needed to make my box and this shadow box is actually made from the second largest vignette box which I sandwiched between two of the Collage Frames which will act as a support for the box and create this freestanding vignette. I started by covering the inside of the vignette box with panels of paper from the Christmas Paper Stash which I then adhered into place using Matte Collage Medium. On the outside of the box, I covered it with the typewriter script paper which I also used to cover my collage frames. Remember when cutting the papers, you want the font so that it will read correctly, so cut a horizontal piece for the top and bottom sections of the box and vertical pieces for the sides of the box. Adhere the panels onto the outside of the vignette box.

To complete the my little box and create a nice, seamless finish on the inside, I added some polka dot design tape around the edges, overlapping it onto the inside of the box before giving everything a coat of Matte Collage Medium to seal the papers and setting it aside to dry.
Moving onto the collage frames ~ you will need two matching frames for this project and so that they looked good back and front, I painted what will become the back of the box with Black Soot Distress Paint. Once it was dry, I then dry brushed some Brushed Pewter Paint over the top. Heat dry the frames and once again, apply some Collage Medium over the top to seal it.
For the fronts of the frames, both of which will be facing forwards ~ I covered these with the same black and white typewriter script paper that I'd used on the outside of the vignette box, adhering the paper with Collage Medium and then flipping the frame over and cutting away the aperture section of the frame. Keep one of the aperture cut outs for later!!! I always use a Sanding Tool to smooth of any rough edges of paper that might be showing and just sand very lightly around the edge.
To assemble the box I placed the first of the collage frames onto my glass mat, paper side uppermost and then attached the covered vignette box into place, placing it over the top of the aperture. I then took my second frame, and attached this over the top of the box to create my freestanding piece.
Leave this to one side so that all the adhesive dries thoroughly and nothing moves before even thinking of touching it again!!
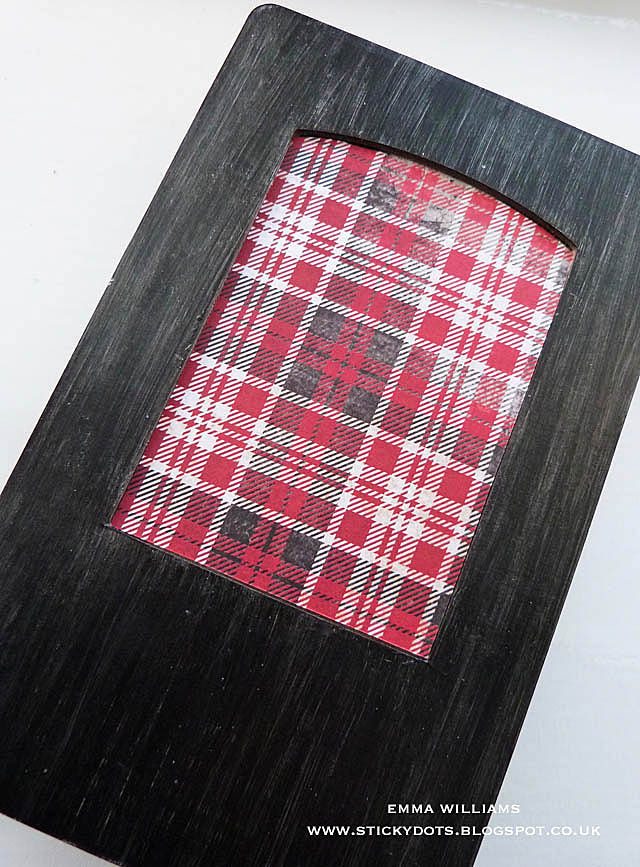
This is also where you need that piece of paper that you cut out from the aperture earlier, as this is going to fit onto the back of the box to give it a nice finish and I just used the reverse side of the paper, the lovely plaid pattern and slotted it into the hole, adhering it into place with Collage Medium!

Whilst the box is doing it's thing, I moved onto the little scene and started my painting my Salvaged Snowman using a selection of Distress Paints ~ Tumbled Glass for his scarf, Candied Apple for his gloves and earmuffs, Black Soot for hat, eyes and buttons and Walnut Stain on his broom. I carefully applied each paint to the individual areas and allowed it to dry. Once it was dry, I then scratched away at some of the paint to remove it, creating much more of a vintage feel to the piece. I sealed the snowman with some Collage Medium and then sprinkled some Rock Candy Distress Glitter over the top, just allowing the glitter to touch random areas, so that he looks like he's been kissed by frost.
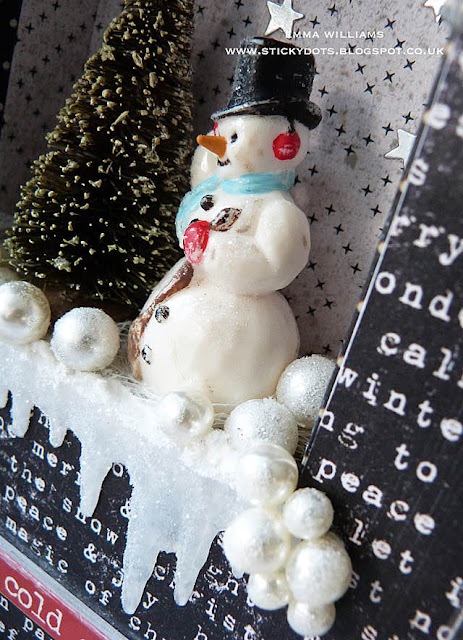
To create my snowy tree, I applied gesso to the tips only ~ you can use either your fingertips or a brush to do this but you want the lightest of touches and only a hint of paint showing. The gesso is going to act as a resist when you add colour and you will need to allow the gesso to dry completely before the next step. Once it is dry, I then spritzed my tree with Peeled Paint Distress Spray Stain, wiping away any excess stain from the tree and revealing the little snowy white tips where the gesso was applied.
The final embellishments for the scene are the icicles and the snowballs, which I covered with Collage Medium before sprinkling with some more Rock Candy Dry Glitter.
We now have all the pieces ready to be arranged and I began by adding some little silver stars to the back wall of the box and an Ephemera Snippet piece, 'Compliments of the Season' which I matted onto silver metallic card and then mounted onto the box.
I attached the icicle along the bottom edge of the aperture of the box and then arranged the snowman, tree and baubles onto a bed of cheesecloth. As a snowy base, I applied some Grit Paste around each of the pieces, sprinkling glitter over the top.
We're nearly there and all that is left is the festive foliage that sits in the top left hand corner of box. I used a selection of dies from the Mini Holiday Greens set and cut the foliage from Classic Kraft Card before frosting each piece with Rock Candy Dry Distress Glitter. The poinsettia is made using my favourite poinsettia die, Tattered Poinsettia to die cut lightweight card that I painted with Festive Berries Distress Paint. I then just shaped and layered each of the die cuts to create a dimensional piece and added gold glitter glass to the centre. I then took my splatter brush, loaded with Picket Fence Paint and splattered all the die cut elements with the paint before attaching the arrangement onto the box.
Finally, I added the 'baby, it's cold outside' quote chip...
... and completed the piece with some Jingle Brads in each corner and a Vignette Accent on the top right hand corner of the frame aperture.
Thanks so much for stopping by today and once again, thanks a million to Tim, Mario and Paula for such wonderful new idea-ology products that spark my imagination ~ I appreciate you all so very much!
See you all again soon...lots of love, Emma xx
Recipe for project:


So cool (pun intended). Great holiday decoration. Your instructions are so appreciated. Thank you.
ReplyDeleteOh Emma, what a magical snowy scene, I love the way you’ve used the collage frames to form a freestanding piece. This will be such a wonderful addition to your decor and will be able to be left out for the entire of winter. The snowballs and snowman look fabulously frosty. I always love your work, thanks for sharing your inspiration and talent. xx
ReplyDeleteThis is simply adorable. Thank you for your tutorial.
ReplyDeleteSimply wonderful! Very creative!
ReplyDeleteWhat's up Snowman ! My, my, my Product Queen you've done it again!!! The free standing technique, those snowballs spilling over the icicles, the realistic poinsettia ... just amazing !!! #GiddyQueengettinherdanceon
ReplyDeleteEmma, this is really fantastic!!! LOVE every detail!!!!!!!
ReplyDeleteThis is absolutely beautiful! Thanks for sharing!!
ReplyDeleteEmma, what a most delightful box.Beautiful created all,by yourself- such a wonderful work of art. I love everything, the snowman and tree, the snowballs , and all your beautiful die cut foliage and the flower. So much magic here, in your vintage winter scene , dear . Hugs Dorthe
ReplyDeleteSo lovely - thanks for such great inspiration!
ReplyDeleteSo beautiful, Emma! Love the idea of the box between the two collage frames! So clever, as always!
ReplyDeleteI'm a sucker for a snowman at christmas so of course I ADORE this LOTS!! From the freestanding frame( snowman home) to the black and white papers , to the pops of red decoration and the darling snowman scene in the window you got it all absolutely spot on, Emma . Another to add to my 'Emma faves' list :)
ReplyDeleteBig hugs x
This is adorable!
ReplyDeleteThis is one of the most beautiful trinkets I've seen this Christmas season -- just lovely!
ReplyDeleteThis is omg adorable! I love this!! Thank you for sharing your project
ReplyDeleteWhat an amazing and beautiful decoration! I just love everything about it and I think you are super clever to create something so delicately made! Thanks so much for sharing - have a joyous Christmas.
ReplyDeleteI just LOVED this project so much that I couldn't wait to make one for myself..
ReplyDeleteI just finished it and am thrilled with it. Had to wait until the holidays were over to have some quiet time! Thank you for the inspiration!
That project made me say wow out loud! That might be my very favorite I've seen on your blog so far - and there was a lot of favorites to choose from! This is spectacular!
ReplyDelete